


How to Convert Email in Tasks in Redmine Automatically
You must have heard about Redmine as a project managing and issue tracking tool and want to try it for your projects as well.

The web-based tool allows users to manage multiple projects and associated subprojects and also features options like wikis and forums, time tracking with Gantt chart and calendar, and flexible, role-based access control per project.
Redmine also allows you to convert emails in tasks automatically. Thus, Project management becomes a lot easier with automatic conversion of your emails from the provided email address to Redmine tasks instead of adding the functions to Redmine manually.
So how to convert your email into a task automatically?
If you are wondering how you will convert your emails into tasks automatically and get track of all your projects, then you are the right place. Here this article is the step by step protocol guide to automate emails into tasks in Redmine. So, let's get started. The following are a few simple steps to follow to automate fetching your emails and converting them to Redmine tasks.
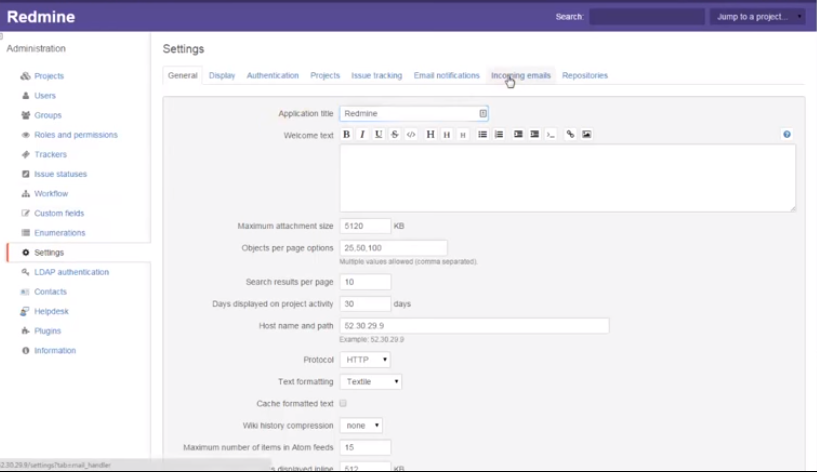
- Go to settings>incoming emails.
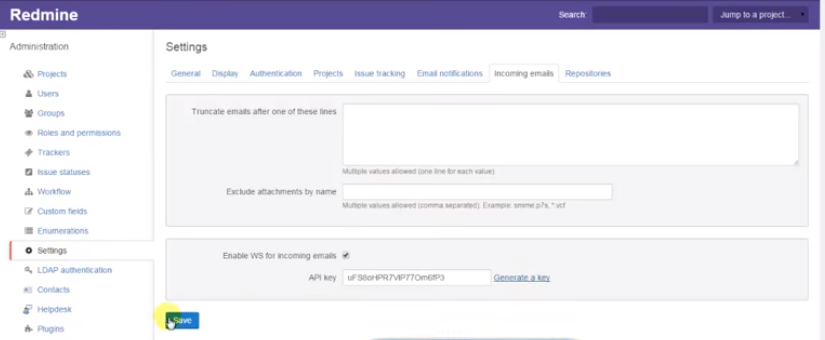
- Get an API key.
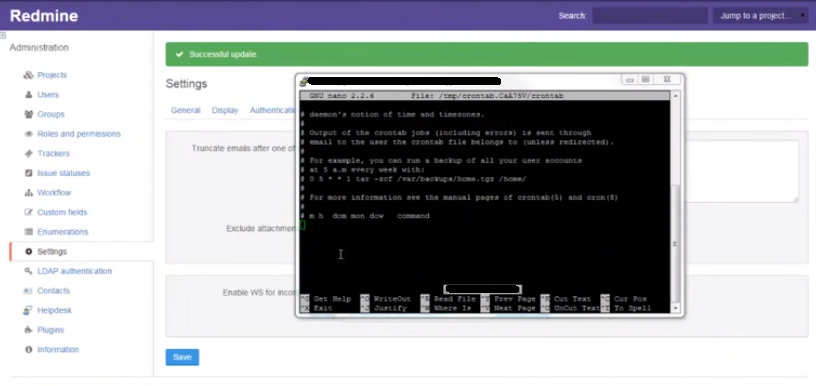
- Go to Redmine's root directory.
- Open "crontab" and then select the editor.
- Set up a system to automatically fetch your emails and convert them to Redmine tasks.
- Save the changes and restart the server.
Now, let's discuss the steps mentioned above in detail to help you out during the procedure of automate fetching the emails and then converting them to Redmine tasks to follow up on your multiple projects and associated subprojects along with their deadlines.
- The first step in the email to tasks automation procedure is to set up Redmine to fetch emails. For this, go to the settings from the menu and then to incoming emails section within the settings.
- From there, activate the web services and obtain the API key and save the settings for further steps.
- Next, connect to the server, preferably SSH connect, and move to Redmine's root directory. Once you are in the root directory, open the "crontab" file using the root privileges, i.e. Crontab should be opened for the user under which Redmine itself is running. For example, if Redmine runs from the root, then the command will be: sudo crontab -e. But if it runs from user "Redmine", then we should switch to this user and open crontab from him. If you are opening it the first time, it will ask you to select or choose a file editor. For this, select the suggested option.
- After this, for the next step, you need to insert a few code lines to automate your emails to tasks in Redmine.
*/5 * * * * wget -0 -http://127.0.0.1/helpdesk_mailer/get_mail?key=xxxx
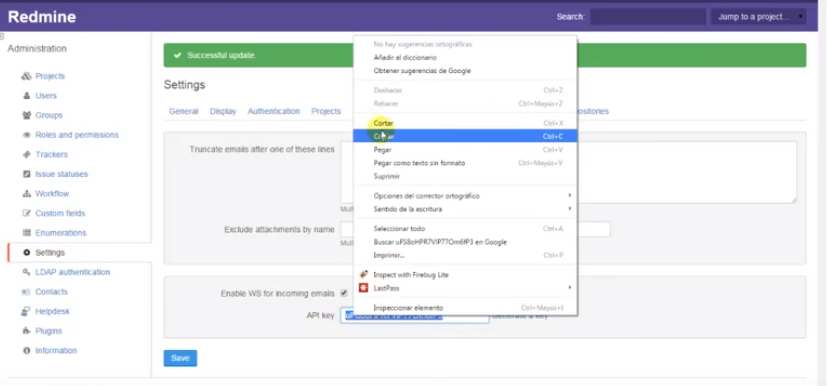
- Here, */5 * * * * means fetching will be executed each 5 min. You can also change the time of fetching emails as you want. Like, using * * /2 * * * * in place of */5 * * * * means fetching will be executed after every 2 hrs. While at the end of the line, XXXX is the API key you obtained previously from Redmine in the settings>incoming emails section.
- After following the steps as mentioned above, save and close the crontab file with CTRL + x and confirm the changes with "Y." Next, click Enter, and you will be returned to the Redmine root directory. The final step is to restart your server to start automating your emails into your tasks in Redmine finally.
So, now you know how to automatically convert your emails to tasks in Redmine.
Following the steps mentioned above, you will be able to set up a system to automatically fetch your emails and convert them into Redmine tasks every 5 minutes. By automating your emails into tasks, you can easily track multiple projects or orders at a time in Redmine. You can easily follow up on your deadlines without missing any of it.

