


Getting Started With Redmine Issue Tracking System

Trackers
You may be wondering what trackers are? Trackers are how you go about splitting your issues into various kinds – the most common ones are Feature, Bug, or Defect.
For each one of the trackers, you may define: (see the picture below)
- Name (it is “Bug” in the example below)
- If the issues attached to the tracker should be shown on the roadmap
- Default status (this is an issue status you apply by default to the new issues)
- Custom and standard fields that are available for the tracker
- A different kind of workflow.
When you create a new tracker, you will have to define its workflow (as you can observe in the picture below) to use it properly. (You may copy a current tracker's workflow when you create a new tracker. That will help you save a lot of time. To copy workflow, pick a tracker in the drop-down list 'Copy workflow from' on the screen that reads 'new tracker').
Issue Status
You can delete and add issue statuses freely. Each of the statuses has these configurable options:
- Issue closed: this specifies that the problem is regarded as closed (more than one status can count as closed)
- Updating issue done ratios: You can only avail of this command if the "Calculate the issue done ratio" choice in the application settings is pre-set to "Use the issue status." On execution, It will set all issue status to the values described in every status "Percentage done" setting upon execution.
- Percentage Done: You can only avail of this option if the "Calculate the issue done ratio" choice in the application settings has pre-set to "Use the issue status." When you set the option, the done ratio of an issue is updated automatically based on what status is allocated instead of manually putting in the done ratio for every problem. If you leave it blank, modifying an issue to this status will not alter its % done.
Workflow
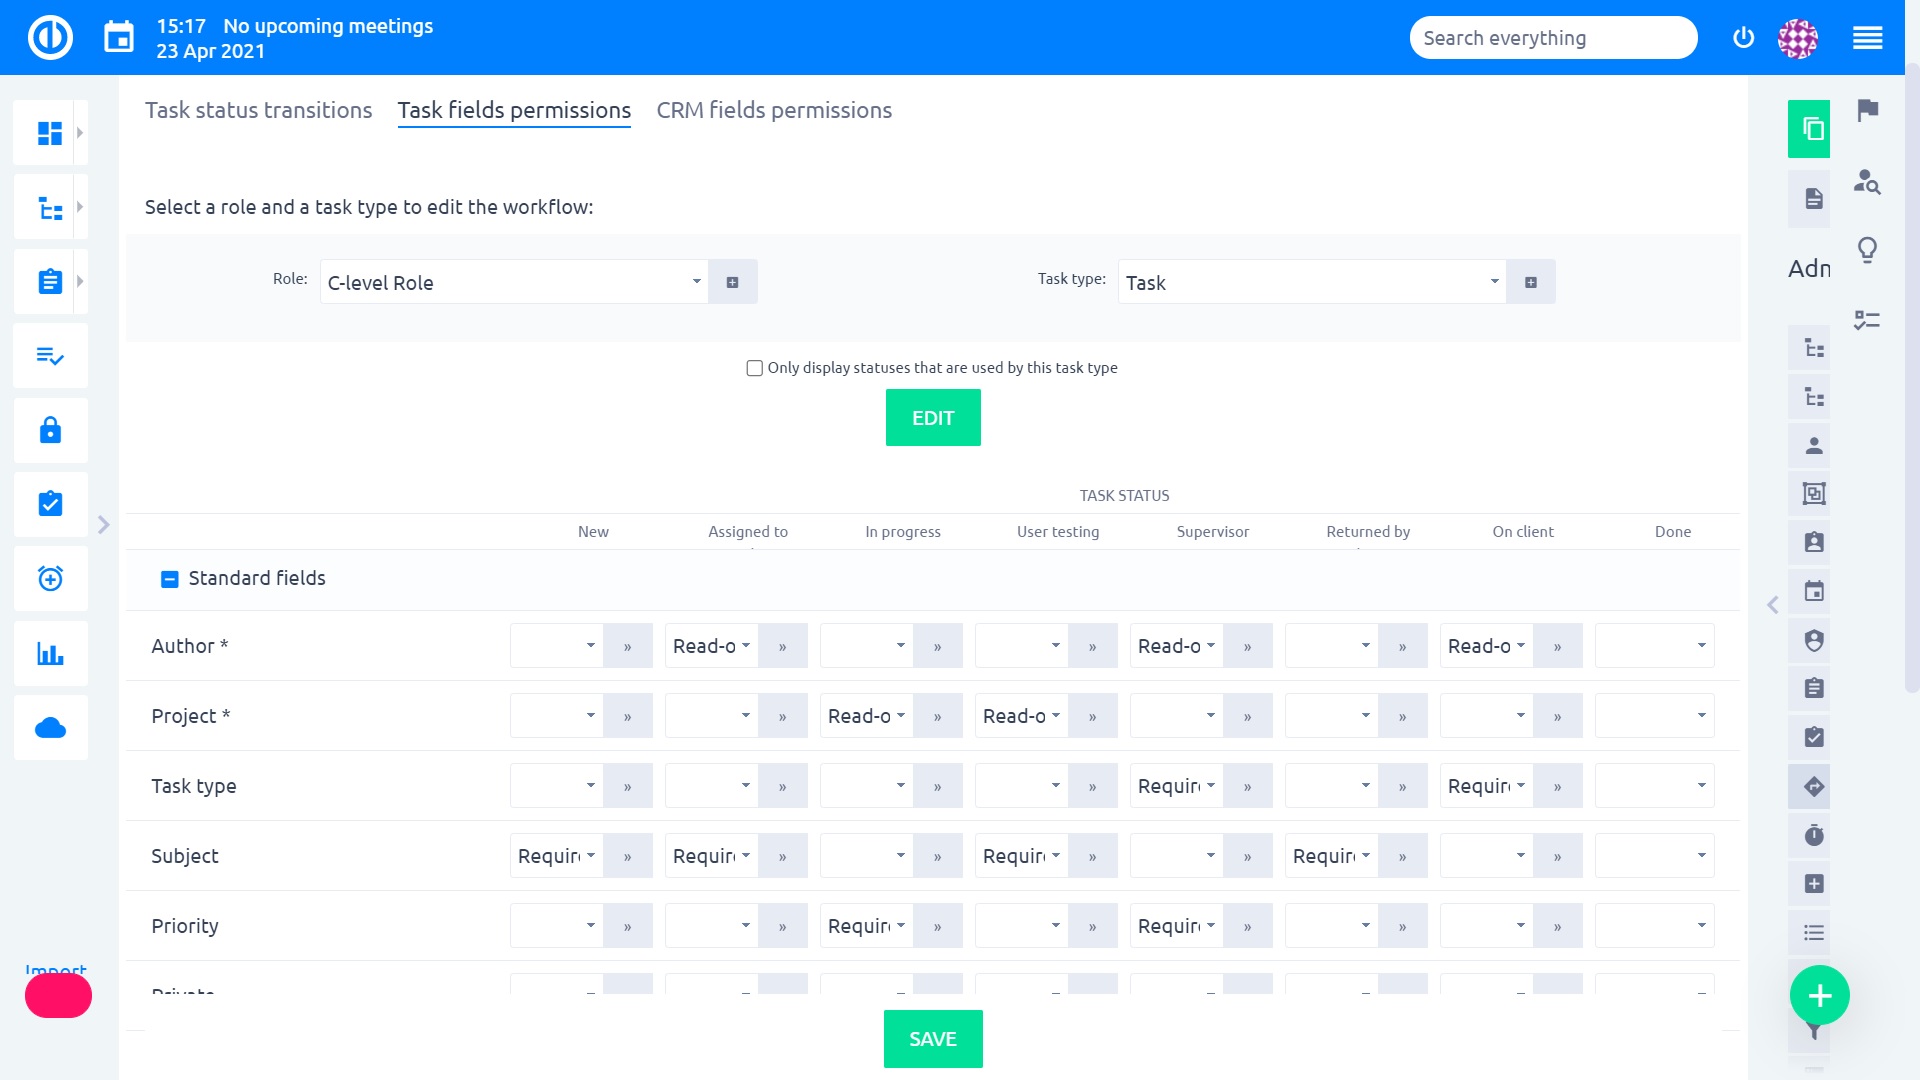
Field Permissions
In the Field Permissions tab, you may set exclusive permissions to a field in a particular state. You can select between the attributes required, read-only, or leave it empty. If you set the field as read-only, it will disappear in the edit section, and the selected role cannot change it.
Workflow in Easy Redmine
Status Transitions
The workflow allows you to specify status transitions that several project team members have permission to make on the issues as per their type.
On the workflow setup screen, choose the tracker and the role you would like to modify the workflow and then press 'Edit.' The screen allows you to pick the approved transitions for the selected tracker and role. The column that reads "Current status" shows an issue’s initial status.
In the example mentioned above, the Developer Role can give Bug with New status a Resolved or an Assigned status. Those who have an Assigned status can acquire a Resolved status. The Developer cannot modify all the other Bugs’ statuses.

Workflow in Easy Redmine

The ultimate Redmine upgrade? Easy.
Get all powerful tools for perfect project planning, management, and control in one software.

