


Unlock the potential of HelpDesk

Discover the hidden gems of Easy Redmine's HelpDesk! While some features are obvious from the start, others quietly transform your workflow behind the scenes. In this article, we'll reveal these unique, lesser-known tools that can boost your efficiency. Read on to unlock the secrets!

Automatic ticket follow up in HelpDesk
Are you having trouble with stale and passive tickets? Or would you like to get feedback after the ticket is solved? Say no more! These and other use cases can be easily covered via Automatic updater in HelpDesk.
You can set it in your Project >> Settings >> HelpDesk
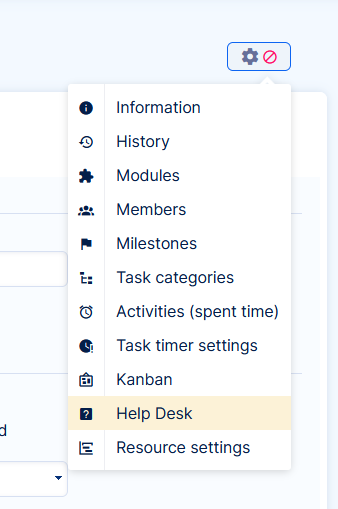
Navigation menu with the HelpDesk option
This section allows you to set a current status and time without any update to avoid updating live tickets.
Then you select the action of what should happen such as change status, assignee, and/or send an email from a template to the client. Since the automatic updater is configured per project, you can design various processes based on product, client level, and region – however, your tickets are sorted into various projects.
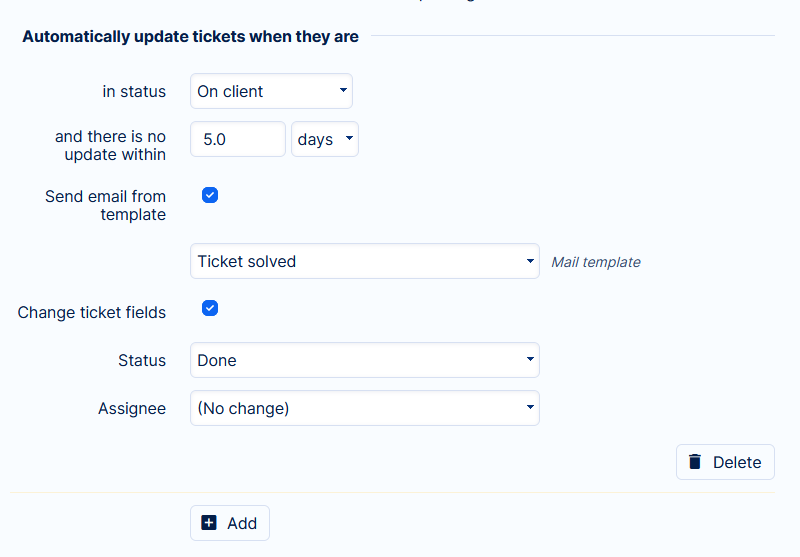
Pop up setting menu for handling tickets automatically
Naturally, in these emails, you can share relevant info about the ticket such as ID, link, ticket owner, priority, subject, or date of last update. This way the message can provide your client with information they may have not been aware of or something they may need.
Use-cases for smooth ticketing
Here we prepared a couple of use cases of how to use this neat feature to make your work easier.
Rate your experience
- Current status: The ticket resolved
- Wait 2 days
- Send an email containing a link to NPS, or another customer survey about their experience with your services
- Change status to Ticket closed
Ticket closing chain
- Current status: Waiting for reply
- Wait 7 days
- Send email follow-up about a question you need to get answered to be able to solve this issue
- Change status to Follow up sent
- Wait 5 days
- Change status to Ticket closed
The ticket was stalled by a support agent
- Current status: In progress
- Wait 4 hours
- Change assignee to Stan the Man(ager) to escalate and highlight that a ticket is in progress for too long without a notification to the client.
Tireless follow-up
- Current status: Feedback required
- Wait 1 day
- Send emails such as: Please send us feedback, it is crucial to solve your problem.
As you can see, there is no status change. What this will do? The system will send a follow-up email every day as long as the ticket remains in this status. Unless the client replies or someone manually changes the status, it will be sending emails till infinity. Sounds extreme? Maybe. But it may happen that you encounter a situation when this is needed.
What to keep in mind while using HelpDesk ticketing system
By now, you have probably already thought of many cases of usage. Before you implement them, make sure to check these notes to prevent any undesirable effects.
1/ Wait time is counted from the last update of the task
The last update means any change in the ticket = attribute change or comment. If you think the ticket should have been automatically updated, but wasn't, please check the History for all changes. Maybe there was an attribute change that reset the wait time.

A broken keyboard ticket overview
2/ Don't forget to “change status”
We strongly recommend changing the status during an automatic update. There may be situations when a perpetual follow-up is desired (Use case D), but in regular cases, the status should be changed to move the process toward a resolution (use cases A, B, C).
3/ Verify statuses after the client reply
Especially in cases when you are asking for a reply, you should be aware of what ticket status will be set after the client sends the reply. Be careful and avoid any follow-ups for this status – the client did what you asked him for.
The status after the client response is in HelpDesk >> HelpDesk settings >> Change status after the client's response.
How to master automatic ticket follow-up in HelpDesk
Now that you've learned the secrets of automatization, you can use your HelpDesk in Easy Redmine to its full potential. With setting up automatic actions you can be more efficient and you'll save some precious time that can be used elsewhere – maybe as your coffee break! Try Easy Redmine software and experience how our HelpDesk feature can streamline your support process. Sign up now for a free trial and see the difference.

All-in-one software for a modern project manager? Easy.
Get all powerful tools for perfect project planning, management, and control in one software.

