


User Types
Introduction
User type = specific permissions, dashboard, menu
Create a new user type
Examples of user types settings
Detailed settings
Built-in roles
Introduction
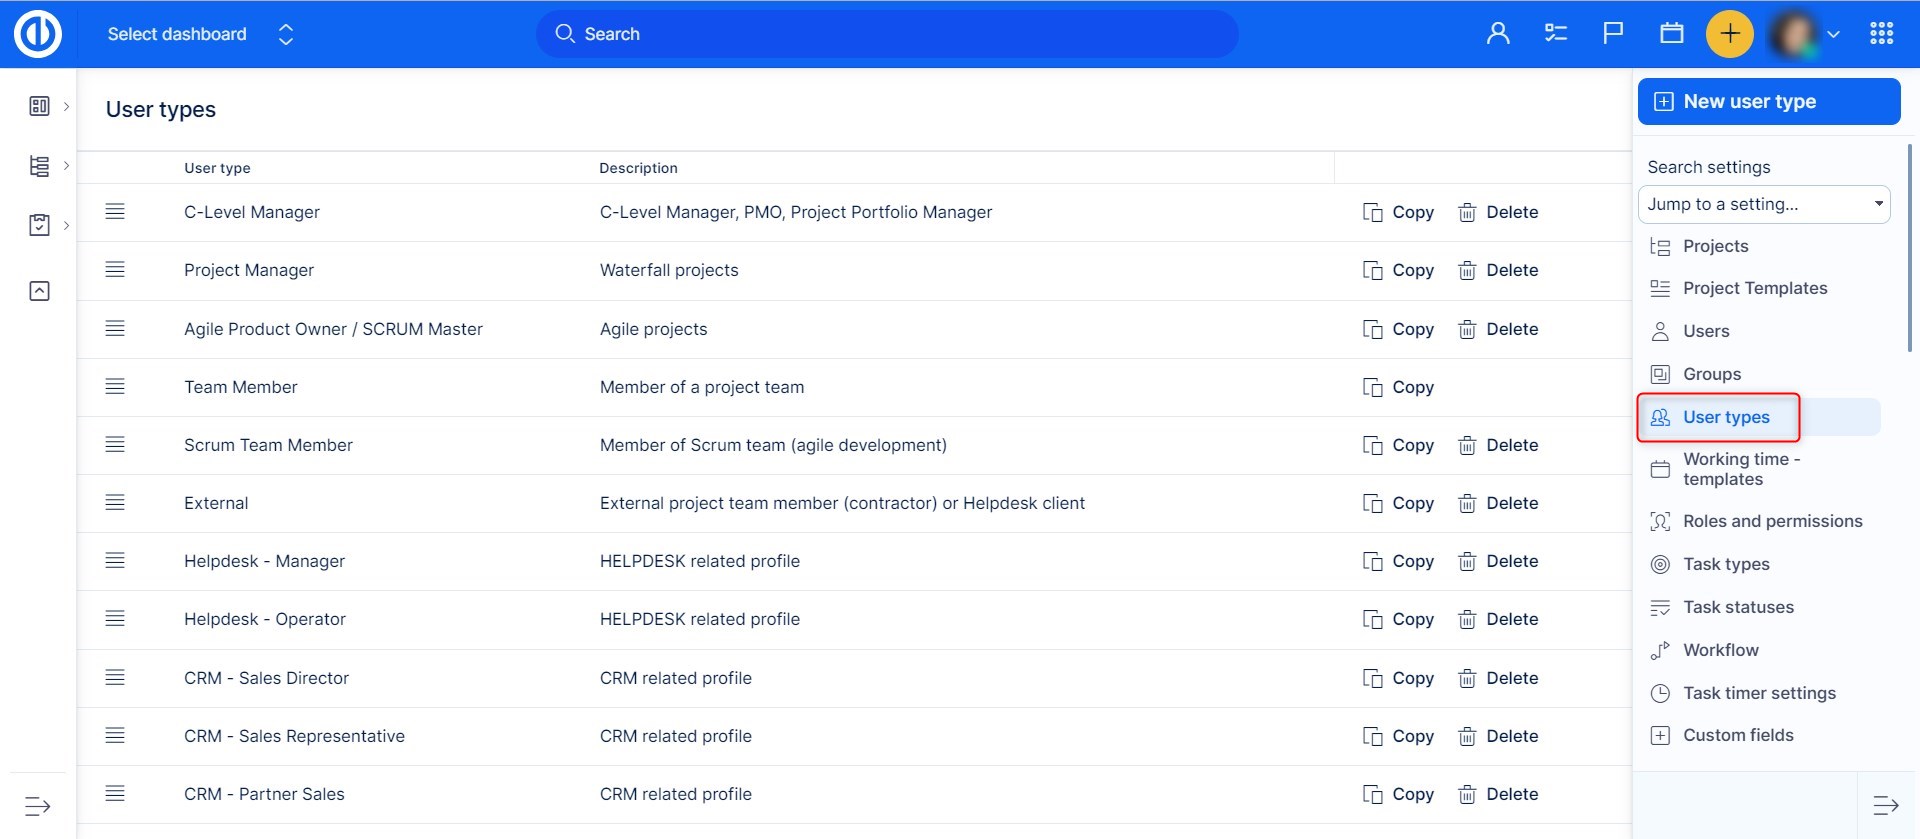
Define user types to differentiate user permissions, dashboard, and menu. User types can be found in Global menu >> Administration >> User types. You will see all the existing user types and a possibility to create a new user type.
User type = specific permissions, dashboard, menu
There are 10+ predefined global user types in Easy Redmine. Each user type has a ready-to-use dashboard with features according to particular responsibilities. Complete permissions and workflow are defined for each user type. Permissions and workflow settings are divided into 4 levels (chief, management, executive and external) and implemented by roles & permissions. This makes Easy Redmine implementation as easy as setting up just 1 option for each user – select his/her user type. However, infinite possibilities of any custom set-up are kept as well as dashboards and menu customizations.
Detailed description of the predefined User Types can be found on the following link.
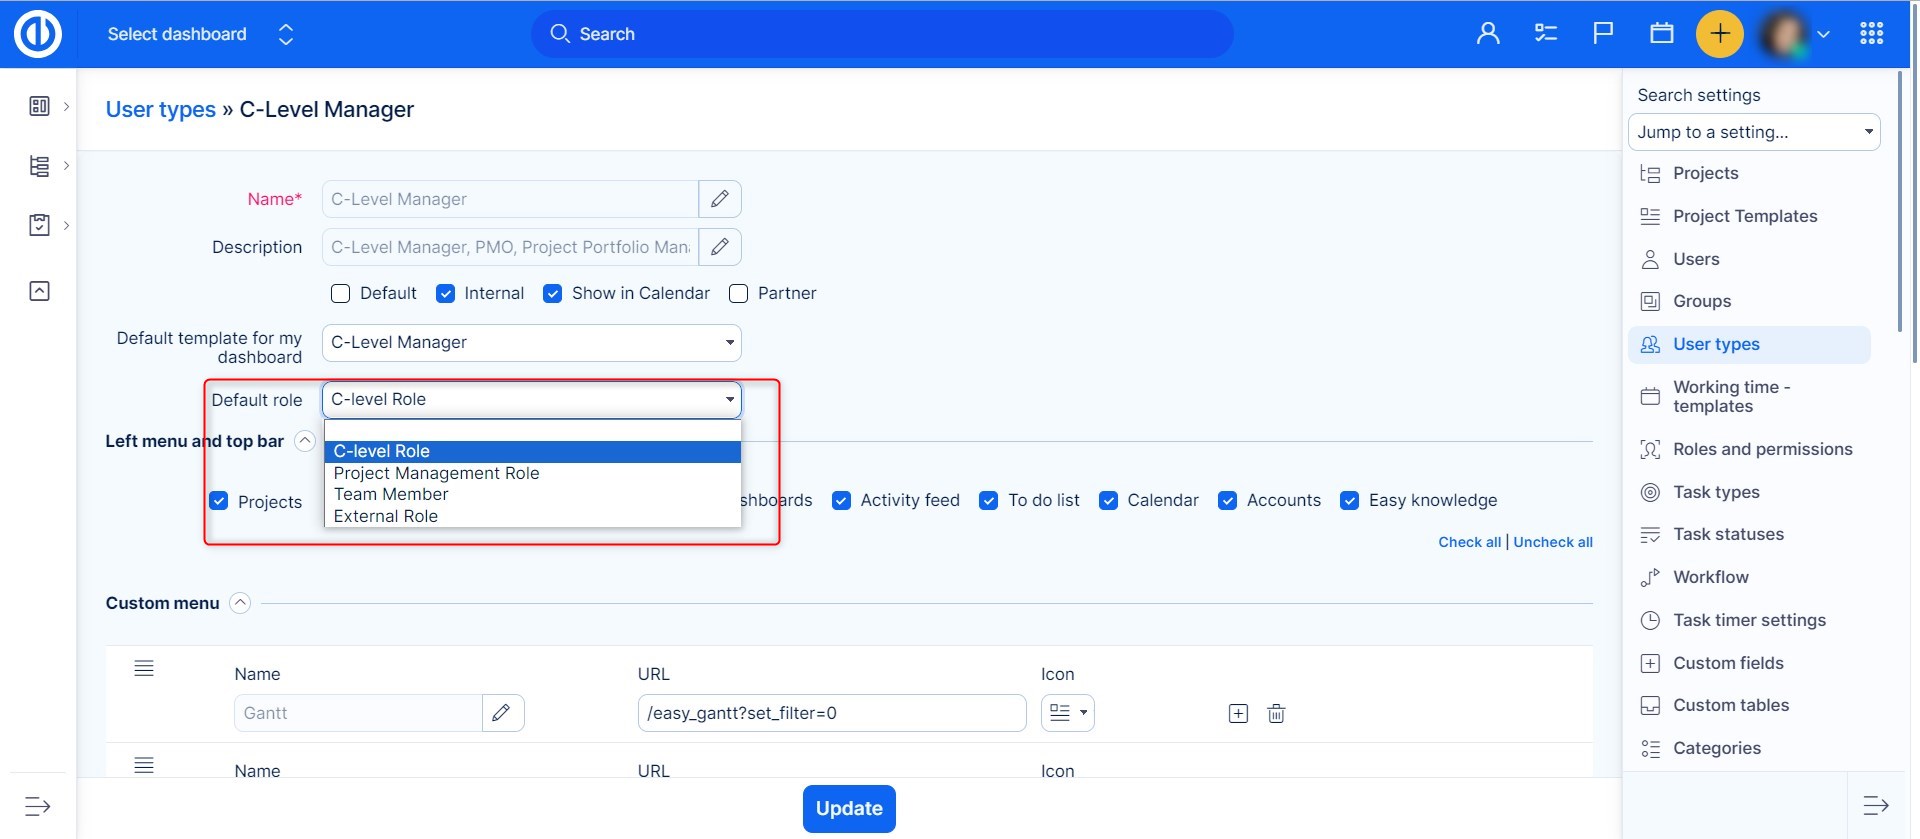
Each user type might have a predefined default role, which will be preselected when adding user to a project. Thus eliminating the need to select a role to newly added users of specific user types. Of course, you will still be able to select different roles for the user. For the sake of simplicity, default user roles are reduced to a few most common roles in an organization.
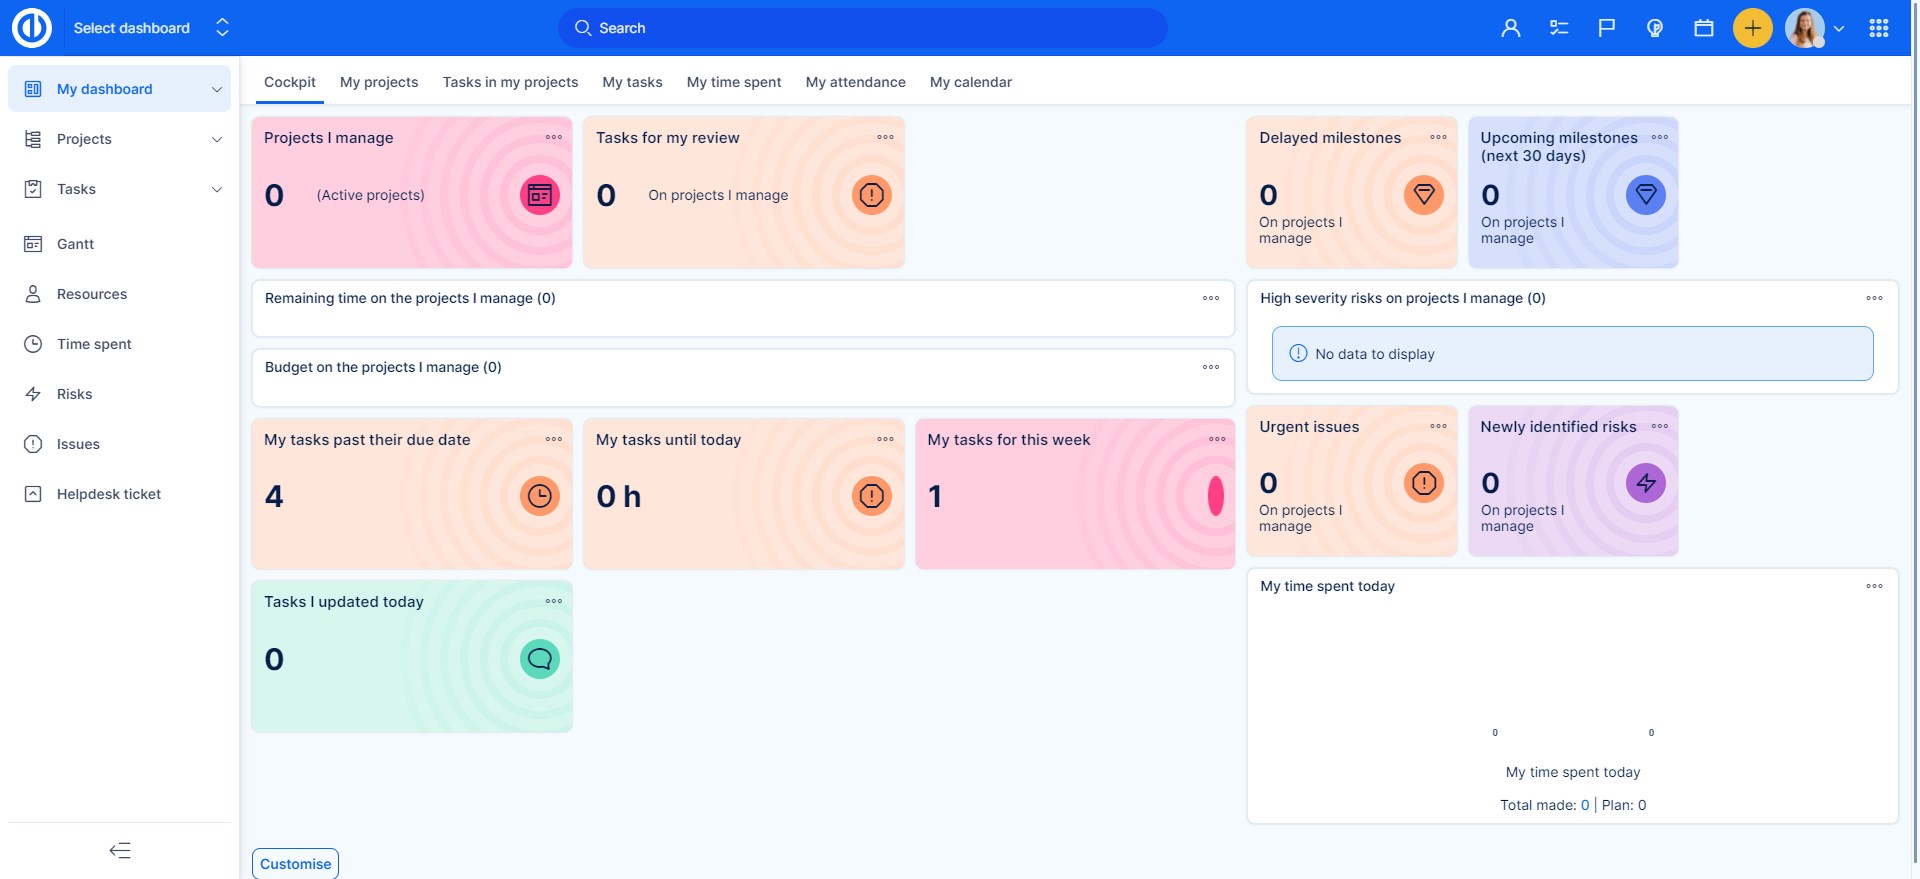
For each user type, a customized personal dashboard and user menu are available for immediate use.
Create a new user type
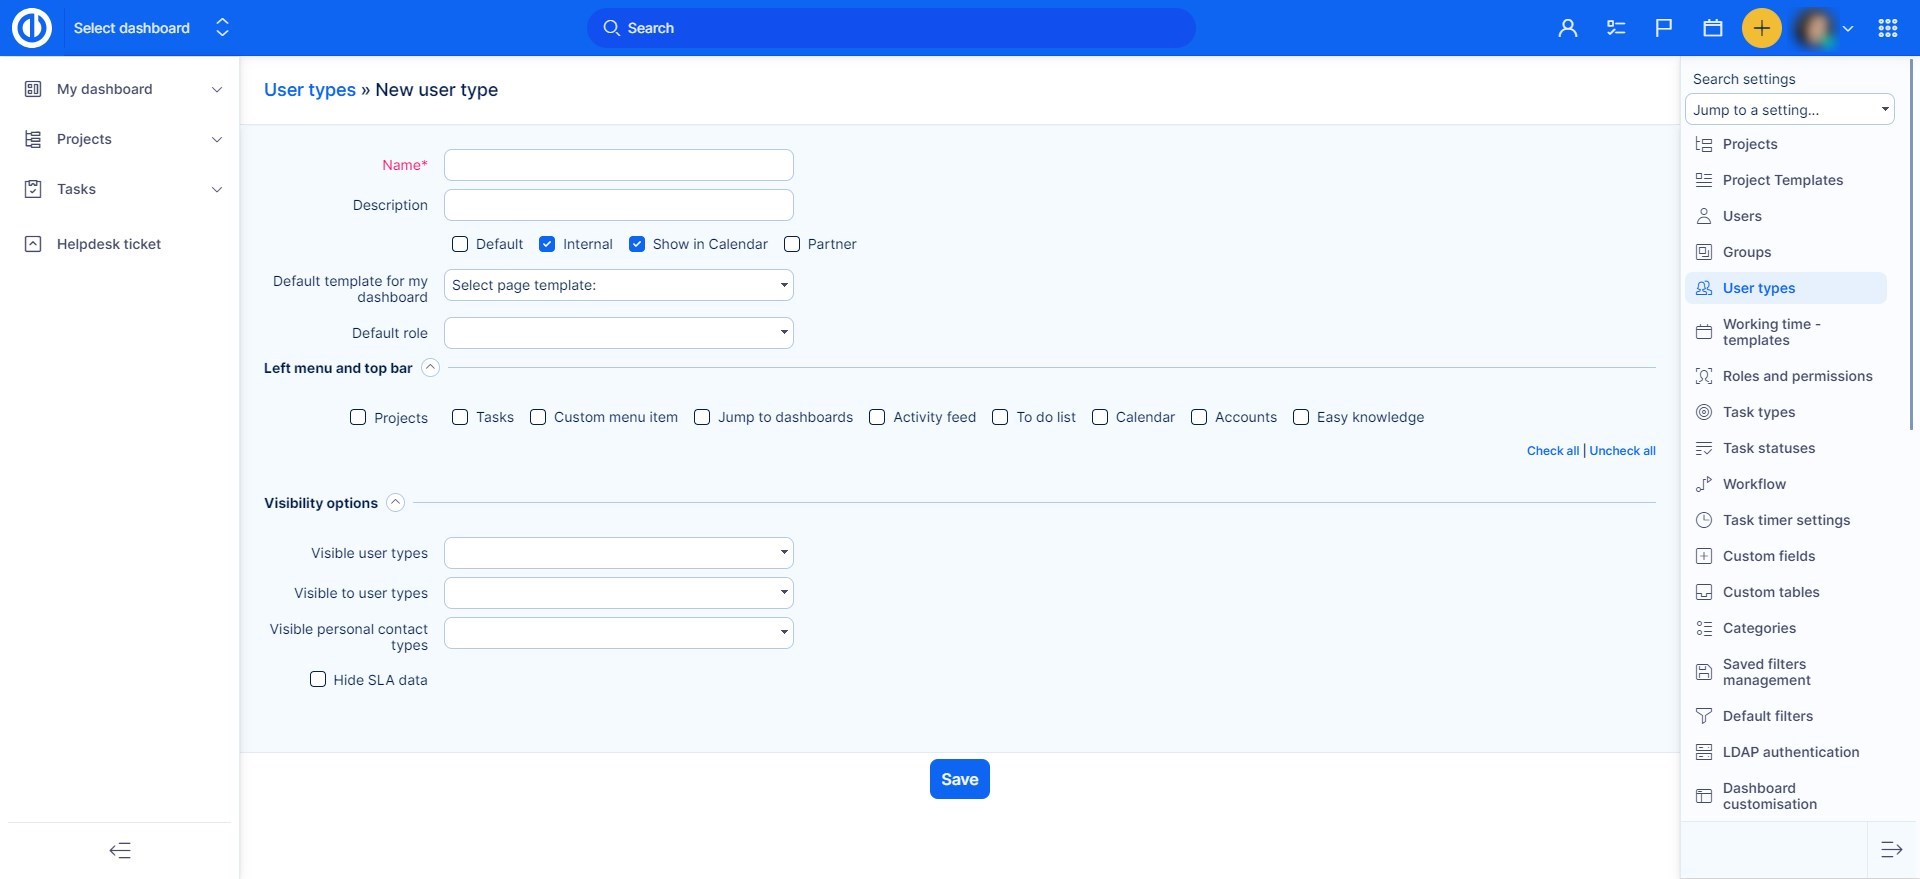
After clicking the button, you will land on this page. You can choose here, what you want the user type to see in the top menu, what other users can he see and if it will be a default user type, or if it is an internal user.
Examples of user types settings
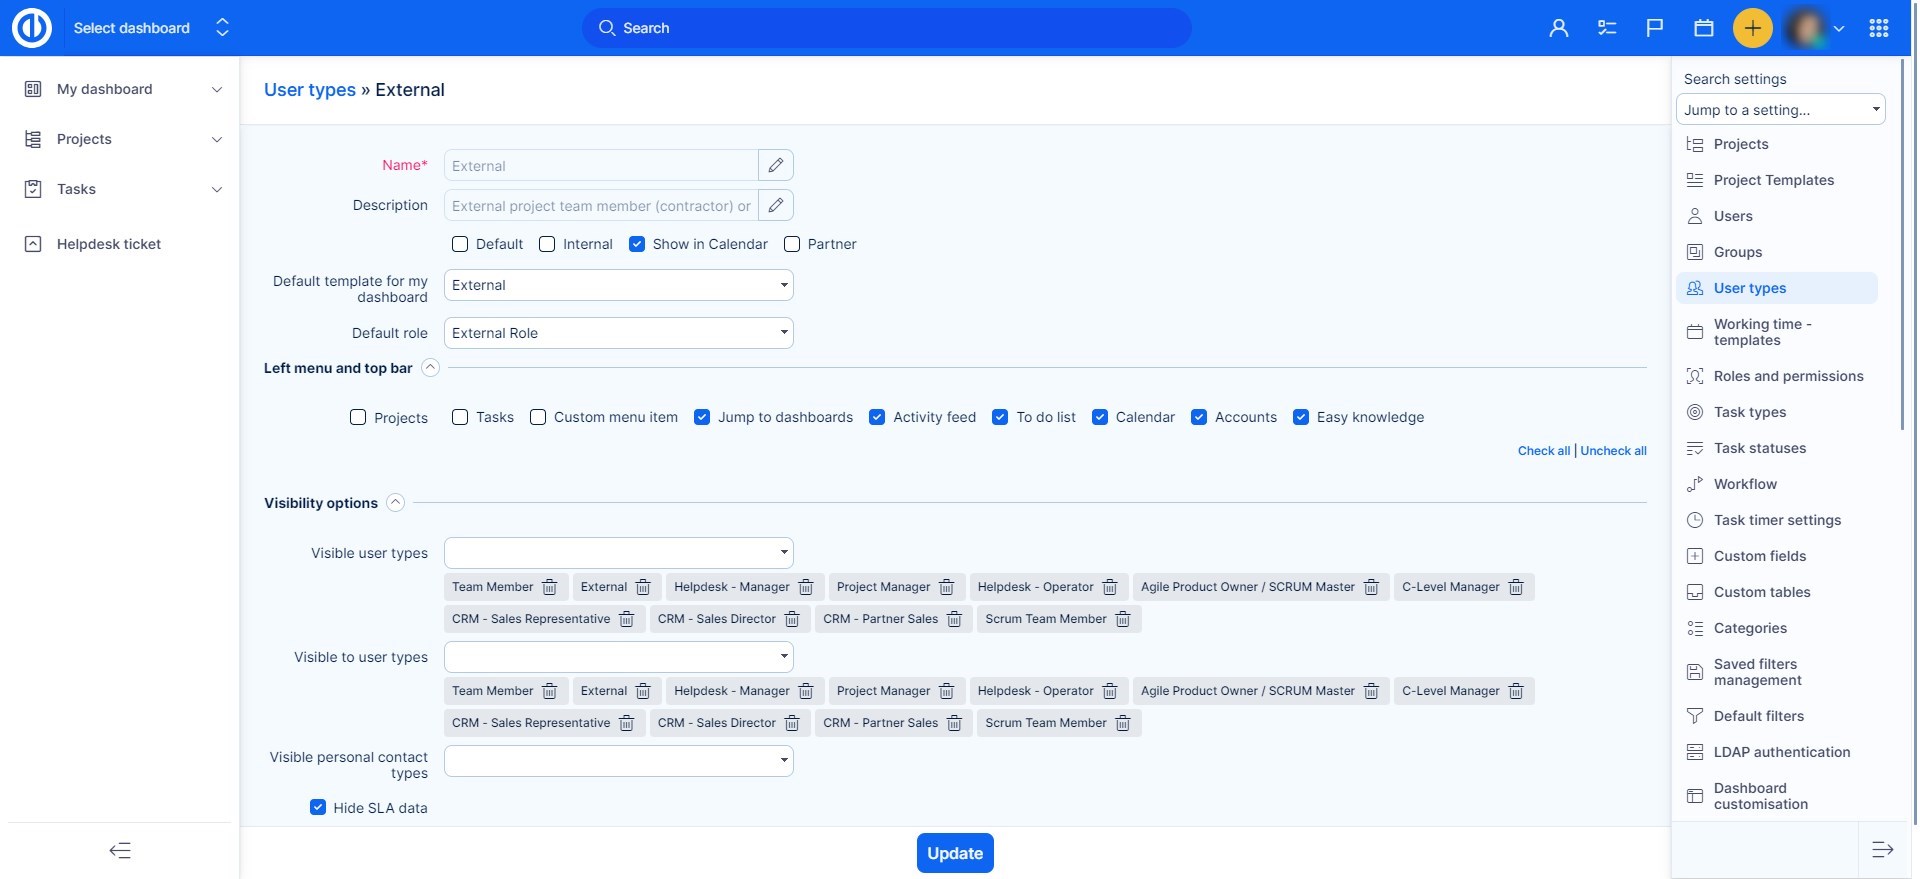
External
This external user has everything disabled except for the meeting calendar. Also, external users are not included in the Budgets plugin so it is not possible to automatically convert their spent time to money. Therefore, if you have external workers and you need them to report their personal costs, you always need to set them as internal users.
Please note that even an external user can be marked as an administrator and may access internal data based on other settings like user visibility and assigned roles. Be mindful when granting these rights to a user with the External user type.
What external users CAN use
- Meeting Calendar
- Project Modules:
- Project Overview
- Tasks
- Contacts
What external users CAN NOT use
- Resource Management:
- Cannot manage external licenses in Resource Management.
- Budgets and Time Tracking:
- Cannot log spent time.
- Cannot be included in the Budgets plugin (spent time cannot be automatically converted into money).
- Filters and Activity:
- Cannot see any filters.
- Cannot view project activity.
- Administrative Permissions:
- Cannot be assigned as an administrator (not recommended).
- Chat and Communication (Available through v11):
- External users can find internal users in chat, but internal users cannot find external users.
- Money Settings:
- Cannot choose hourly rates in Money settings.
- Mentions and Task Assignment:
- Cannot be mentioned in tasks like internal users.
- Global Filters and Reports:
- Cannot be found in global filters for spent time.
- Project Roles:
- Cannot be an author or project manager of a project.
- SLA Events Visibility:
- Cannot see SLA events, even if permission is granted under their project role.
- Limited email sending:
- Cannot send quick email to customer from template
- Cannot send email to customer with preview
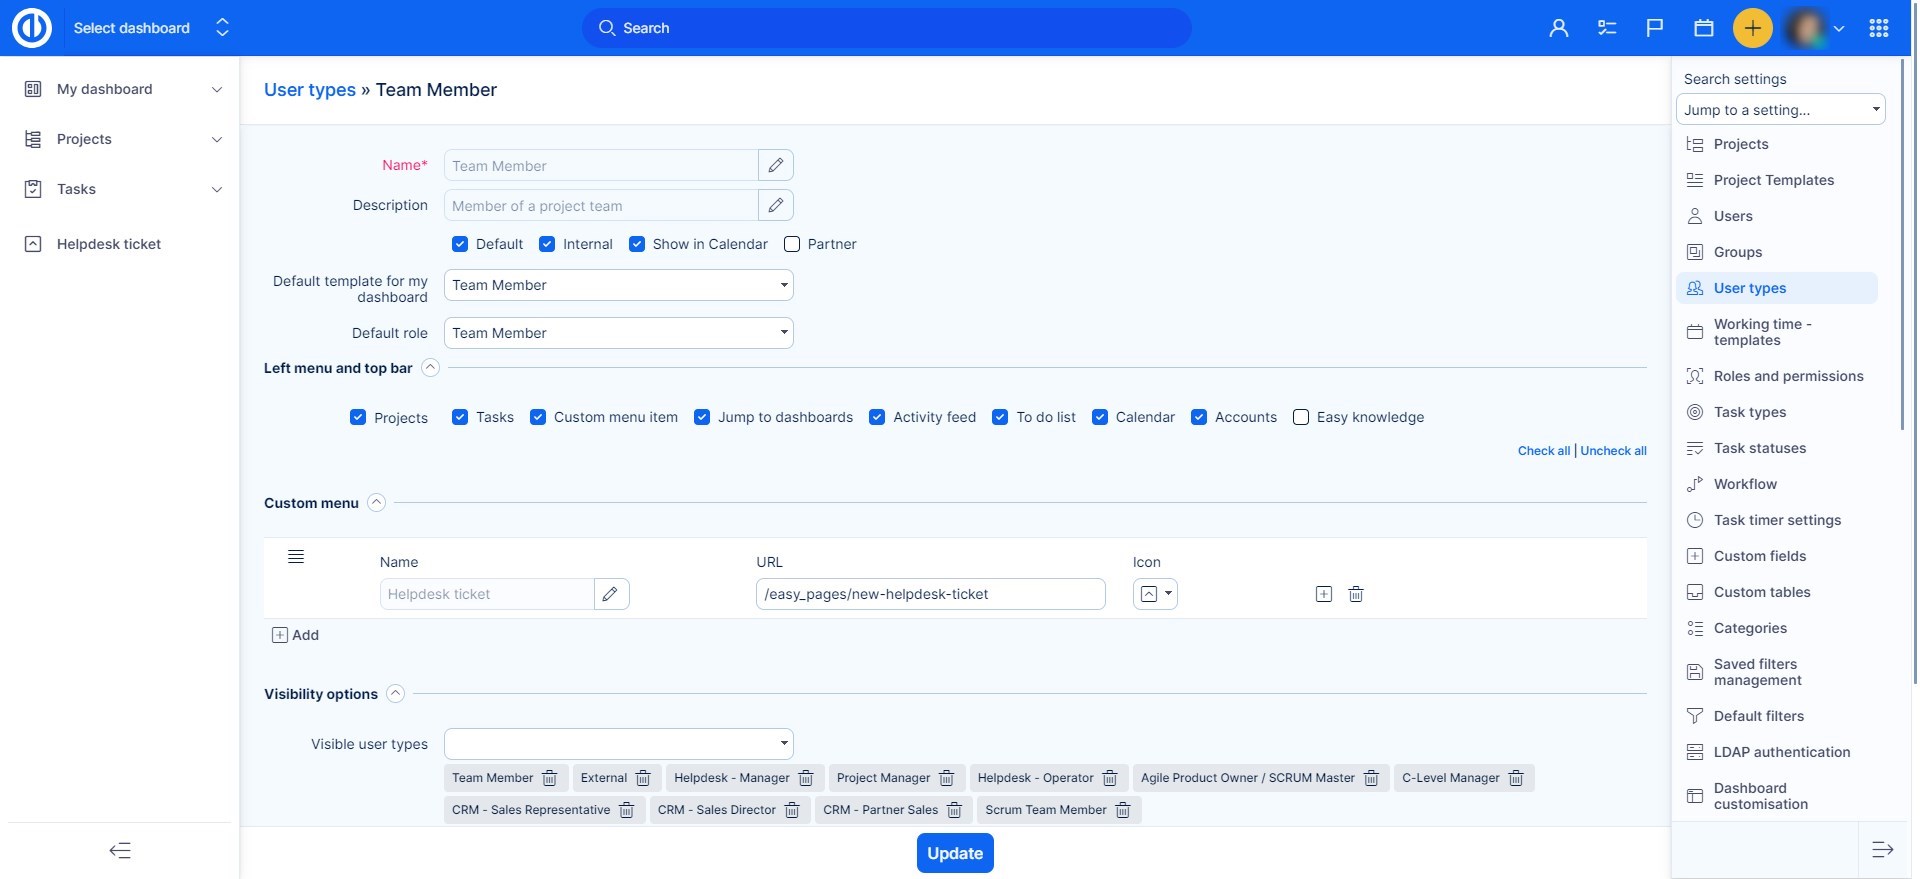
Internal
This internal user has everything enabled.
Detailed settings
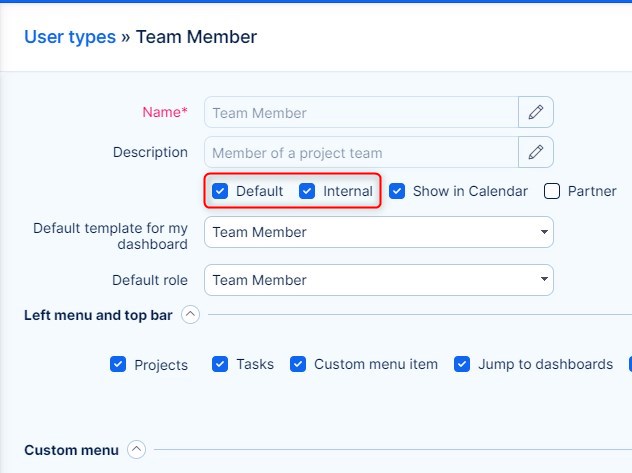
- Default? Internal?
Checking the option "Default" means this user type will be pre-selected when creating new users. The option "internal" allows selecting whether this user type is in-house employee or external worker/client with corresponding permissions.
- Non-internal users cannot log spent time and are not included in Budgets plugin, so it is not possible to automatically convert their spent time to money.
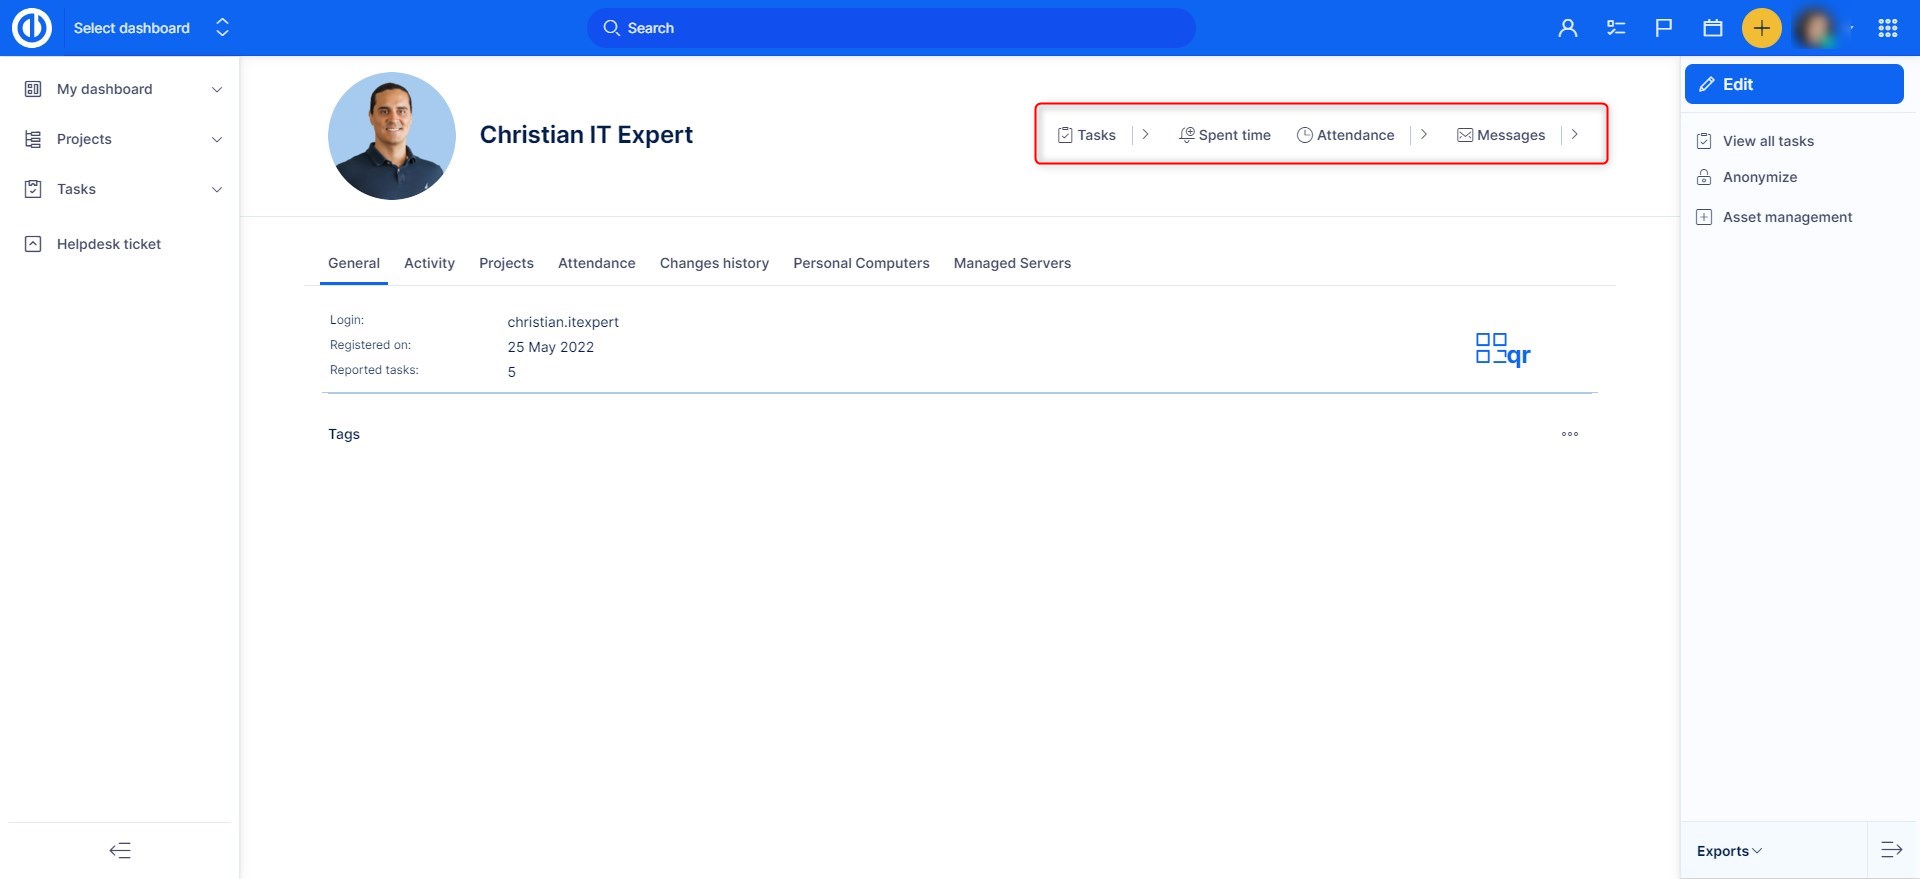
- Non-internal users do not see tasks, spent time, attendance and resource management buttons on their user profile.
- Non-internal users do not see saved public filters anywhere, only their own saved private filters.
- Non-internal users do not see estimated hours on assigned tasks, and neither in resource management.
- Non-internal users can not see project activity, even if they have the permission on the project.
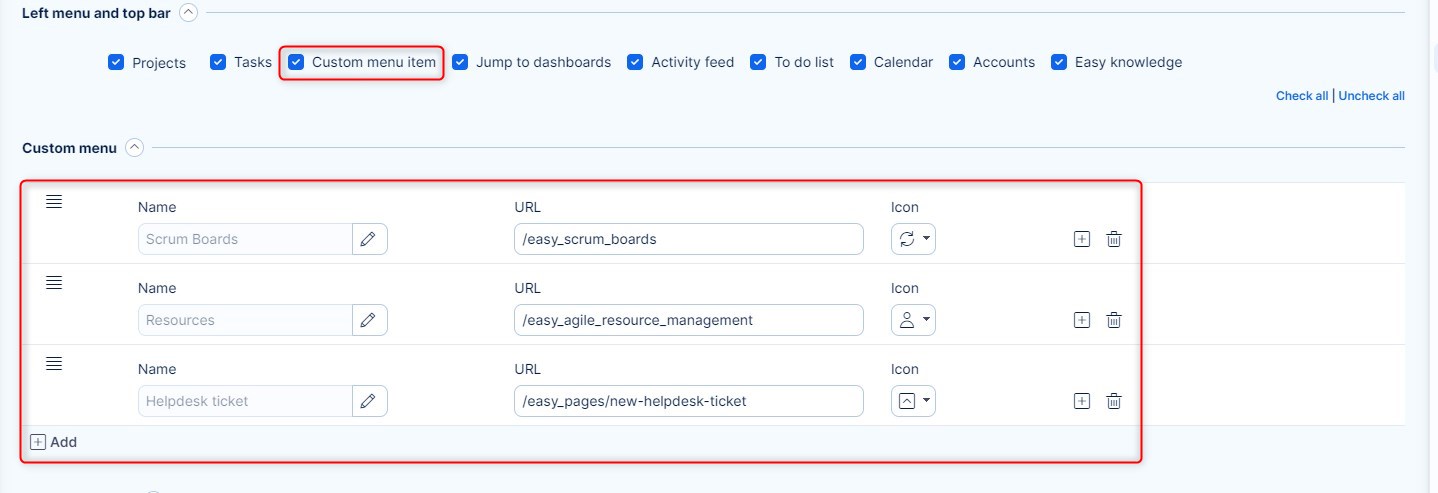
- Custom menu item
If you want to make it easier for your users to reach something, or you want to restrict them from using the More menu but still need them to have access to specific modules, for example Budgets or Resources, then you should make a custom menu for them. Just enter the name of the menu item, the URL link of the item (limited up to 2000 characters), and select the graphic icon.
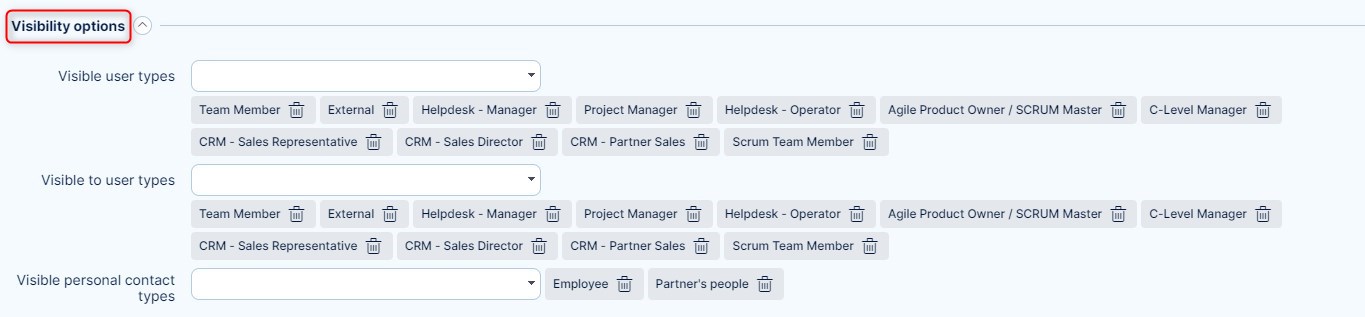
- Visibility options
Here, you can choose which user types can see other user types. Or, you can select "All" to see all user types. Selecting <<all>> means it will use all existing user types only. New types created from this moment on will not be considered unless <<all>> is selected again after their creation. Even with limited user type visibility, all users with the permission "View all spent time" on their user profiles can still see spent time records of other user types. This setting does not apply to spent time visibility, which can only be limited by user roles' permissions on projects.
Built-in Role: Automatic Role Assignment Across All Projects
In some organizations, certain people—such as C-level executives, HR staff, or auditors—need consistent visibility across all projects. Manually adding them as members to every new project or template is inefficient. To simplify this, Easy Redmine offers a built-in role feature that automatically assigns a predefined project role to users of a selected user type in all projects.
How to Enable and Set a Built-in Role
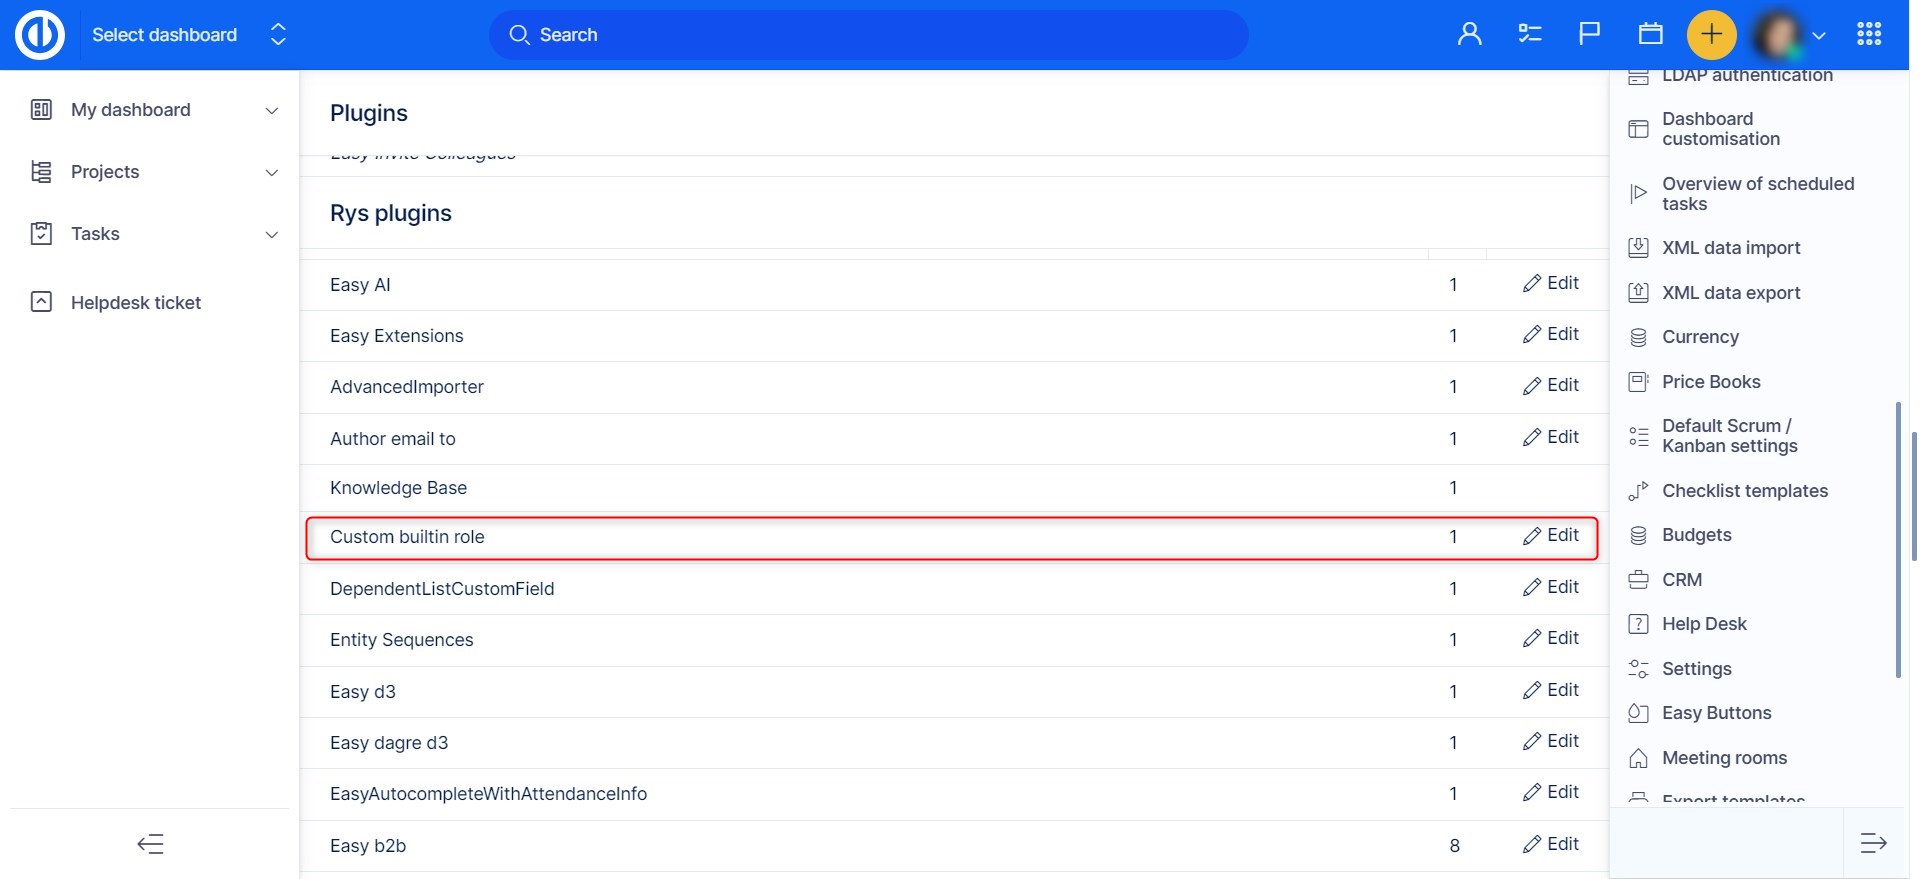
- Go to Global menu >> Administration >> Plugins.
- Find Custom built-in role in the plugin list and click Edit.
- Activate the feature if it is not enabled yet.
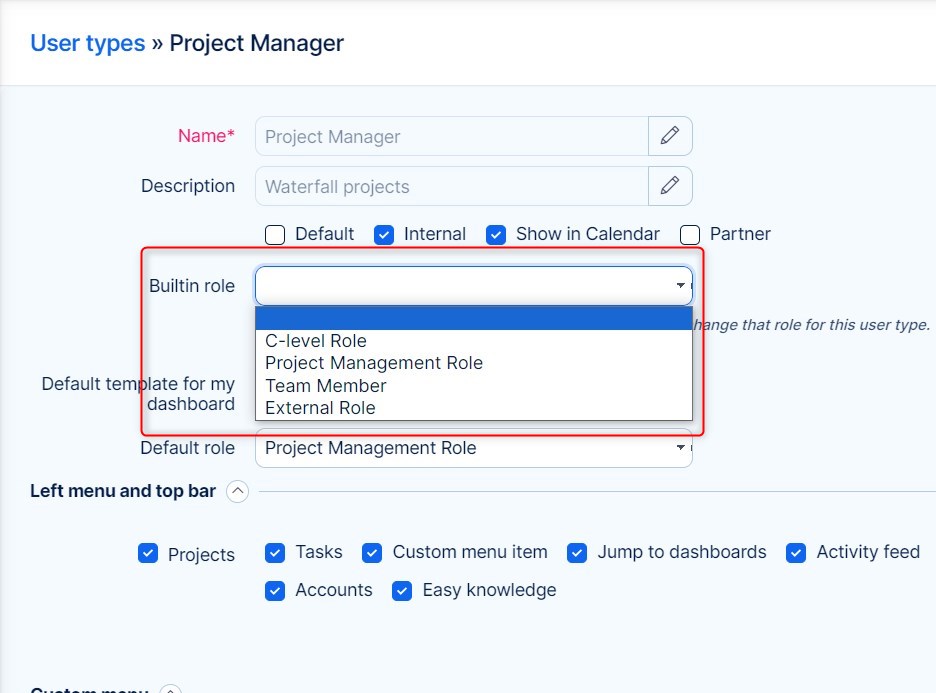
- Navigate to Global menu >> Administration >> User types.
- Edit the user type for which you want to assign a built-in role.
- In the Built-in role field, choose a predefined role such as "Team Member" or "C-level Role".
How It Works
- Once set, all users with that user type will automatically receive the selected role in all projects where they are not already added as members.
- If the user is already a member of a project (either directly, via group, or via template), the built-in role will not apply to that project.
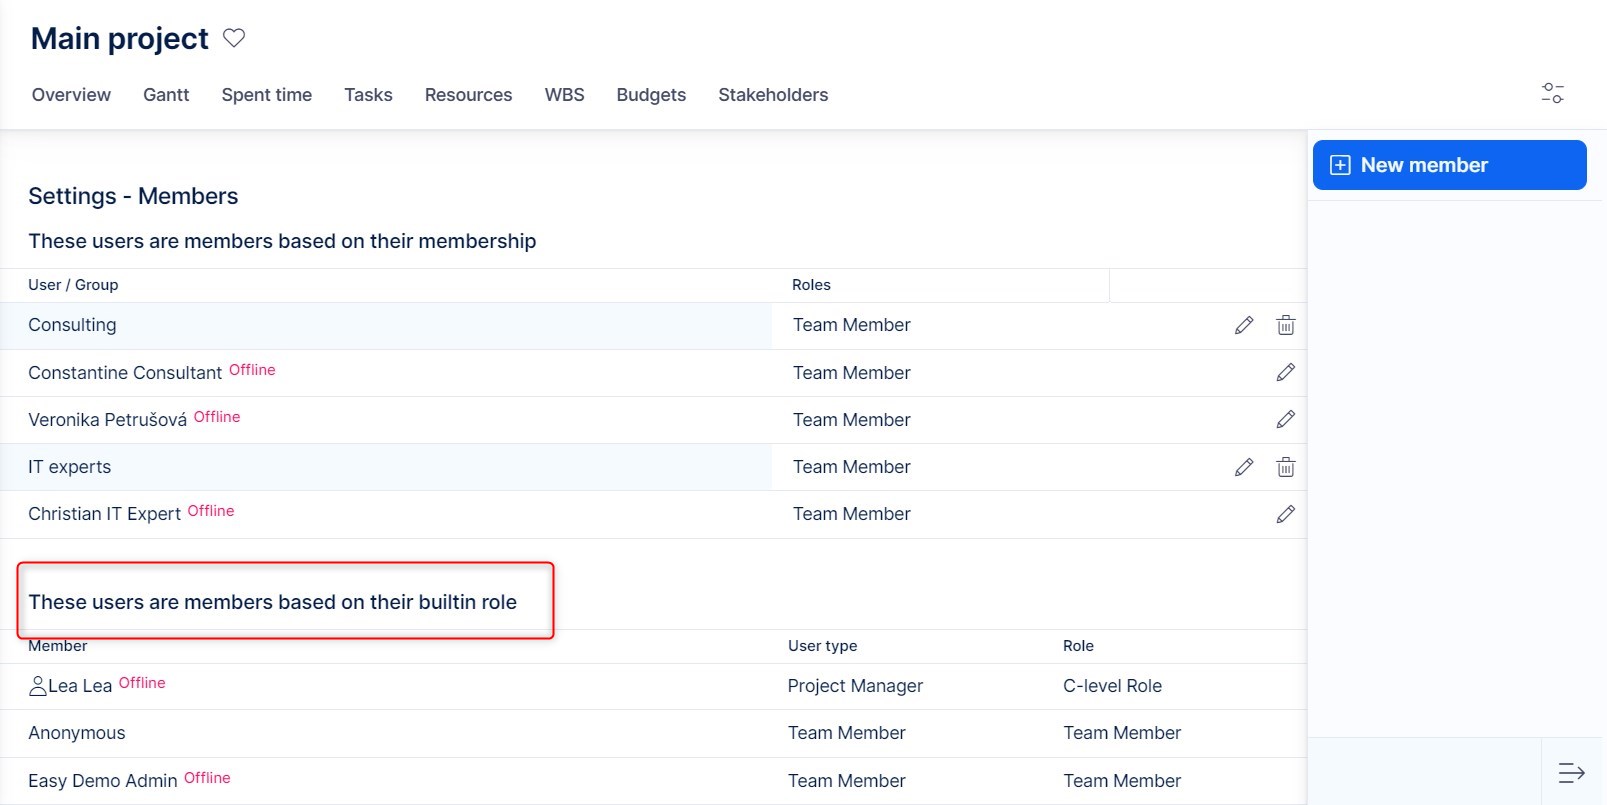
- The system will treat these users as project members for permission purposes. In the project member list, such users will be listed under a separate section labeled "These users are members based on their built-in role."
Important Clarification
We’d like to clarify that the so-called built-in role is not a replacement for project membership—nor was it intended as such. The goal was to provide users with read-only access to all projects without the need to add them manually as project members.
This feature is simply a way to bypass the need for membership, not a full replacement for permissions based on project roles.
To summarize:
- Users with a specific account type can now be granted automatic access to all projects.
- A new option allows assigning a predefined role to these users across all projects, with permissions limited to read-only access.
- Any editing rights remain available only in projects where the user is an actual member.
Best Practice
We recommend that if you set a built-in role to a certain user type, you avoid manually adding those users to specific projects or templates. This prevents permission overlap or inconsistencies. If a user is manually added to a project, the manual membership takes precedence, and the built-in role does not apply in that project.
Summary
- Built-in roles allow automatic role assignment in all projects for selected user types.
- Only applies where the user is not already a member.
- Ideal for auditors, HR, or executives who need global visibility.
- Permissions are limited to the selected role—usually read-only.
- Manual project membership is required for editing permissions.

