


How to set up Kerberos authentication
Introduction
From January 2019, Easy Redmine (version 2018.1.3, platform 05.02) supports user authentication via Kerberos. Easy Software provides Kerberos authentication as a premium service, which may be charged by a one-time fee.
The functionality is a part of the general SSO authentication setting (version 10: Administration >> Settings >> Authentication; version 11: Administration >> Easy SSO ).
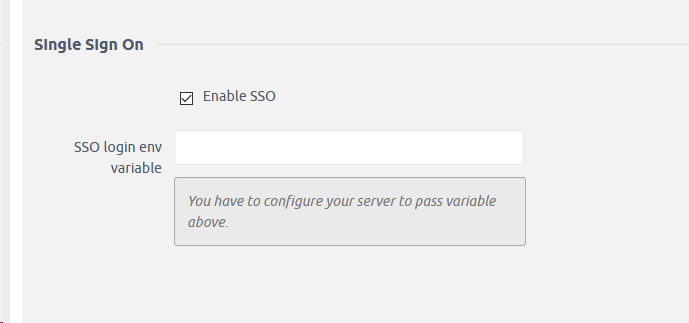
With the configuration described in detail below, you would enter: manager/admin@EASYPROJECT.COM where EASYPROJECT.COM is realm name.
This setting is the easy part. The bigger part, however, is done on the server side. Kerberos for Easy Redmine requires Apache web server. The configuration is carried out by our server experts according to your needs.
Below you can find a guideline to the configuration. It serves only as reference material about the setup that would be done. Please be aware this is not a guaranteed manual. By trying to configure Kerberos or any other SSO authentication on your server, you take full responsibility of the security and overall functioning of the application.
Don't hesitate to contact your account manager or support to plan the configuration with our experts.
Kerberos installation on a Linux server
Contents
How to install and prepare kerberos server
How to use kerberos authentication on apache2 web-server
How to use kerberos authentication on nginx web-server (only on CentOS based machines!)
Sources and useful links
Installation of Kerberos
For this discussion, we will create na MIT Kerberos domain with the following features (edit them to fit your needs):
Realm: EASYPROJECT.COM
Primary KDC: kdc01.easyproject.com (192.168.0.1)
Secondary KDC: kdc02.easyproject.com (192.168.0.2)
User principal: manager
Admin principal: easy/easy666
It is strongly recommended that your network-authenticated users have their uid in a different range (say, starting at 5000) than that of your local users.
Before installing the Kerberos server, a properly configured DNS server is needed for your domain. Since the Kerberos Realm by convention matches the domain name, this section uses the EASYPROJECT.COM domain configured in Primary Master of the DNS documentation.
The next part is very important!
!!!Also, Kerberos is a time sensitive protocol. So if the local system time between a client machine and the server differs by more than five minutes (by default), the workstation will not be able to authenticate. To correct the problem all hosts should have their time synchronized using the same Network Time Protocol (NTP) server. For details on setting up NTP see Time Synchronization.!!!
Installation of Kerberos server
1) First we need to install the krb5-kdc and krb5-admin-server packages.
sudo apt install krb5-kdc krb5-admin-server
You will be asked at the end of the install to supply the hostname for the Kerberos and Admin servers, which may or may not be the same server, for the realm.
By default the realm is created from the KDC's domain name.
2) Now we need to create the new realm with the kdb5_newrealm utility:
sudo krb5_newrealm

Upgrade your project management
Get next-level Redmine features that adapt to your needs and bring you perfect overview.
Configuration of Kerberos server
1) The questions asked during installation are used to configure the /etc/krb5.conf file. If you need to adjust the Key Distribution Center (KDC) settings simply edit the file and restart the krb5-kdc daemon. If you need to reconfigure Kerberos from scratch, perhaps to change the realm name, you can run the next command
sudo dpkg-reconfigure krb5-kdc
2) Once the KDC is properly running, an admin user -- the admin principal -- is needed. It is recommended to use a different username from your everyday username. Run
sudo kadmin.local

Authenticating as principal root/admin@EASYPROJECT.COM with password.
kadmin.local: addprinc manager/easy
WARNING: no policy specified for manager/admin@EASYPROJECT.COM; defaulting to no policy
Enter password for principal "manager/admin@EASYPROJECT.COM":
Re-enter password for principal "manager/admin@EASYPROJECT.COM":
Principal "manager/admin@EASYPROJECT.COM" created.
kadmin.local: quit
In the above example manager is the Principal, /admin is an Instance, and @EASYPROJECT.COM signifies the realm. The "every day" Principal, a.k.a. the user principal, would be manager@EASYPROJECT.COM, and should have only normal user rights.
Replace EASYPROJECT.COM and manager with your Realm and admin username.
3) Next, the new admin user needs to have the appropriate Access Control List (ACL) permissions. The permissions are configured in the /etc/krb5kdc/kadm5.acl file:
manager/admin@EASYPROJECT.COM *
This entry grants manager/admin the ability to perform any operation on all principals in the realm. You can configure principals with more restrictive privileges, which is convenient if you need an admin principal that junior staff can use in Kerberos clients. Please see the kadm5.acl man page for details.
4) Now restart the krb5-admin-server for the new ACL to take affect:
sudo systemctl restart krb5-admin-server.service
5) The new user principal can be tested using the kinit utility:
kinit manager/admin

manager/admin@EASYPROJECT.COM's Password:
After entering the password, use the klist utility to view information about the Ticket Granting Ticket (TGT):
klist
Credentials cache: FILE:/tmp/krb5cc_1000
        Principal: manager/admin@EASYPROJECT.COM

  Issued                 Expires               Principal
Jul 13 17:53:34  Jul 14 03:53:34  krbtgt/EASYPROJECT.COM@EASYPROJECT.COM
Where the cache filename krb5cc_1000 is composed of the prefix krb5cc_ and the user id (uid), which in this case is 1000. You may need to add an entry into the /etc/hosts for the KDC so the client can find the KDC. For example:
192.168.0.1 kdc01.example.com kdc01
Replacing 192.168.0.1 with the IP address of your KDC. This usually happens when you have a Kerberos realm encompassing different networks separated by routers.
The best way to allow clients to automatically determine the KDC for the Realm is using DNS SRV records. Add the following to /etc/named/db.example.com:
_kerberos._udp.EASYPROJECT.COM.     IN SRV 1  0 88  kdc01.easyproject.com.
_kerberos._tcp.EASYPROJECT.COM.     IN SRV 1  0 88  kdc01.easyproject.com.
_kerberos._udp.EASYPROJECT.COM.     IN SRV 10 0 88  kdc02.easyproject.com.
_kerberos._tcp.EASYPROJECT.COM.     IN SRV 10 0 88  kdc02.easyproject.com.
_kerberos-adm._tcp.EASYPROJECT.COM. IN SRV 1  0 749 kdc01.easyproject.com.
_kpasswd._udp.EASYPROJECT.COM.      IN SRV 1  0 464 kdc01.easyproject.com.
Replace EASYPROJECT.COM, kdc01, and kdc02 with your domain name, primary KDC, and secondary KDC.
See Domain Name Service (DNS) for detailed instructions on setting up DNS.
Your new Kerberos Realm is now ready to authenticate clients.
Secondary KDC Configuration (Optional)
It is good practice to have a Secondary KDC in case the primary becomes unavailable. Also, if you have Kerberos clients that are in different networks (possibly separated by routers using NAT), it is wise to place a secondary KDC in each of those networks.
1) install the packages, and when asked for the Kerberos and Admin server names enter the name of the Primary KDC:
sudo apt install krb5-kdc krb5-admin-server
2) Once you have the packages installed, create the Secondary KDC's host principal. From a terminal prompt, enter:
kadmin -q "addprinc -randkey host/kdc02.easyproject.com"
After, issuing any kadmin commands you will be prompted for your username/admin@EASYPROJECT.COM principal password.
3) Extract the keytab file:
kadmin -q "ktadd -norandkey -k keytab.kdc02 host/kdc02.easyproject.com"
4) There should now be a keytab.kdc02 in the current directory, move the file to /etc/krb5.keytab:
sudo mv keytab.kdc02 /etc/krb5.keytab
If the path to the keytab.kdc02 file is different adjust accordingly.
5) Also, you can list the principals in a Keytab file, which can be useful when troubleshooting, using the klist utility:
sudo klist -k /etc/krb5.keytab
The -k option indicates the file is a keytab file.
6) Next, there needs to be a kpropd.acl file on each KDC that lists all KDCs for the Realm. For example, on both primary and secondary KDC, create /etc/krb5kdc/kpropd.acl:
host/kdc01.easyproject.com@EASYPROJECT.COM
host/kdc02.easyproject.com@EASYPROJECT.COM
7) Create an empty database on the Secondary KDC:
sudo kdb5_util -s create
8) Now start the kpropd daemon, which listens for connections from the kprop utility. kprop is used to transfer dump files:
sudo kpropd -S
9) On the Primary KDC, create a dump file of the principal database:
sudo kdb5_util dump /var/lib/krb5kdc/dump
10) Extract the Primary KDC's keytab file and copy it to /etc/krb5.keytab:
kadmin -q "ktadd -k keytab.kdc01 host/kdc01.easyproject.com"

sudo mv keytab.kdc01 /etc/krb5.keytab
Make sure there is a host for kdc01.easyproject.com before extracting the Keytab.
11) Using the kprop utility push the database to the Secondary KDC:
sudo kprop -r EASYPROJECT.COM -f /var/lib/krb5kdc/dump kdc02.easyproject.com
There should be a SUCCEEDED message if the propagation worked. If there is an error message check /var/log/syslog on the secondary KDC for more information.
12) You may also want to create a cron job to periodically update the database on the Secondary KDC. For example, the following will push the database every hour (note the long line has been split to fit the format of this document):
# m h  dom mon dow   command
0 * * * * /usr/sbin/kdb5_util dump /var/lib/krb5kdc/dump &&
/usr/sbin/kprop -r EASYPROJECT.COM -f /var/lib/krb5kdc/dump kdc02.easyproject.com
13) Back on the Secondary KDC, create a stash file to hold the Kerberos master key:
sudo kdb5_util stash
14) Finally, start the krb5-kdc daemon on the Secondary KDC:
sudo systemctl start krb5-kdc.service
The Secondary KDC should now be able to issue tickets for the Realm. You can test this by stopping the krb5-kdc daemon on the Primary KDC, then by using kinit to request a ticket. If all goes well you should receive a ticket from the Secondary KDC. Otherwise, check /var/log/syslog and /var/log/auth.log in the Secondary KDC.
Active Directory as a Kerberos server
All users that should be able to login must be in AD to get through the webserver (e.g. Apache) to ER. For SSO to work, user must login from a domain PC to which he’s logged in as the AD user. Even without SSO working, user must provide login credentials to AD to the webserver (just HTTP basic authentication is used in this case, https is strongly recommended).
1) Create AD user for the webserver with option password never expires turned on. E.g. user easysso with password SECRET and the domain being used for SSO (e.g. EASYPROJECT.COM).
2) Generate Kerberos keytab file on the AD Windows server:
ktpass -princ HTTP/www.easyproject.com@EASYPROJECT.COM -mapuser easysso@EASYPROJECT.COM -pass SECRET -crypto ALL -ptype KRB5_NT_PRINCIPAL -out C:\Temp\http.keytab
3) Set SPN (service principal name) to the AD account created above on the Windows server, e.g. by:
setspn -s HTTP/www.easyproject.com easysso
Kerberos Linux Client
You will now need to configure a Linux system as a Kerberos client. This will allow access to any kerberized services once a user has successfully logged into the system.
1) In order to authenticate to a Kerberos Realm, the krb5-user and libpam-krb5 packages are needed, along with a few others that are not strictly necessary but make life easier. To install the packages on a Debian-based system enter the following in a terminal prompt:
sudo apt install krb5-user libpam-krb5 libpam-ccreds auth-client-config
To install the packages on a Redhat-based system use:
yum install krb5-workstation pam_krb5
The auth-client-config package allows simple configuration of PAM for authentication from multiple sources, and the libpam-ccreds will cache authentication credentials allowing you to login in case the Key Distribution Center (KDC) is unavailable. This package is also useful for laptops that may authenticate using Kerberos while on the corporate network, but will need to be accessed off the network as well.
2) To configure the client in a terminal (Debian-based system) enter:
sudo dpkg-reconfigure krb5-config
On Redhat-based system, it’s sufficient to edit /etc/krb5.conf (see below).
You will then be prompted to enter the name of the Kerberos Realm. Also, if you don't have DNS configured with Kerberos SRV records, the menu will prompt you for the hostname of the Key Distribution Center (KDC) and Realm Administration server.
The dpkg-reconfigure adds entries to the /etc/krb5.conf file for your Realm. You should have entries similar to the following:
[libdefaults]
        default_realm = EASYPROJECT.COM
...
[realms]
        EXAMPLE.COM = {
                kdc = 192.168.0.1
                admin_server = 192.168.0.1
        }
If you set the uid of each of your network-authenticated users to start at 5000, as suggested in Installation, you can then tell pam to only try to authenticate using Kerberos users with uid > 5000:
# Kerberos should only be applied to ldap/kerberos users, not local ones.
for i in common-auth common-session common-account common-password; do
sudo sed -i -r \
-e 's/pam_krb5.so minimum_uid=1000/pam_krb5.so minimum_uid=5000/' \
/etc/pam.d/$i
done
This will avoid being asked for the (non-existent) Kerberos password of a locally authenticated user when changing its password using passwd.
3) You can test the configuration by requesting a ticket using the kinit utility. For example:
kinit manager@EASYPROJECT.COM
Password for manager@EASYPROJECT.COM:
When a ticket has been granted, the details can be viewed using klist:
klist
Ticket cache: FILE:/tmp/krb5cc_1000
Default principal: manager@EASYPORJECT.COM

Valid starting     Expires            Service principal
07/24/08 05:18:56  07/24/08 15:18:56  krbtgt/EASYPROJECT.COM@EASYPROJECT.COM
        renew until 07/25/08 05:18:57
Kerberos 4 ticket cache: /tmp/tkt1000
klist: You have no tickets cached
4) Next, use the auth-client-config to configure the libpam-krb5 module to request a ticket during login:
sudo auth-client-config -a -p kerberos_example
You will should now receive a ticket upon successful login authentication.
Apache 2 configuration
1) Install the mod_auth_kerb authentication module
Apache does not itself provide support for SPNEGO but it can be added using the module mod_auth_kerb. This is included in most major GNU/Linux distributions, but because it is a third-party module it is usually packaged separately from Apache. On Debian-based systems it is provided by the package libapache2-mod-auth-kerb:
apt-get install libapache2-mod-auth-kerb
and on Red Hat-based systems by the package mod_auth_kerb:
yum install mod_auth_kerb
2) Apache modules must be loaded before they can be used, but both of the above packages arrange for this to happen automatically. If for any reason you need to do this manually then the appropriate configuration directive is:
LoadModule auth_kerb_module /usr/lib/apache2/modules/mod_auth_kerb.so
(where the pathname of the module should be replaced with whatever is appropriate for your system).
3) Create a service principal for the web server
SPNEGO requires that a Kerberos service principal be created for the web server. The service name is defined to be HTTP, so for the server www.easyproject.com the required service principal name is HTTP/www.easyproject.com@easyproject.COM.
If you are using MIT Kerberos then the service principal can be created using the kadmin command:
kadmin -p manager/admin -q "addprinc -randkey HTTP/www.easyproject.com"
4) Create a keytab for the service principal
A keytab is a file for storing the encryption keys corresponding to one or more Kerberos principals. mod_auth_kerb needs one in order to make use of the service principal created above. If you are using MIT Kerberos then the keytab (like the service principal) can be created using the kadmin command. Its ownership must be such that it is readable by the Apache process.
On Debian-based systems a suitable location for the keytab would be /etc/apache2/http.keytab and the appropriate owner is www-data:
kadmin -p manager/admin -q "ktadd -k /etc/apache2/http.keytab HTTP/www.easyproject.com"
chown www-data /etc/apache2/http.keytab
On Red Hat-based systems a suitable location would be /etc/httpd/http.keytab and the appropriate owner is apache:
kadmin -p manager/admin -q "ktadd -k /etc/httpd/http.keytab HTTP/www.easyproject.com"
chown apache /etc/httpd/http.keytab
The -k option specifies the pathname to the keytab, which will be created if it does not already exist.
If you use AD instead of the Linux Kerberos server, use the http.keytab file generated as described above in the AD section.
5) If you wish to check that the key has been correctly added to the keytab then you can attempt to use it to authenticate as the service principal, then view the resulting ticket-granting ticket using klist:
kinit -k -t /etc/apache2/http.keytab HTTP/www.easyproject.com
klist
6) Specify the authentication method to be used
Apache must be told which parts of which web sites are to use authentication provided by mod_auth_kerb. This is done using the AuthType directive with a value of Kerberos. Some further directives are then needed to configure how mod_auth_kerb should behave.
If the intent is to apply these directive to the whole of a given web site then they can be placed in a <Location> container with a path corresponding to the root of the site:
<Location />
 AuthType Kerberos
 AuthName "Acme Corporation"
 KrbMethodNegotiate on
 KrbMethodK5Passwd off
 Krb5Keytab /etc/apache2/http.keytab
</Location>
In case of AD Kerberos server, you may also need:
<Location />
 ...
 KrbAuthRealms EASYPROJECT.COM
 KrbServiceName HTTP/www.easyproject.com
</Location>
The AuthName directive specifies the HTTP authorisation realm. Its purpose is to indicate to the user which of the various passwords he might know is needed to gain access to a particular web site. With true Kerberos authentication there should be no password prompt, and mod_auth_kerb appears to work perfectly well without an AuthName having been specified; however the Apache documentation states that it is required, so it would seem prudent to supply one anyway. A suitable value might be the domain name, the name of the Kerberos realm, or the name of the organisation to which the web site belongs.
In addition to the SPNEGO protocol, mod_auth_kerb has the ability to ask the user for a password using basic authentication then validate that password by attempting to authenticate to the KDC. This can be useful if there is a need for the web site to be accessible to its authorised users from machines that are not part of the Kerberos realm, however it is significantly less secure than true Kerberos authentication. Both SPNEGO and password authentication are enabled by default. In this example there is no requirement for the site to be accessible to non-SPNEGO-enabled web browsers, therefore password authentication has been disabled using the KrbMethodK5Passwd directive. For completeness, SPNEGO has been explicitly enabled using the KrbMethodNegotiate directive.
The Krb5Keytab directive specifies the pathname of the keytab to which the HTTP service principal has been added. It should match whatever was passed to the ktadd command of kadmin earlier in this procedure.
Although a <Location> container has been used in this example, it would be equally acceptable for the above directives to be placed within a <Directory>, <Files> or <Proxy> container or within an .htaccess file.
7) Specify a list of authorised users
Setting the authentication method does not by itself restrict access to the server. This is because Apache defaults to allowing access by anonymous users, and unless that behaviour is overridden then the authentication method (whatever it might be) will not be invoked.
In this example there are only four users who need access, and the simplest way to arrange that is by means of a Require directive:
<Location />
 # ...
 Require user dougal@EASYPROJECT.COM brian@EASYPROJECT.COM ermintrude@EASYPROJECT.COM dylan@EASYPROJECT.COM
</Location>
However, if you want to allow access through Apache to all LDAP/AD users, you can specify:
<Location />
 # ...
 Require valid-user
</Location>
8) Reload the Apache configuration
See Cause a system service to reload its configuration. On recent Debian-based systems the required command is:
service apache2 force-reload
Nginx configuration
This section only applies to CentOS/RedHat based OS.
1) Make sure Nginx is installed in your system.
All the next commands should be run from root user or using sudo.
2) Run the next command to check what modules are available in your nginx installation.
Nginx -V
(look for “ with-stream=dynamic” in the output of the command to make sure your steam module is avaialble)
3) Go to your root and search for the ngx_stream_module.so file
 cd /
 find / -name ngx_stream_module.so
Note the exact path of the steam module file
For example, it can be placed in “ /usr/lib64/nginx/modules/ngx_stream_module.so ” you will need this path to set it in nginx.conf
If you don't have ngx_stream_module, you need to uninstall your default nginx and reinstall it back from sources or specific rpm package. On this page you may find the exact versions of nginx packages which include ngx_stream_module - https://rpmfind.net/linux/rpm2html/search.php?query=ngx_stream_module.so()(64bit)
4) Now all set to write your Nginx configration.
vim /etc/nginx/nginx.conf
############################################
user nginx;
worker_processes 1;
load_module /usr/lib64/nginx/modules/ngx_stream_module.so;
error_log /var/log/nginx/error.log warn;
pid /var/run/nginx.pid;
events {
worker_connections 1024;
}
stream {
#…
 error_log /var/log/nginx/stream_error.log debug;
 server {
 listen 88;
 proxy_pass kdc01.easyproject.com:88;
 }
 server {
 listen 749;
 proxy_pass kdc01.easyproject.com:749;
 }
}
############################################
5) Restart nginx service.
systemctl enable nginx
systemctl start nginx
6) Check if the assigned ports are open now.
netstat -tupnl |grep nginx
Now our Nginx is ready to redirect the requests to kerb server.
Web client configuration if AD is in use
The domain name must be allowed in client browsers so that the clients can use SSO. This can be used by adujsting the domain policy or directly in the browsers as follows:
- IE: Navigate to Tools -> Internet Options -> Security -> Local Intranet -> Sites -> Advanced and add the domain, e.g. easyproject.com
- Edge: Inherited from IE
- Chrome: Inherited from IE
- Firefox: Navigate to URL about:config and update the following variables: network.negotiate-auth.trusted-uris, network.automatic-ntlm-auth.trusted-uris – add the domain again, e.g. easyproject.com
Debugging
If you want to verify, that your EasyRedmine application sees the SSO variables sent by the webserver (e.g. Apache), navigate to [url]/sso_variables, e.g. to https://www.easyproject.com/sso_variables.
The Current value, Current login and Current use in DB items should be filled and should corresppond to the user trying to log in.
Sources and useful links
https://help.ubuntu.com/lts/serverguide/kerberos.html.en
http://www.microhowto.info/howto/configure_apache_to_use_kerberos_authentication.html
https://medium.com/@Santii/how-to-setup-kerberos-behind-a-reverse-proxy-nginx-d692f609191c

