


Requirements Management
How to use Requirements Management
Overview
How to use the feature
Types of artifacts
Relations between artifacts
Import and export of artifacts
Corner situations
Overview
Requirements Management is useful for technically sophisticated projects where lots of small components and details build a big and impressive product (like a car or a piece of machinery). Simply create artifacts, which represent basic elements in the requirements' tree structure. Technically, it is solely a project-level module with no global requirements page available (application-wide).
Key features:
- Technical decomposition of a project/product
- An unlimited tree structure of artifacts with their own statuses
- 3 customizable types of artifacts (Section, Requirement, Change request)
- Incoming/outgoing relationships between artifacts
- Linking artifacts to tasks
- Import/export option
- Custom fields for requirements
How to use the feature
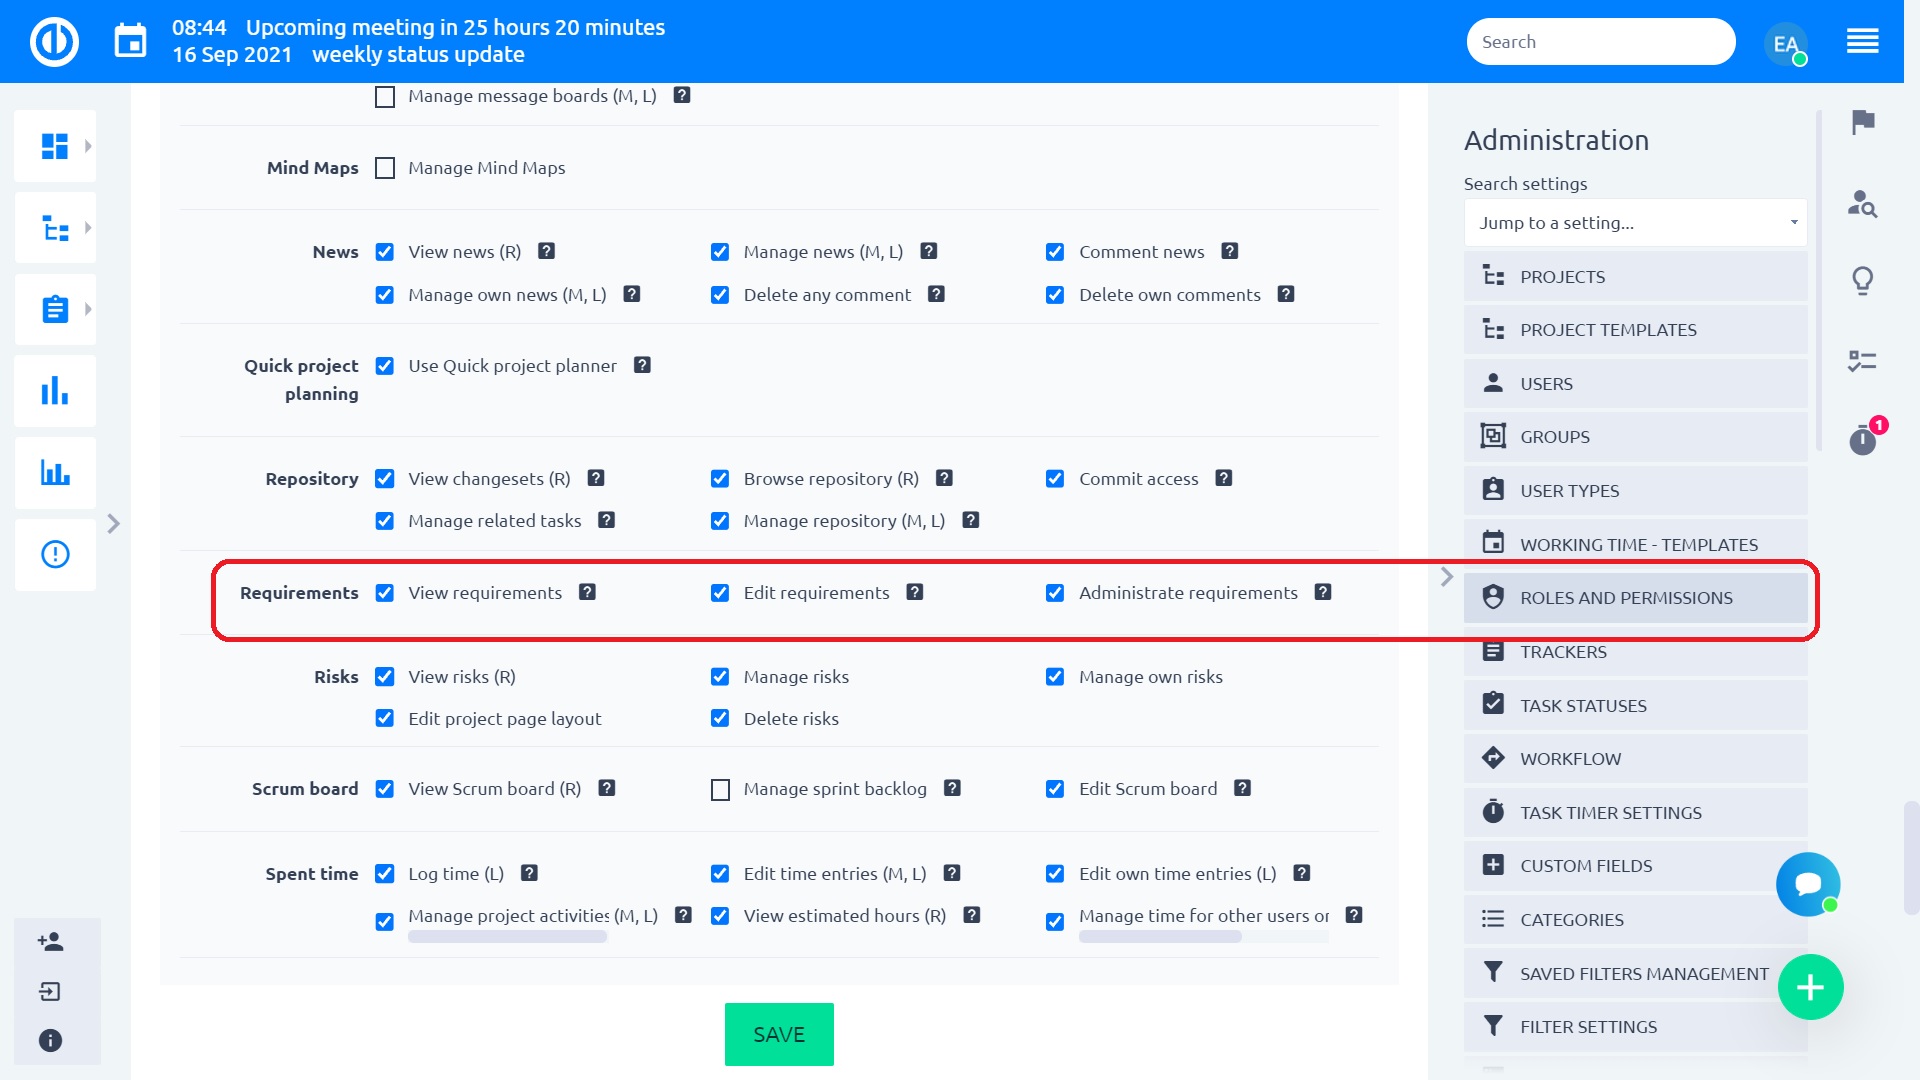
First of all, make sure you are a member of the respective project and have all the necessary permissions related to view, edit, and administrate the Requirements feature. The permissions can be managed in Administration » Roles and permissions » Requirements. Administrators have those permissions by default.
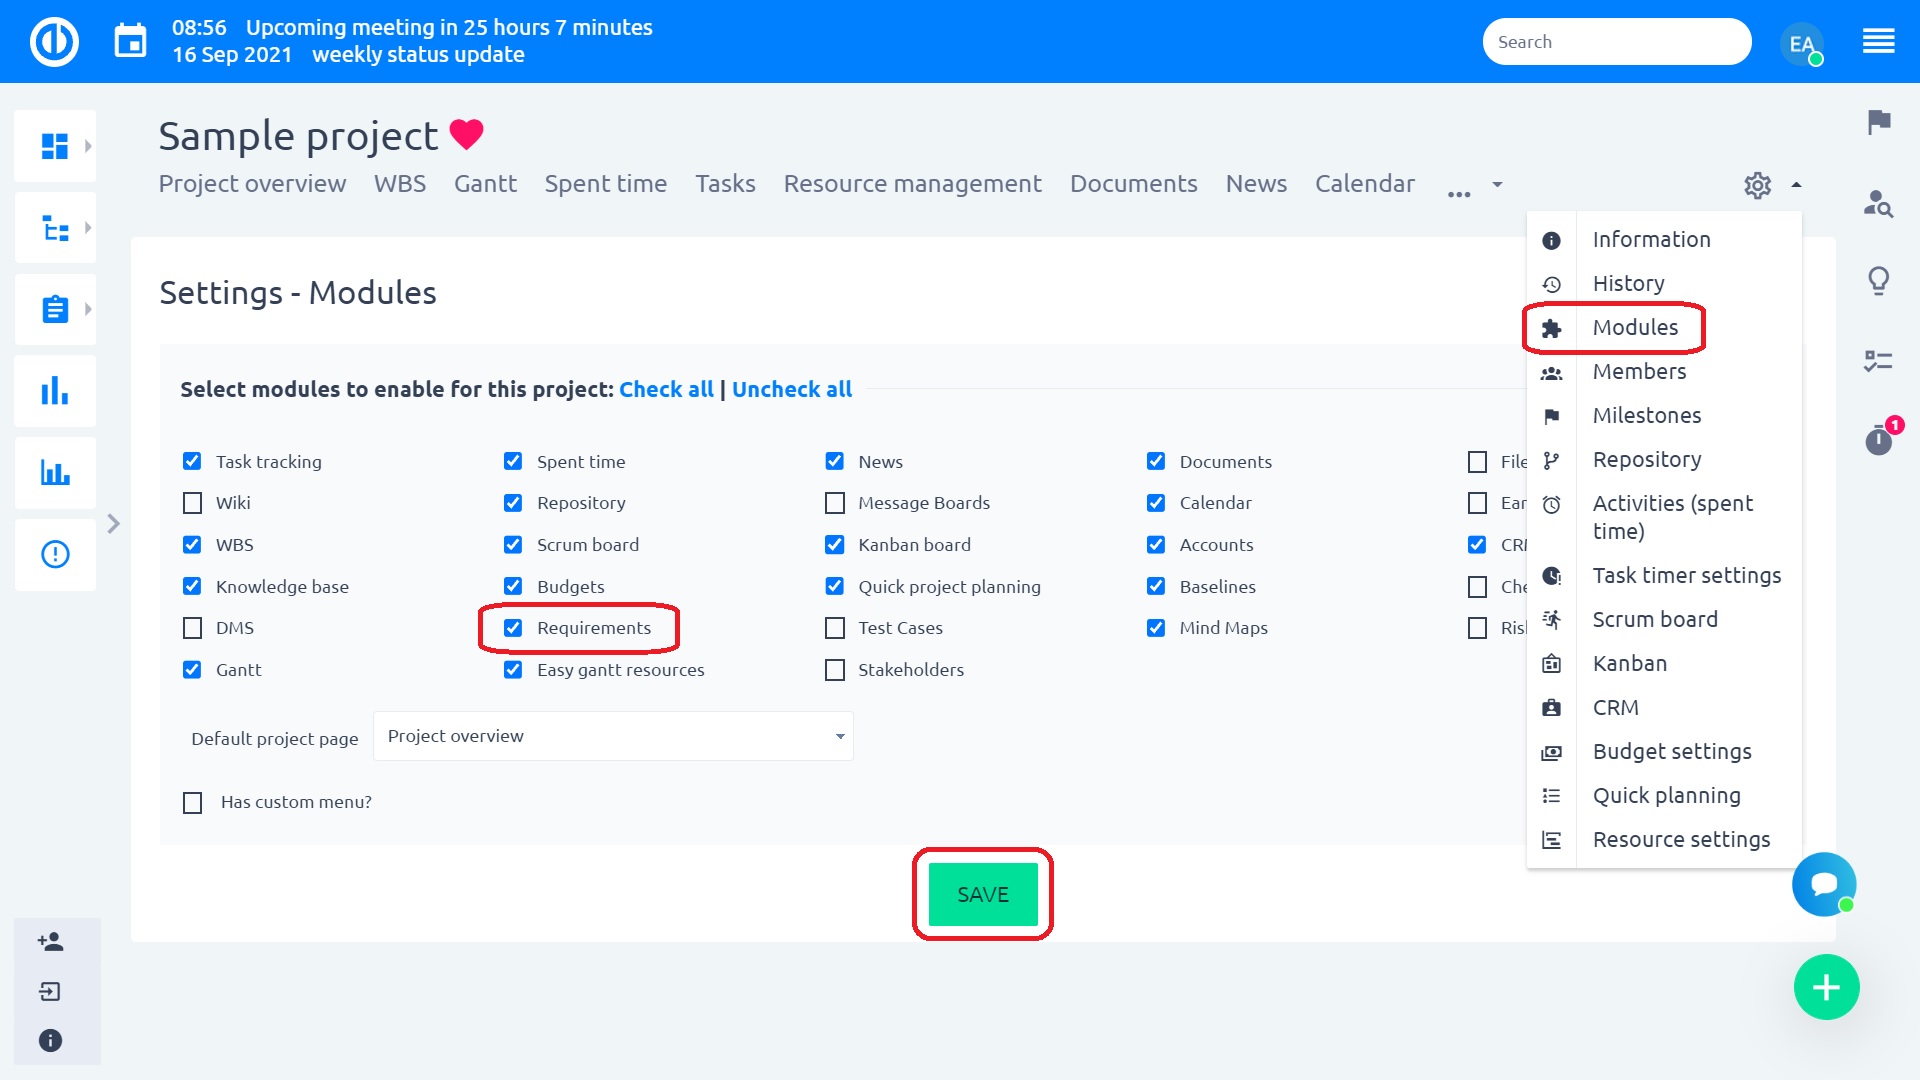
Open the project modules' settings (Project » Modules) on those projects when you need to work with this feature and enable the Requirements module by ticking the respective checkbox in the list of modules. Right after saving, the Requirements tab appears in the project's header menu. Just click on it to open the Requirements feature.
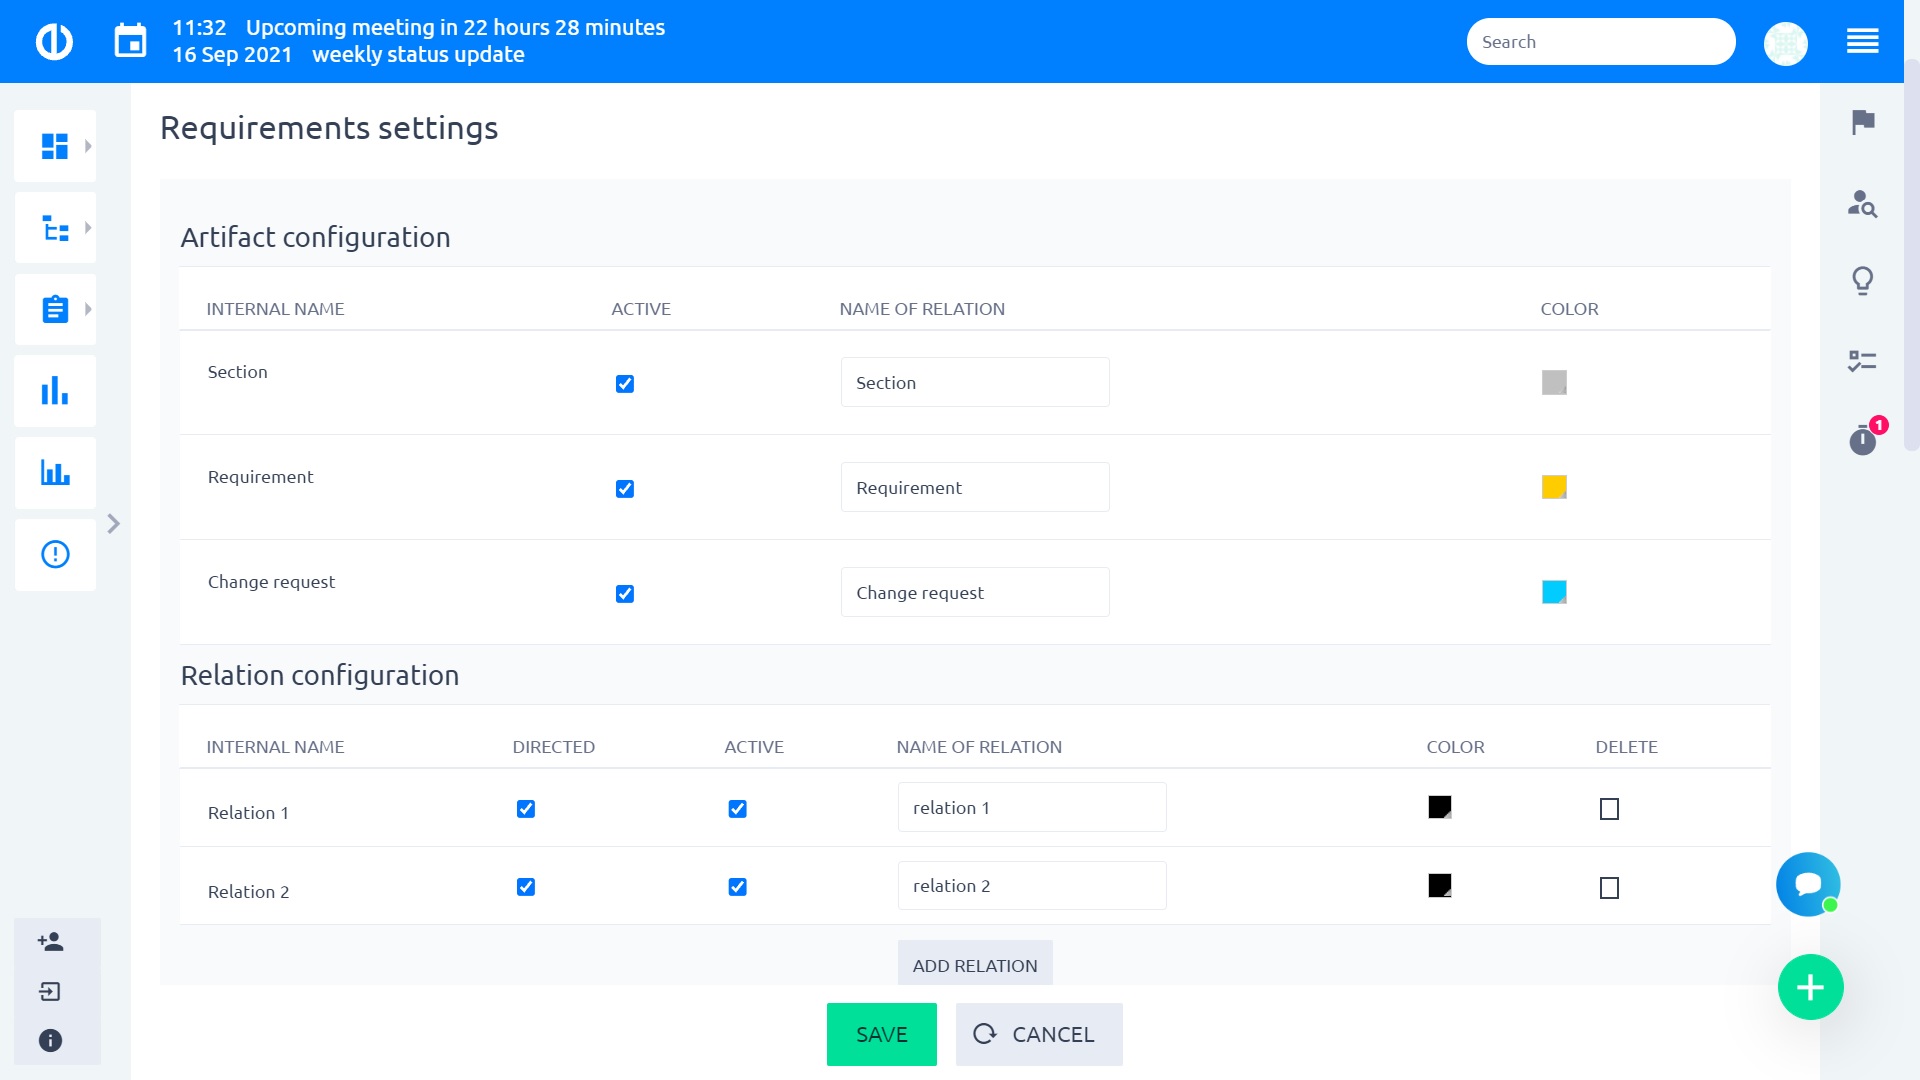
Now you have to set it up. First, set the names for your Artifacts. By default, there are: Section, Requirement, and Change request. Here you can also deactivate specific artifacts, which you will not need to use. On the right side, you can assign a color to each artifact. Then configure relations. By default, there are parent-child (which allows you to build requirement tree), dependency, conflict. You can add more relations if needed.
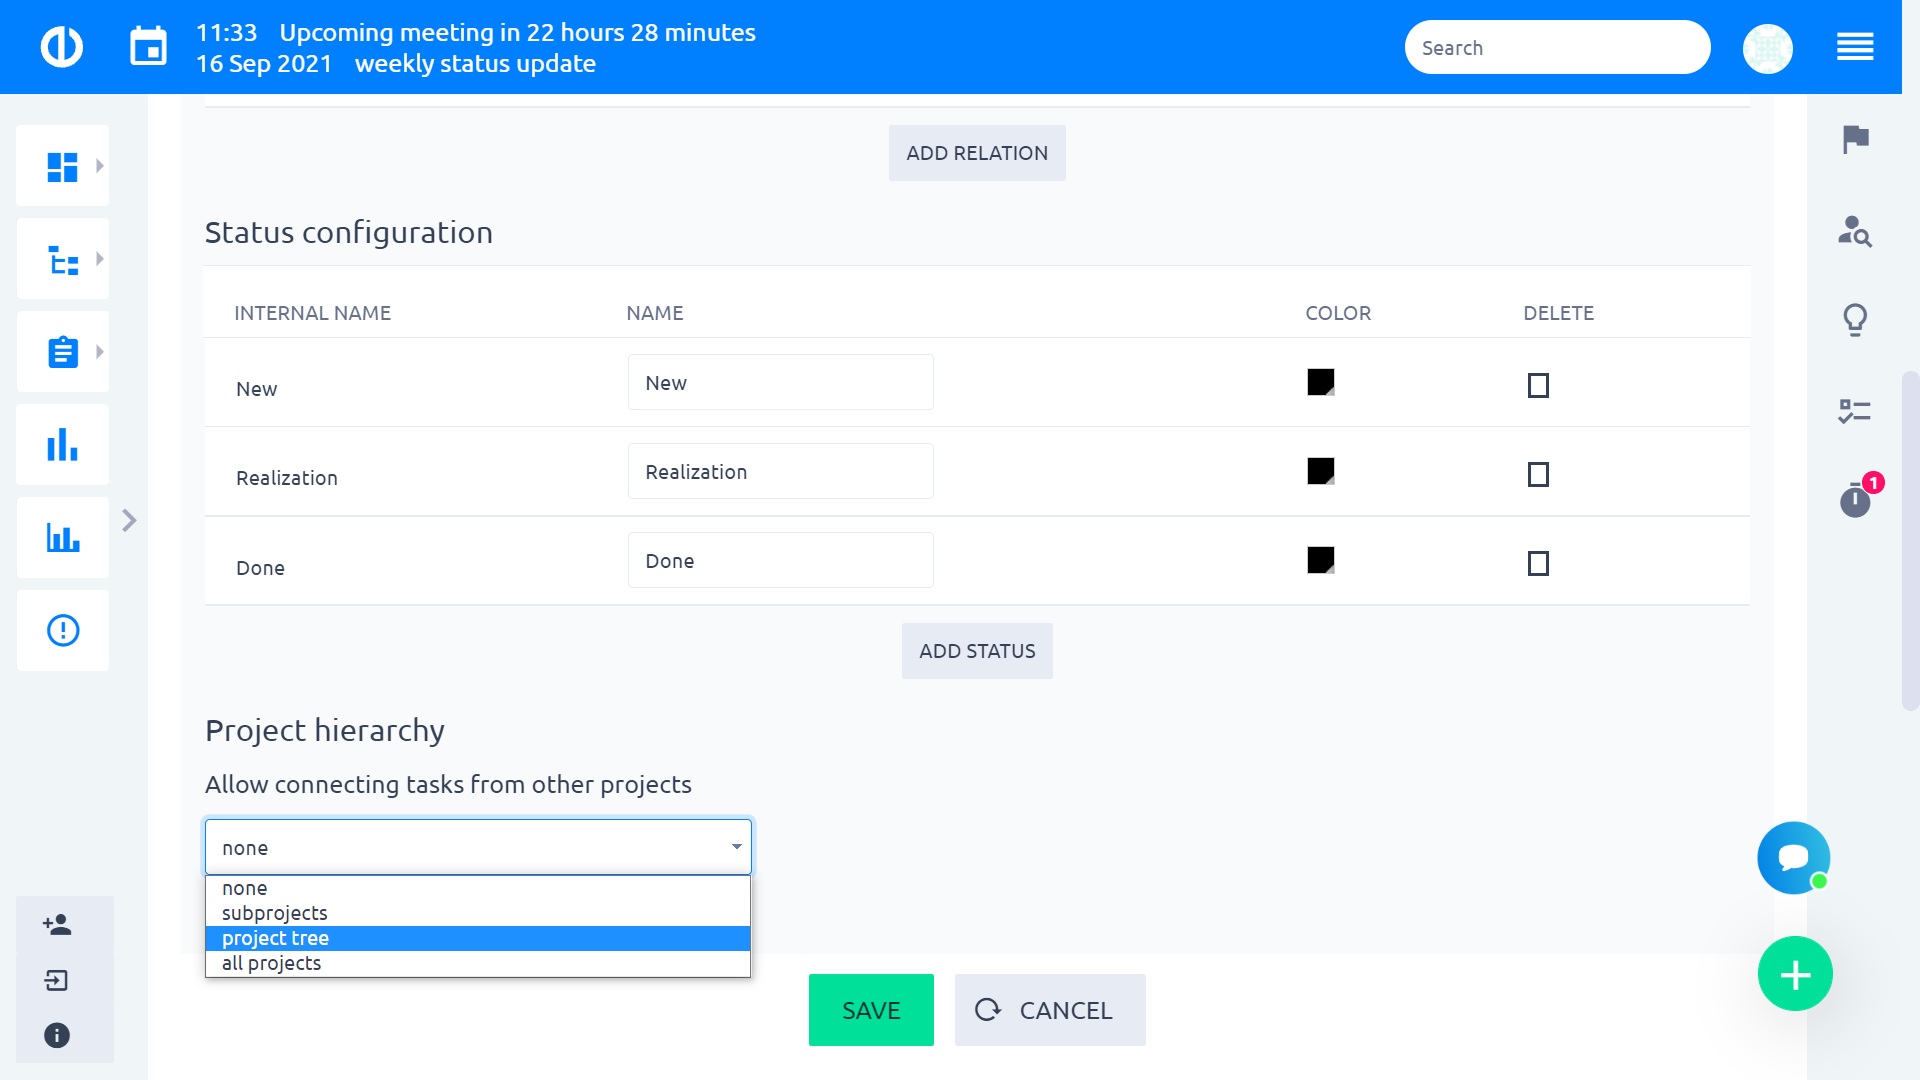
Also, create statuses for your artifacts, for example: New, Realization, Done. Decide if you want to allow connecting tasks from other projects. Save and you are ready to go.
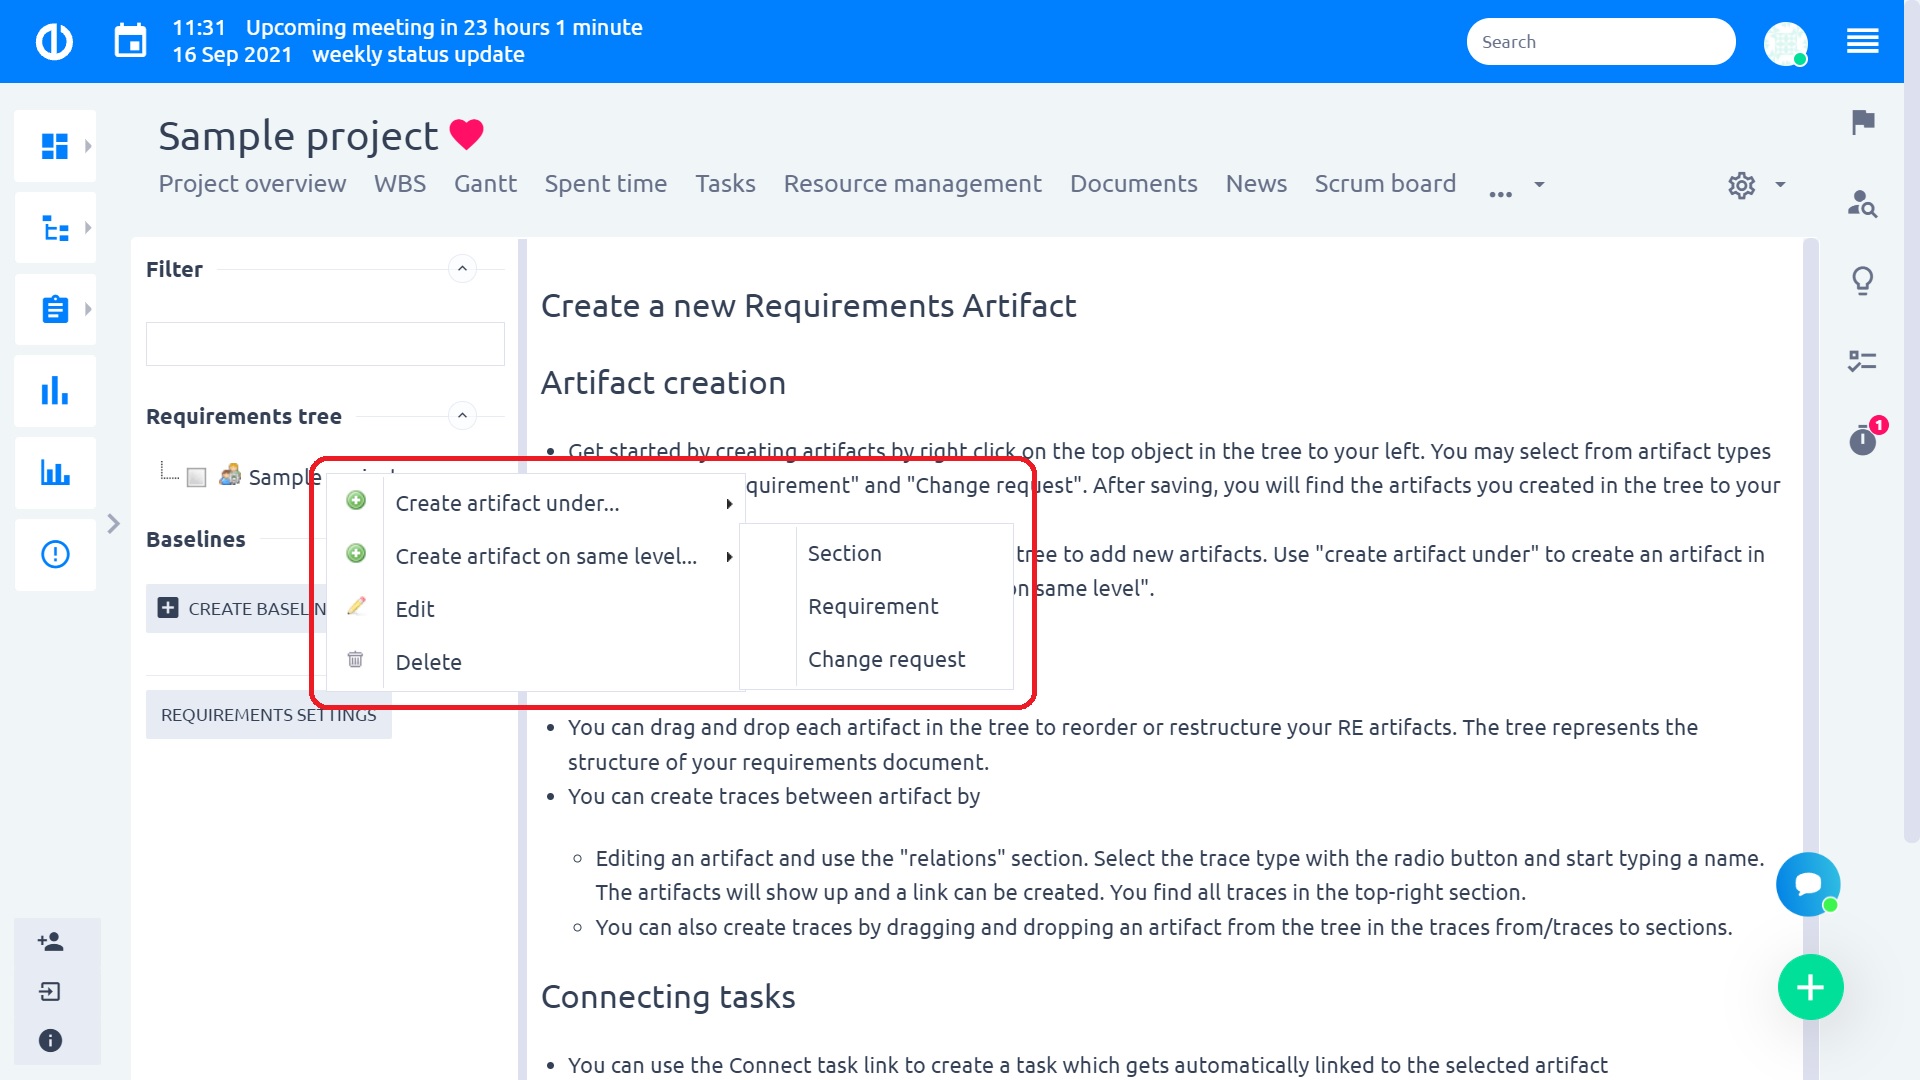
Get started by creating artifacts by right click on the top object in the tree to your left. You may select from artifact types like "Section", "Requirement", and "Change request". After saving, you will find the artifacts you created in the tree to your left. You can also right-click on any artifact on the tree to add new artifacts. Use "create artifact under" to create an artifact in the next level of the tree or "create artifact on the same level".
You can drag and drop each artifact in the tree to reorder or restructure your RE artifacts. The tree represents the structure of your requirements document. When creating a new artifact, you will be asked to input the Name, Responsible person, Status (if you decided to use the statuses above), Description. Later, you might add related tasks or create a relation between artifacts.

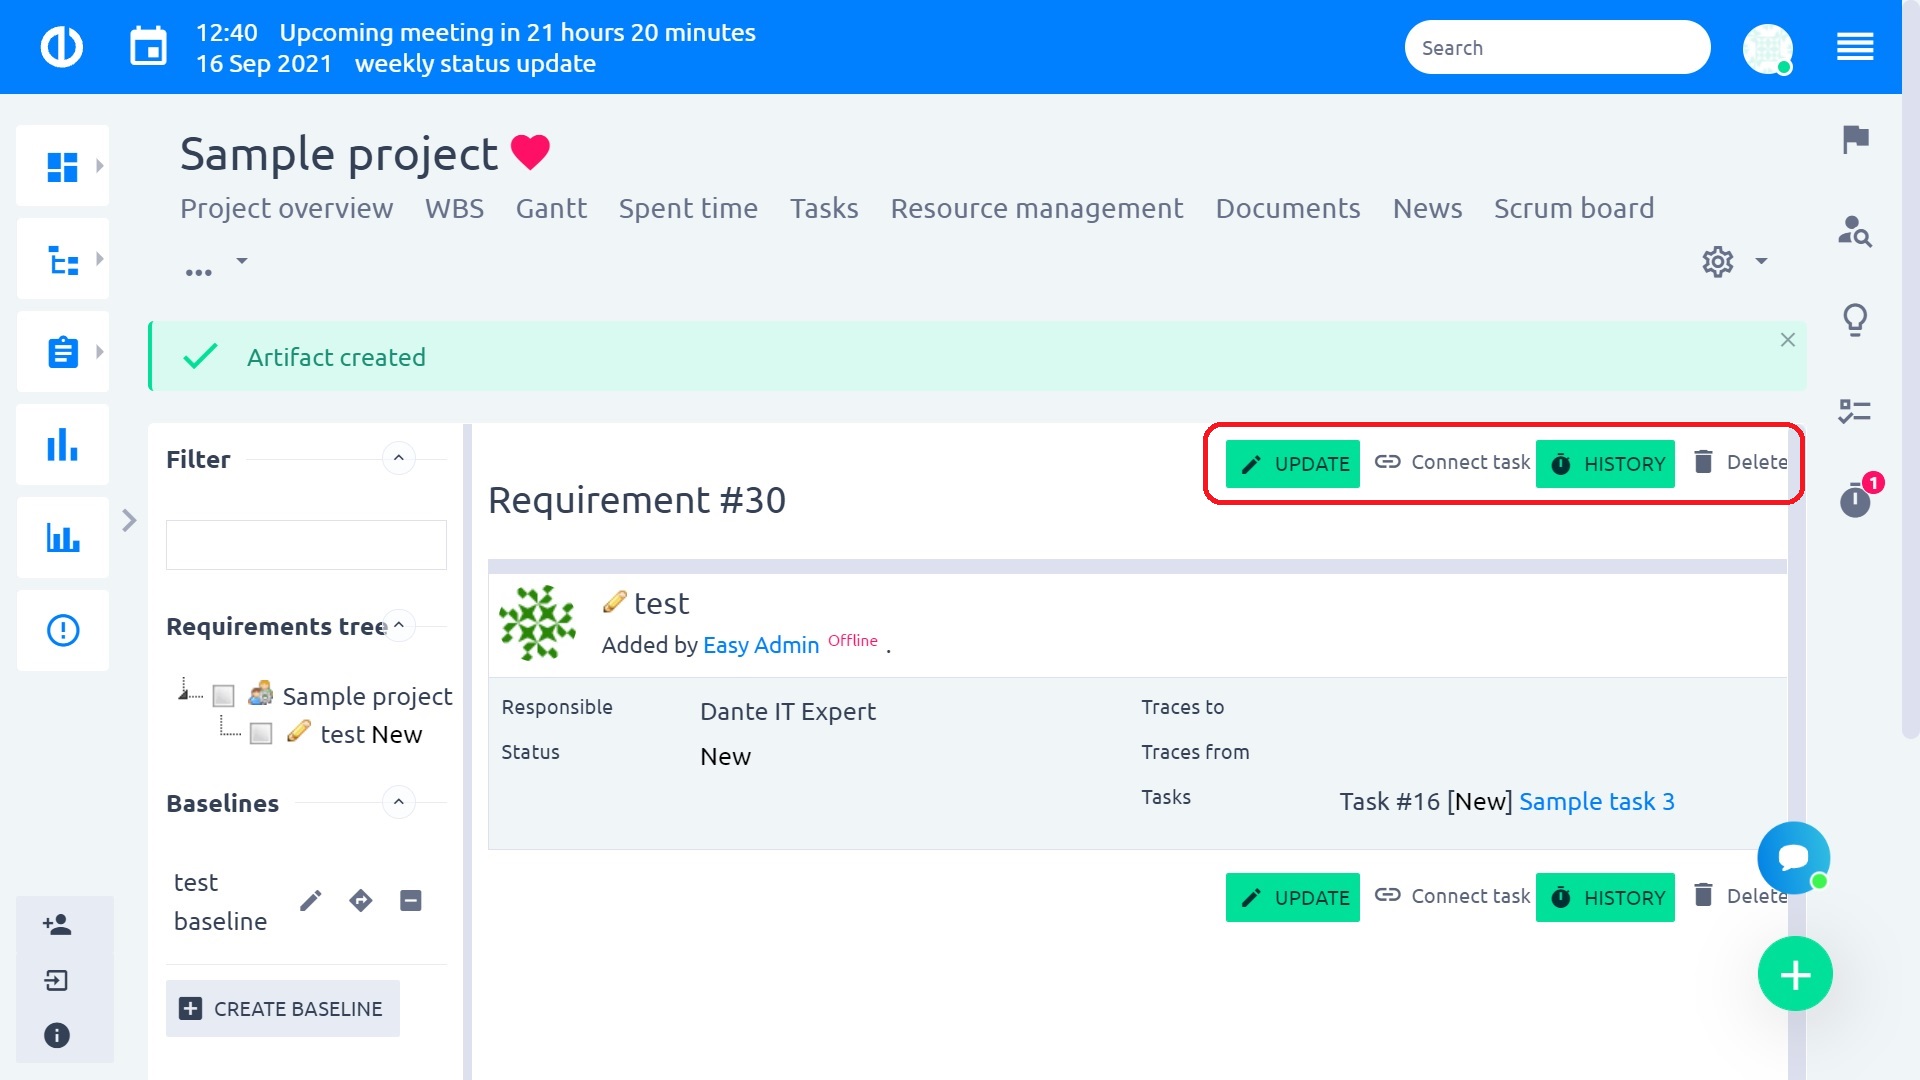
Once you have created an artifact, you can update it, connect a new or existing task to it, view the history of changes related to it, or delete it.
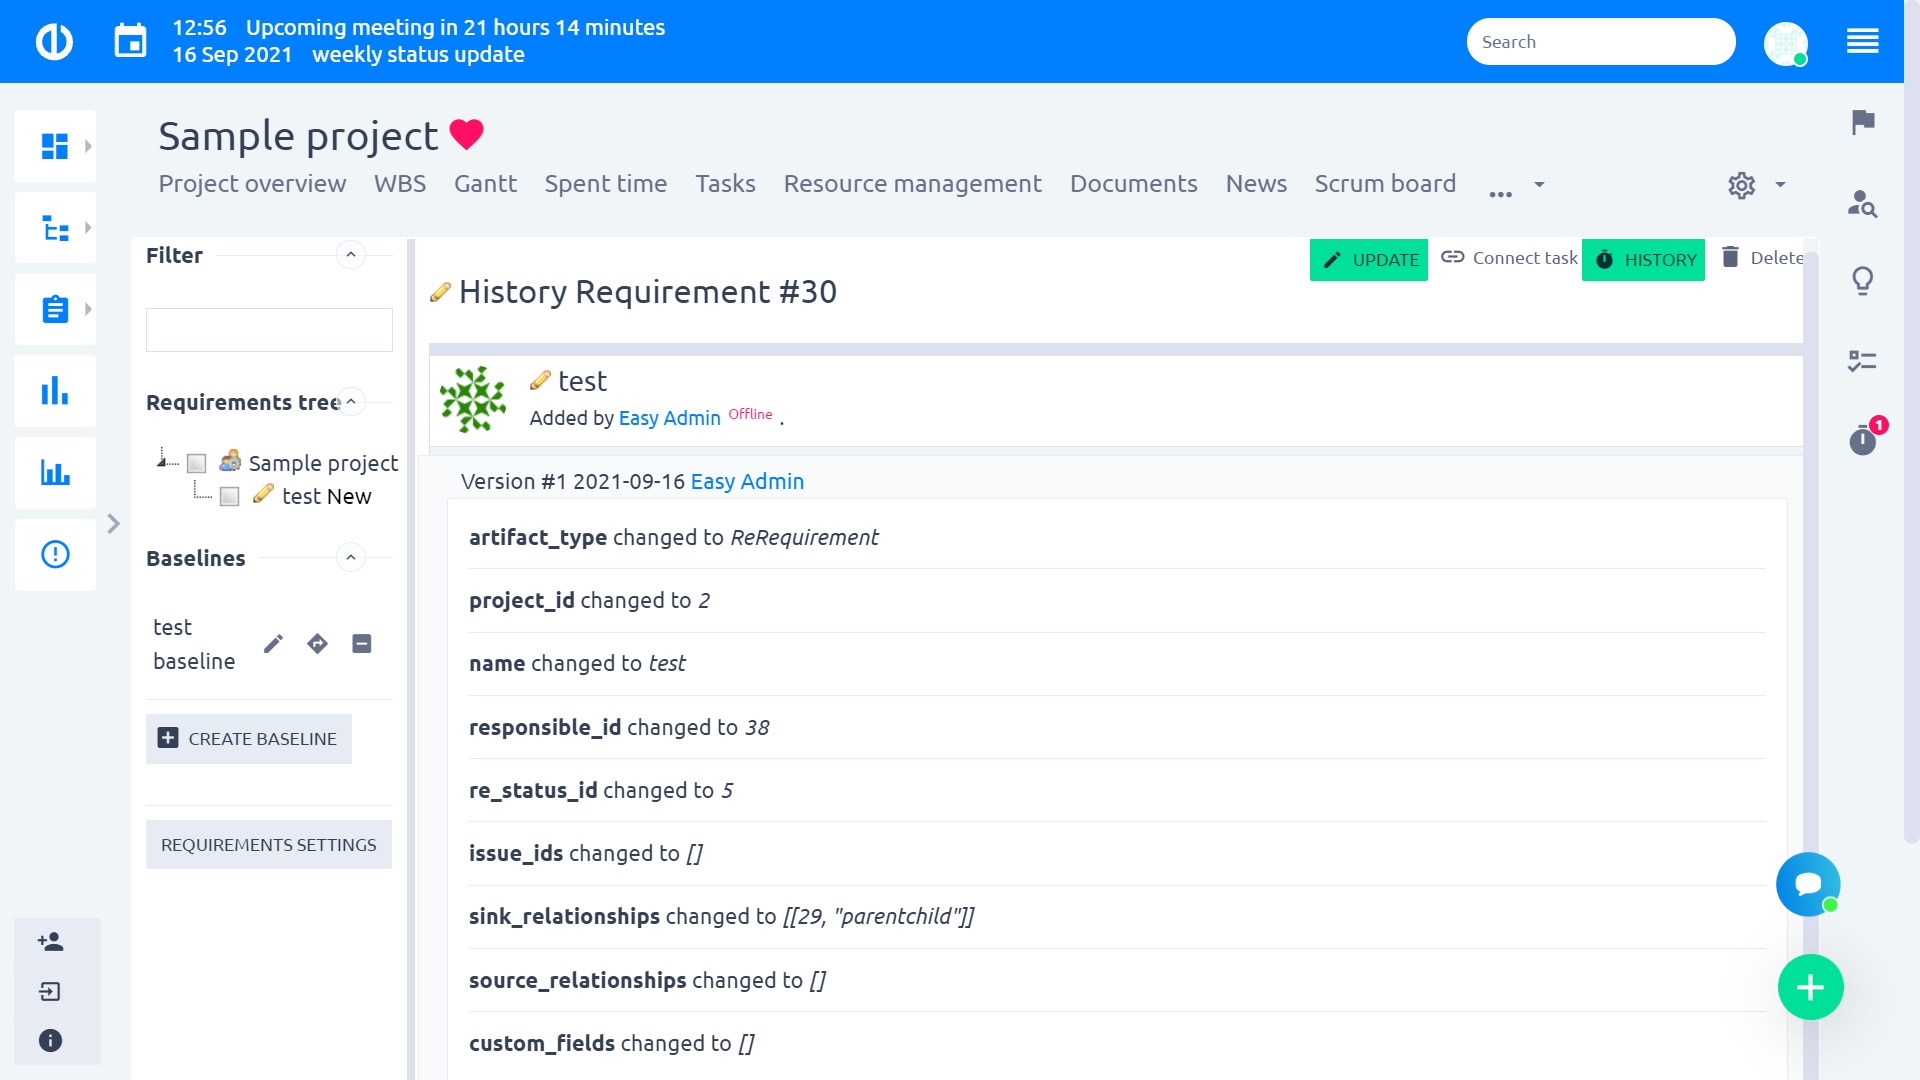
This is how the history of an artifact might look like. It helps you keep track of all the changes that you or somebody else have made on an artifact.
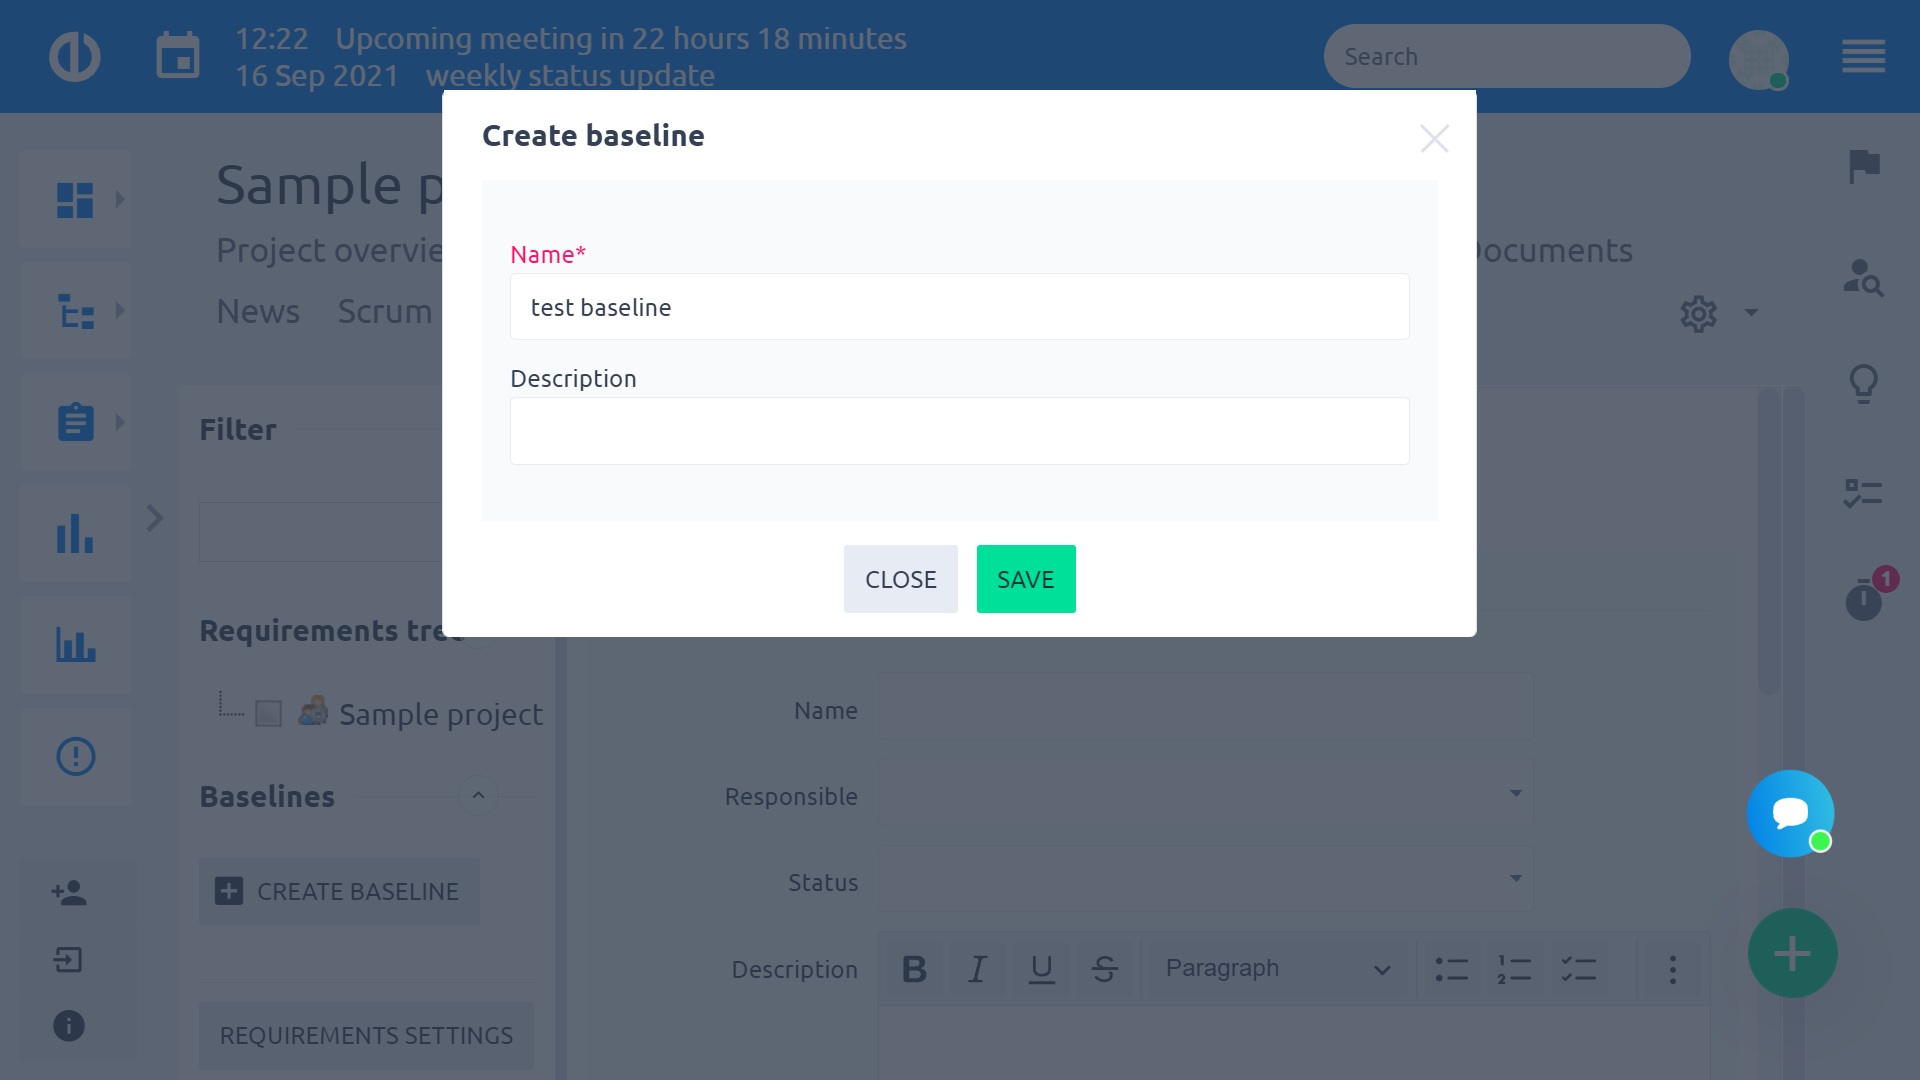
Additionally in the left sidebar, you can filter through your artifacts as well as create a baseline of your requirement's tree. A baseline is the project's previous version of the requirement's tree, it does not change when the current tree is edited, and you have an option to revert back to that version anytime. It allows you to create more baselines, which thus work as the snapshots of the project requirement's tree. Before start using baselines, you need to have the Baselines module enabled in your project settings (Project » Modules). That's it, now you have the basics to start working with Requirements. Also please check corner situations.
Types of artifacts
Artifact is the main entity used in requirements management, just like a task is the main entity for managing work in the project. There are 3 types of artifacts: Section, Requirement, and Change request. Let us explain what is the background of these:
- Section – Sections are good to structure your requirements into meaningful groups (sections). Sections help to give you a better overview and context of your requirements.
- Requirement – This is the most important artifact, as it gave the name to the whole plugin. You can obtain requirements from your stakeholders, from technical specifications, etc. Usually, they are derived from user scenarios.
- Change request – Request for adjustment of what was approved earlier. Bear in mind that a change request could alter the scope, budget, resourcing, and timeline of your project.
Let's also mention some other terms that you find see within the plugin:
- Task – link the tasks to the requirements so have full traceability
- Responsible – a person responsible for the Artifact
- Acceptance criteria – what it takes to fulfill the requirement
- Description – field for any comments or link you might need
Relations between artifacts
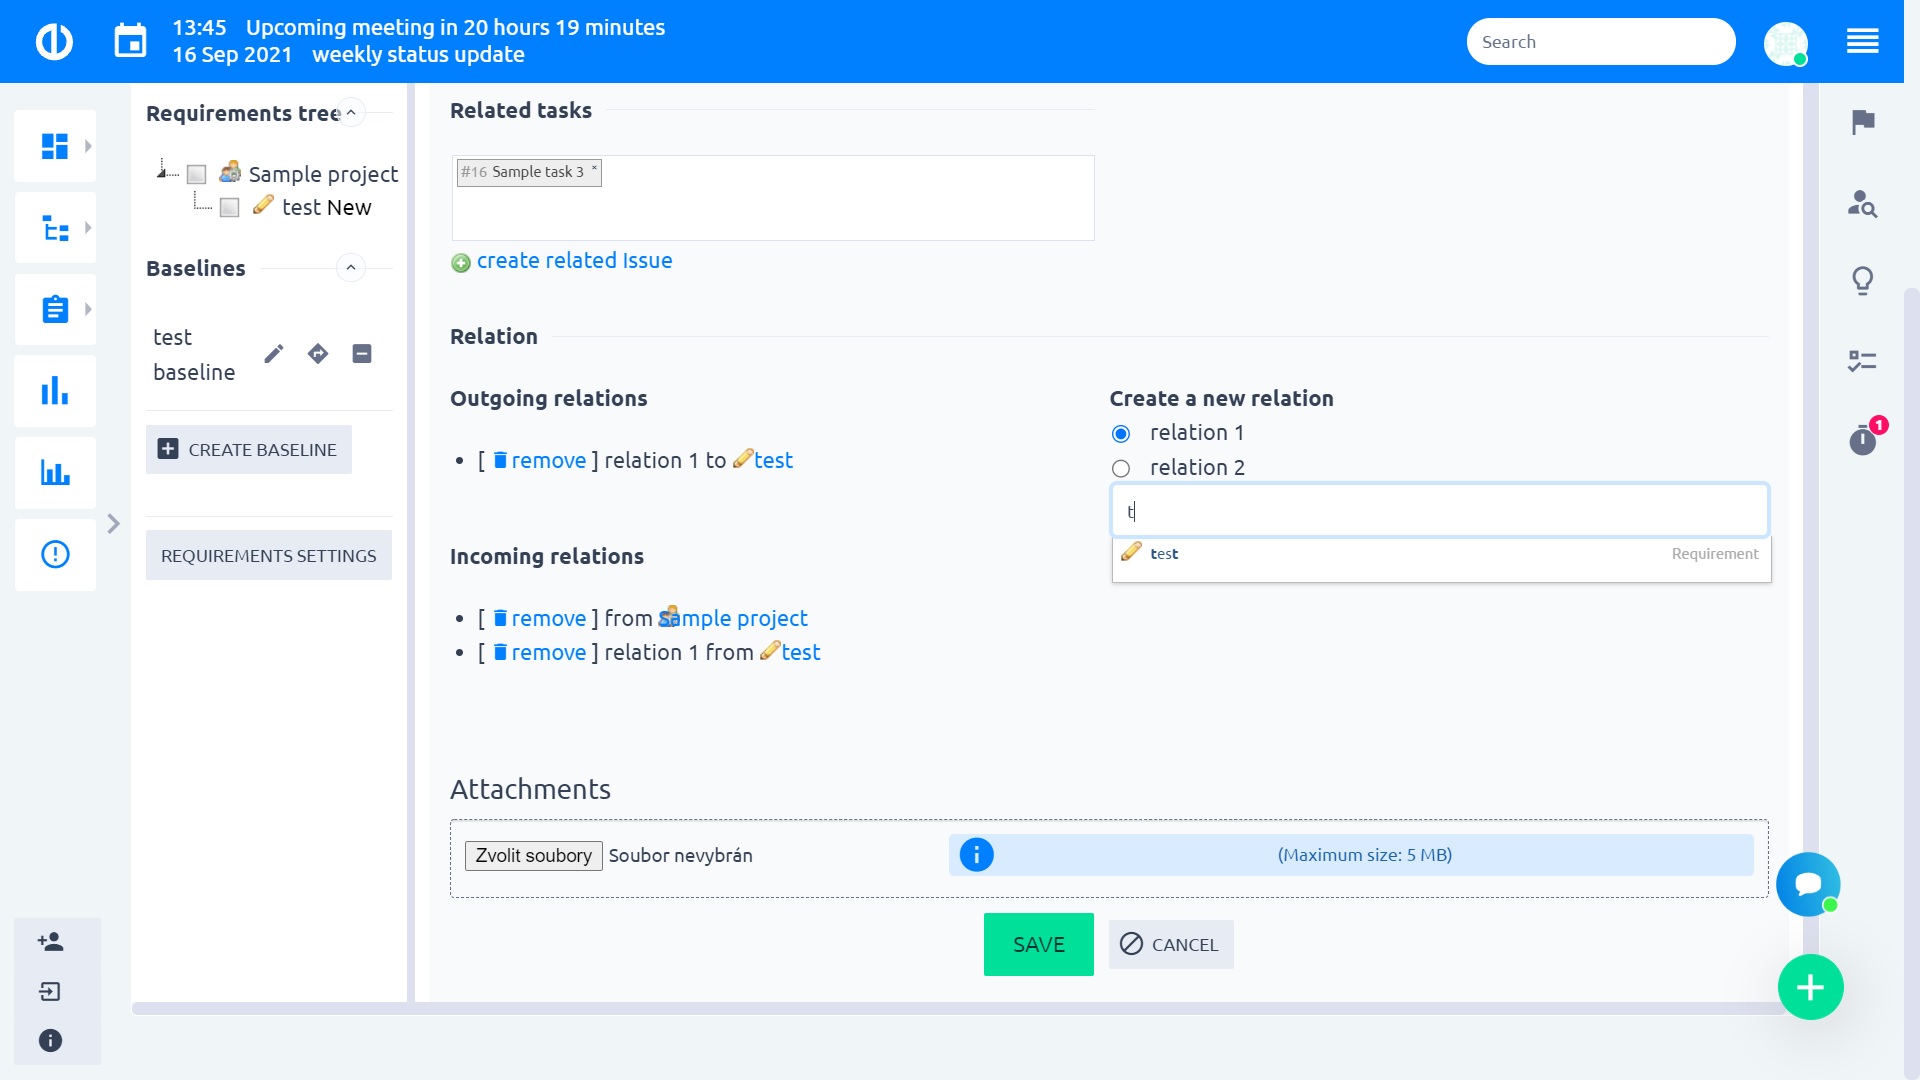
Remember configuring relations? This is where we will use them. To create a related artifact, go to any artifact and click on "Update". At the bottom of the page, you will see “Create a new relation”. Select one type of relation, choose the related artifact, and the two 2 artifacts will be connected to each other. Creating a “parent-child” relation can also be made by structuring artifacts in the tree.
To add a related task, click on the input field “Related task” and start searching among existing tasks. If you do not have your task yet, use the “Create related Issue” button. The related task will be visible on the Artifact page. You can also start at Task. Go to Task update, there you will see the “Add related artifacts” selector. You cannot create a new artifact straight from here. On the other hand, you can link more than one Artifact.
You can create any of those connections both ways (such as from artifact to task, or from task to artifact). Therefore, they are automatically listed as incoming relations or outgoing relations.
In addition to that, you can add file attachments to artifacts by uploading the required files from your computer using the section below.
Import and export of artifacts
If you are interested in artifact import and/or export, you might do so on the Settings page. To get there, just click the Requirements Settings button in the left sidebar. Import and/or export is only possible in .xls or .xlsx formats. Supported data fields (columns) for import and/or export artifacts are as follows.

Few examples of data format for artifact import and/or export can be seen below.


Corner situations
- For the “Revert to baseline” button behavior with attachments – if you delete the requirement, and you use the baseline feature to return to the past, note that you will lose your attachments as they were deleted from the database. If you only use the baseline feature to go to the past, and then return to the present, your attachments will remain.
- For the “Revert to baseline” button behavior with related tasks – if you delete the requirement with a related task, and you use the baseline feature to return to the past, your related task relation will remain. Same case if you use the baseline feature to go to the past and then return to the present.

