


Release notes for version: 08.00
Please read before upgrading to platform version 08.
Underlining Redmine version: 4.0.4
Recommended Ruby version: 2.6
<<Warning about possible issues here>>
Quick task editor (new pop up)
+ removed sidebar in WBS
One of the most noticable changes coming with the release of platform version 08. In Scheduler (click on task), Meeting calendar (click on task or other items in the calendar), WBS (click on edit button) and Agile board (click anywhere on task card) and task list (via special edit button), there is a new pop up form for task editing.
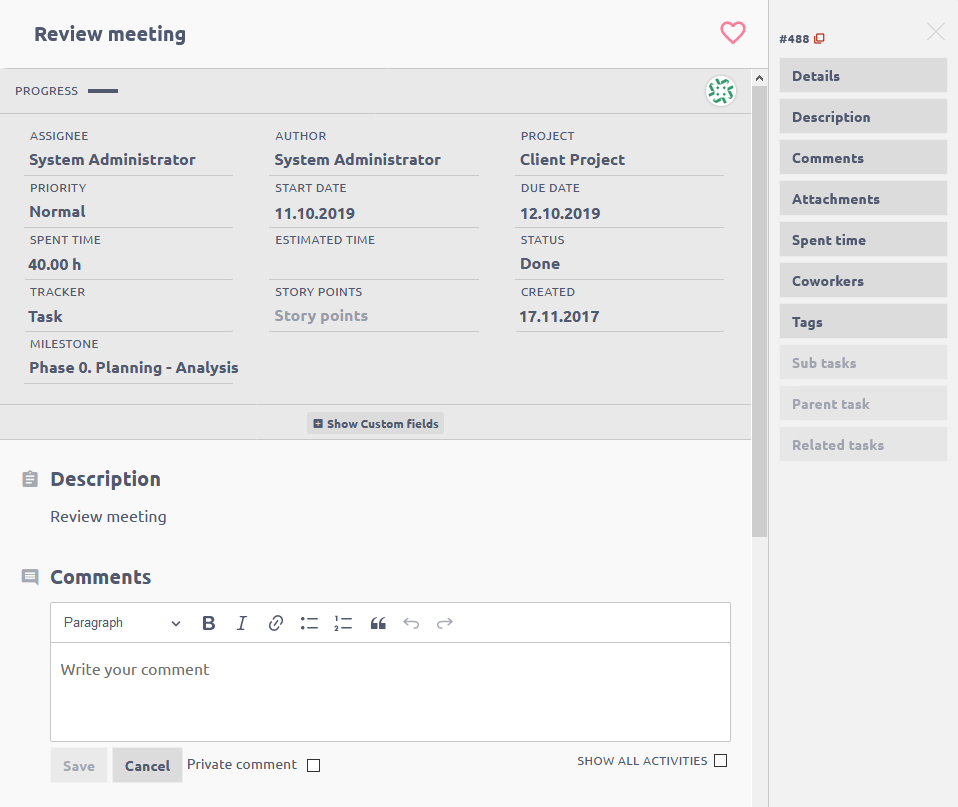
This window contains all task information, history, time entries, attachments and others. The window is completely interactive - task attributes are editable (based on your permissions and workflow), you can add comments, log time, add related tasks, manage coworkers, upload attachments. The changes of task attributes are saved immediately.
The feature represents a revolution in application usability, quickness of navigation (no need to access different pages) and mobile versatility (much more compact and touch-friendly view).
How to open in WBS
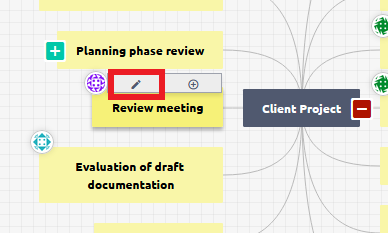
WBS sidebar, that previously contained task details, has been completely replaced by this feature => sidebar on WBS will disappear.
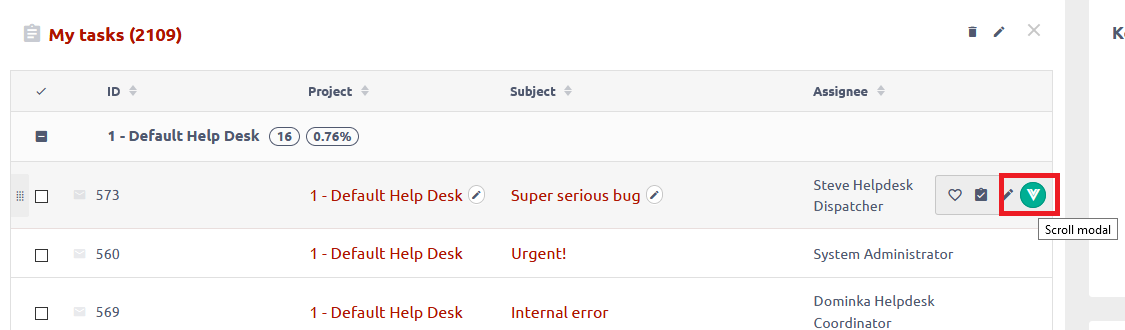
How to open in task list
Resource managment - autobalancer
One-click balancing of allocated hours in Resource management. You will find it in the Tools menu.
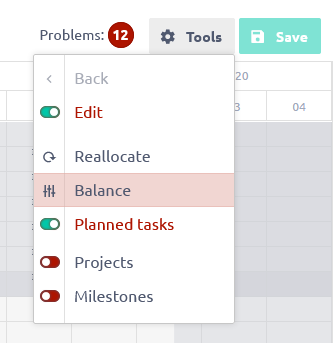
The Balance feature can be found in the Tools menu of Resource Management, both on the global and the project levels. By clicking on it, all allocated hours of all displayed user-assigned tasks (i.e. those expanded/visible on the timeline, not those hidden/collapsed) will automatically redistribute throughout the entire task's duration (start date - due date) based on the user's free capacity, taking into account his daily working hours, vacations as well as other task allocations.
A little difference between the global and the project levels is that the project-level balancing only works with tasks belonging to that particular project, ignoring any possibly visible tasks from different projects, and that the balancing process is always applied to all the tasks from this particular project, regardless of whether they are expanded or collapsed.
This automatic balancing process is based on the allocator type called Future evenly = hours are allocated evenly throughout duration of a task, starting from today onwards. Only the last day of the task duration is never (auto)balanced because any remaining hours that could not be allocated into previous days are all moved into this last day. Likewise, when two or more tasks overlap, their allocated hours from the days of overlap are all moved to the last days of that particular tasks and must be allocated manually.
After the balancing is finished, any newly created vacations are not taken into account anymore, however, the process can be repeated to take them into account too. If you need to restore an original state of an unsaved reallocation (i.e. you did not click the Save button after the balancing process was finished), you can do it simply by refreshing the page (using F5 key). Do not use the Back button to cancel an unsaved Balance reallocation because it does not work well for this purpose. An already saved Balance reallocation can be taken back just manually by the user.
The balancing process is always executed in order of tasks' priorities - if the Priority column is displayed on the left side of Resource Management, tasks with a higher priority are balanced first (before tasks with lower priority). If the Priority column is not displayed, then tasks are balanced according to their order in the left-side list. Reservations are excluded from balancing.
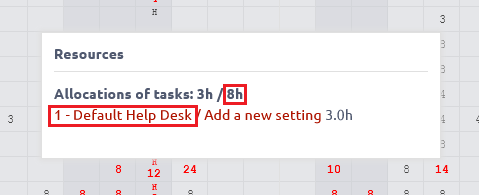
Resource management - tool tip expanded
Info window after clicking on the total hours allocated to a user has been added capacity information and project of each listed task.
New chart - time series
One chart - unlimited timeseries.
How to use
- During page customization, find module Timeseries
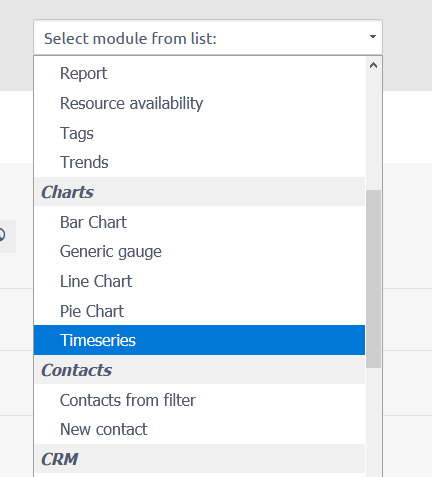
- Choose default period
- Add data series
- Choose entity (the entity must have some date attribute (for example due date in tasks, contract date in CRM cases)
- Select which date attributed will be used
- Select which value will be on the chart. You can select number of the entities, but also sum or average of a numeric attribute of the entity.
- Set filters for the entity
Example
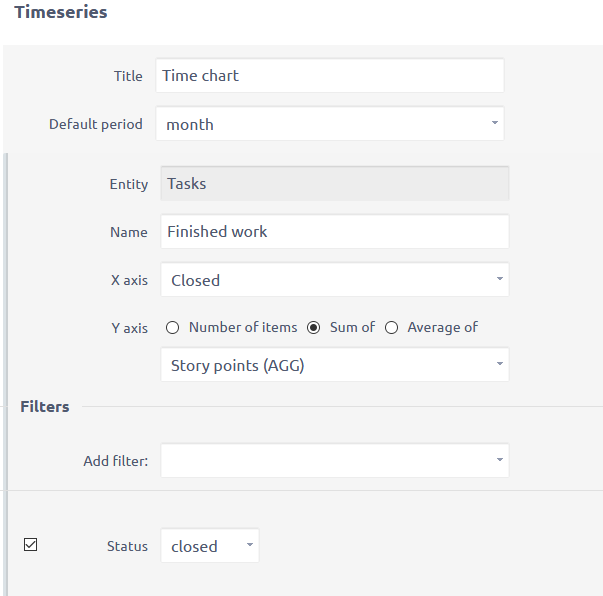
The best thing is you can view any number of various entities in one chart. For example a total performance chart, containing sum of story points on closed tasks, project incomes by date, number of closed support tickets, amount of billable service hours, total value of billable service hours, etc. Just think of the possibilities.
Filtering with OR operator
A widely requested feature has finally found its way into reality. Please keep in mind that the feature is in an experimental mode, and was tested for relatively simple use cases. The user interface is advanced and currently allows invalid inputs, which may be mistaken for misfunction.
How to use
- Go to Adminstration >> Settings >> General - Enable Easy Query Language
- On any list under filters, you will find it as the last item
- In this input, enter the attributes and conditions. You will find a tooltip to better understand the syntax under Show help button. By starting typing the filtering attribute, suggestions will appear.
Result of these filters will show open tasks that are either assigned to me or where I am coworker (my user ID is 5). This is actually the most requested use case we received from the community.
Some rules to remember:
- Users, priorities, statuses and other enumerated attributes use IDs. If you intend to let your regular users to use this feature, you should prepare a reference table for the values and their IDs. You can find the IDs in the database (server solution), or in the URL when editing the attribute.
ID of status Done in this application is 6 - Combining the custom filter with regular filters is possible and works standardly - with AND operator. Meaning, that my custom filter acts as one condition next to all other filters you choose and resulting items have to comply to all conditions. If used incorrectly, you may set contradictory conditions. For example into the custom filter you will have assignee is my user, and at the same time you will use the regular assignee filter for a different user. This example will logically have no results. My user ID is 5 and Lukas is my colleague. The task cannot be assigned to Lukas and me at the same time.
- The custom filter doesn't contain all the options as regular filters, for example <<me>> filter for users, or open for statuses.
Nevertheless, even with the limitations, we believe this functionality will provide vast expansion of usability and reporting capabilities.
Gantt - fixed delays
In large and complex projects, with many relations between tasks, when working in Easy Gantt, one single move of a task could cause a chain of shifts in the rest of the project.
That may end in various forbidden operations that are reported as errors (tasks moved beyond their milestone, task dates that violate earliest/latest due/start dates based in their relations).
The cause of these situations is that during Gantt edit, the delay in task relations is fixed (delay is the time between end of the first task and start of the second task, e.g. 3 days). The delay will not be allowed to become shorter, therefore, all tasks will be moved forward.
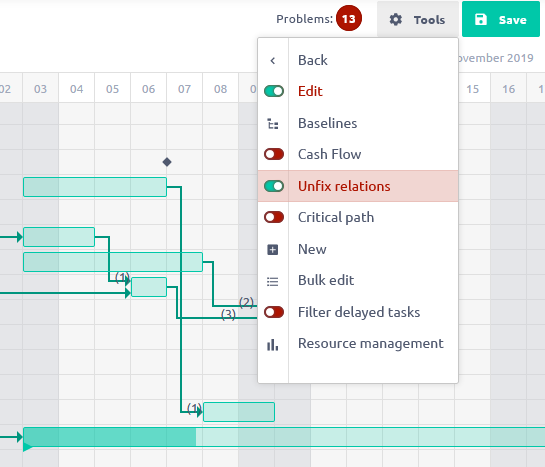
To solve this problem, there is a new option on Gantt called Unfix all relations (under Tools button). By enabeling this option, all relations between tasks will become "flexible" during editing. As a result, moving one task will not cause move of the whole following set of tasks. When saving the change, the relation delays will be saved as new, and will not be validated whether they satisfy previously set fixed delays.
Gantt - task progress by spent time ratio
New option in Gantt settings (More >> Global Gantt >> Settings)

By enabeling this, you will see the spent/estimated time ratio on the task bar in the Gantt.
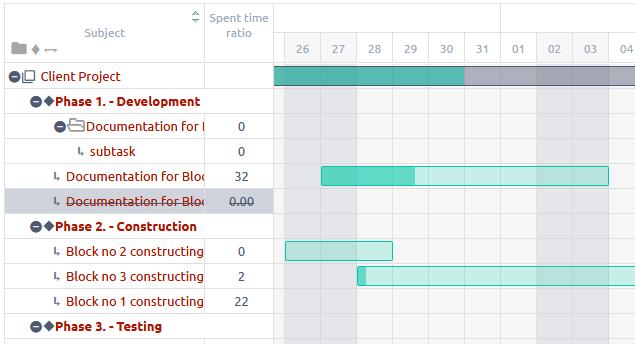
This value can by changed only by logging time or editing estimated time on the task. Therefore, you can't change it directly in Gantt as you can when showing %done.
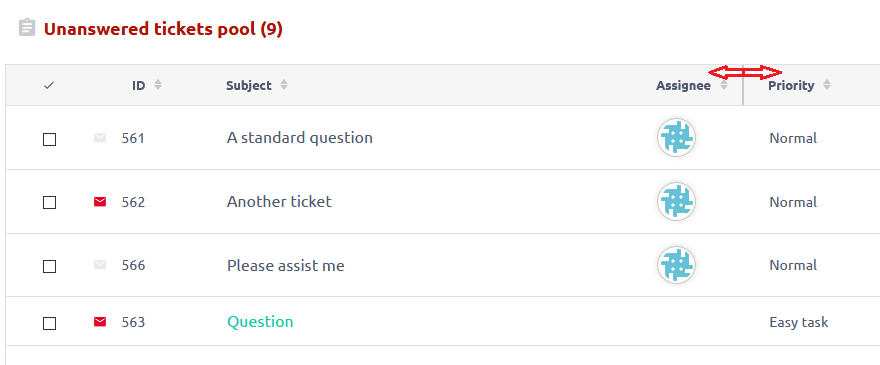
Adujstment of column width
On any list, you can adujst the column width. The width is remembered in local storage of your browser, meaning that your setting will remain until you delete your browser cookies.
Budget - zero vs. blank rate
In budget settings >> hourly rates, it is now possible to enter zero rate, as oposed to leaving the rate empty.
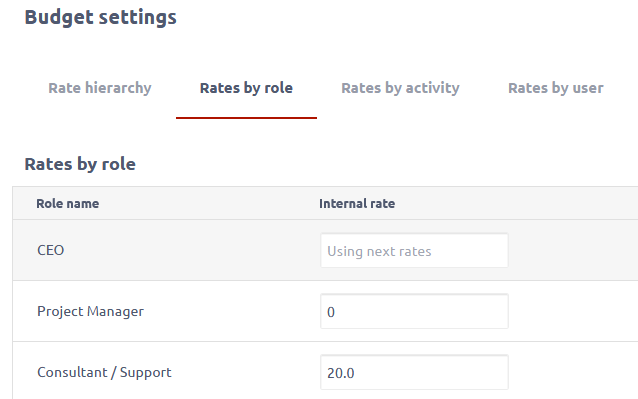
What is the difference?
- Zero rate - when you want to purposely multiply spent time by zero. For example a free service towards your customers.
- Empty - behaviour as before, this item is considered as not evaluated and the next evaluated item based on rate hierarchy is used.
Removed page module - My tasks
On customisation of user home page, you will no longer find the module My tasks in the selection. This was a hardcoded module without any settings, which became obsolete and can be easily substituted by Tasks from filter module.
The module will be kept on all existing pages, it just won't be possible to add it newly.
Creating project - role of the author
Behavior of default role of project author has changed.
Previously
Every user who created a project was given the role based on global setting (Administration >> Settings >> Projects - default role for user who creates a project)
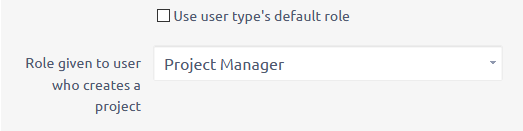
Now
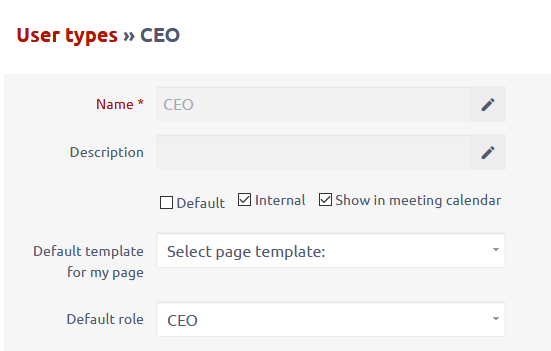
Role of the author of the project is taken primarily from setting of his user type (Administration >> User types - Default role)
If this is not selected, then the global setting is used
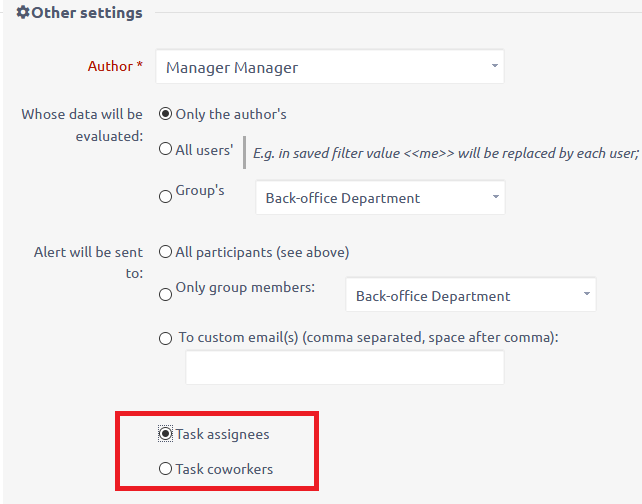
Alerts - new recipient options
Recipients of task-related alerts can be set to assignees or coworkers of the tasks. This way you can set a general alert for all users, but everyone will receive only report of tasks that concern then directly.
Help desk changes
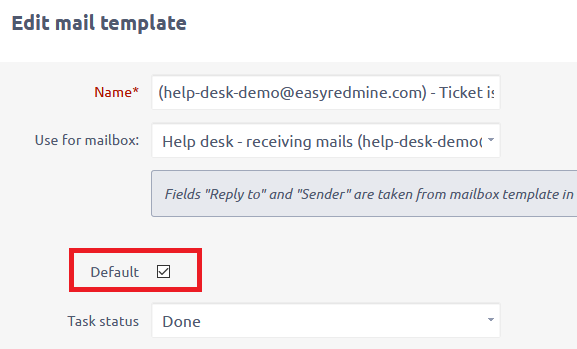
Default email template
It is possible to select a help desk email template as default. Meaning that when you are sending comment to customer, there is a higher chance that a template is preselected (leaving less manual work for the support agent).
The behavior is as follows:
Prerequisites
- one email template can be set as default
- every email template must have a linked mailbox
- you can have more mailboxes in your system
- email template may be (but it is not required) connected to a certain status
Situations
- ticket is created manually (not from email) - template from a is preselected according to status; if not found, default template is preselected
- ticket is created from a different mailbox than the one with which the default email template is used - template with this mailbox is preselected based on the status (same as currently) => no template is automatically preselected if using status for which there is no template assigned
- ticket is created from the mailbox with which the default tempate is used - template is preselected based on the status - if no such template is found, the default template is preselected
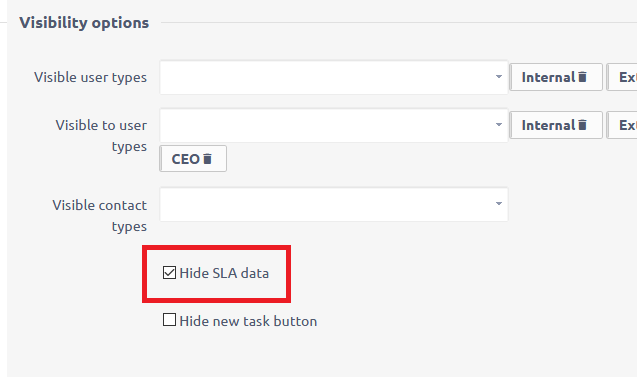
Hide SLA data
Information about SLA response and resolve time on task detail can be hidden for selected user types (Administration >> User types >> Edit).
SLA can also be hidden for specific users (Administration >> Users >> Edit).
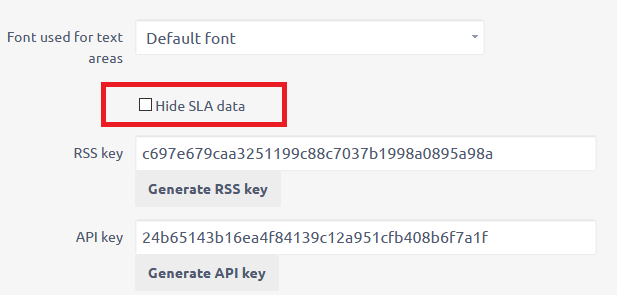
User will not see the SLAs if at least one of the setting concerning their user or user type is enabled.
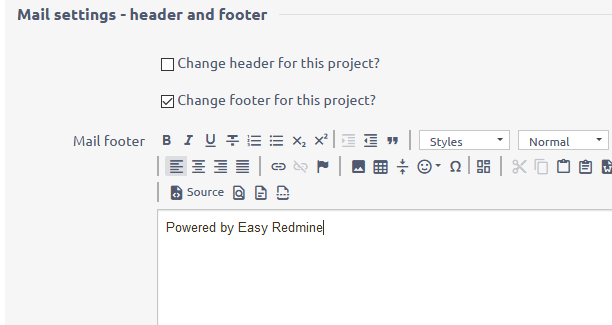
Header and footer of help desk emails
Globally set header and footer of emails notifications (Administration >> Settings >> Email notifications) will no longer be a part of emails sent from help desk.
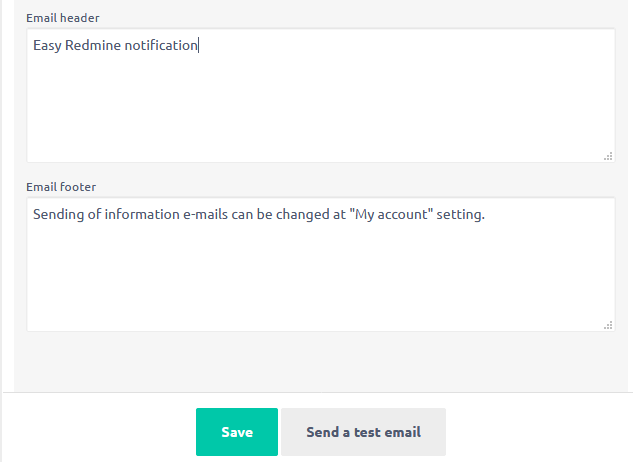
To add header and footer for help desk emails, go to help desk settings of a specific project (Project >> Settings >> Help desk).
Verify database configuration
Upgrading tests uncovered an incompatibility in two configurations that previously cooperated correctly.
Make sure that both database server and config/database.yml have the same (recommended) utf8mb4 set.
1) etc/my.cnf
character_set_server            = utf8mb4
collation_server                = utf8mb4_unicode_ci
2) config/database.yml
production:
  adapter: mysql2
  database: easy
  host: 127.0.0.1
  username: easy
  password: "EASY_STRONG_PASSWORD"
  encoding: utf8mb4
If these are not alligned, you will not be able to use any autocomplete field, e.g. Jump to project, Assignee selection, Filters, etc.
Finally you have to run this command to set all tables encoding correctly.
for TABLE in `mysql -e "use ${DB}; show tables;" --batch --skip-column-names | xargs`; do
echo "Converting ${DB}.${TABLE}"
mysql -e "alter table ${DB}.${TABLE} CONVERT TO character set utf8mb4 collate utf8mb4_unicode_ci;"
done
done
Instead of YOUR_DB_NAME enter name of your database.
Note: Correct database configuration is a general requirement for flawless running any web application. It is not just a specific requirement of this new version of Easy Redmine.
Custom design breaks (no CSS)
In case you had custom branding (logo, colors, background) and after upgrade it broke down - missing all styles, site looks broken, you can fix it simply.
Go to page /easy_theme_desings >> find your design >> recompile >> load again. It will repair the design and load the styles.


