


Dynamic filters
Introduction
Dynamic filters on the task list
Dynamic filters on the project list
Dynamic filters on spent time entries
Dynamic filters as a configurable module on any personalized page
How to set up and control dynamic filters
Async export
Permissions related to filters
Corner situations
Related article:
Introduction
Dynamic filters are a tool that allows you to browse through any amount of data much easier and immediately display the desired results, so you can find your tasks, projects, or logged time much faster than with the standard filters (Filters 1.0). Dynamic filters represent the next generation of filters, which you can create, save, and apply on just specific entities of Easy Redmine, namely the task list, project list, spent time entries, and as a configurable module on any personalized page. This feature can be enabled individualy on each list, or can be enabled globaly.
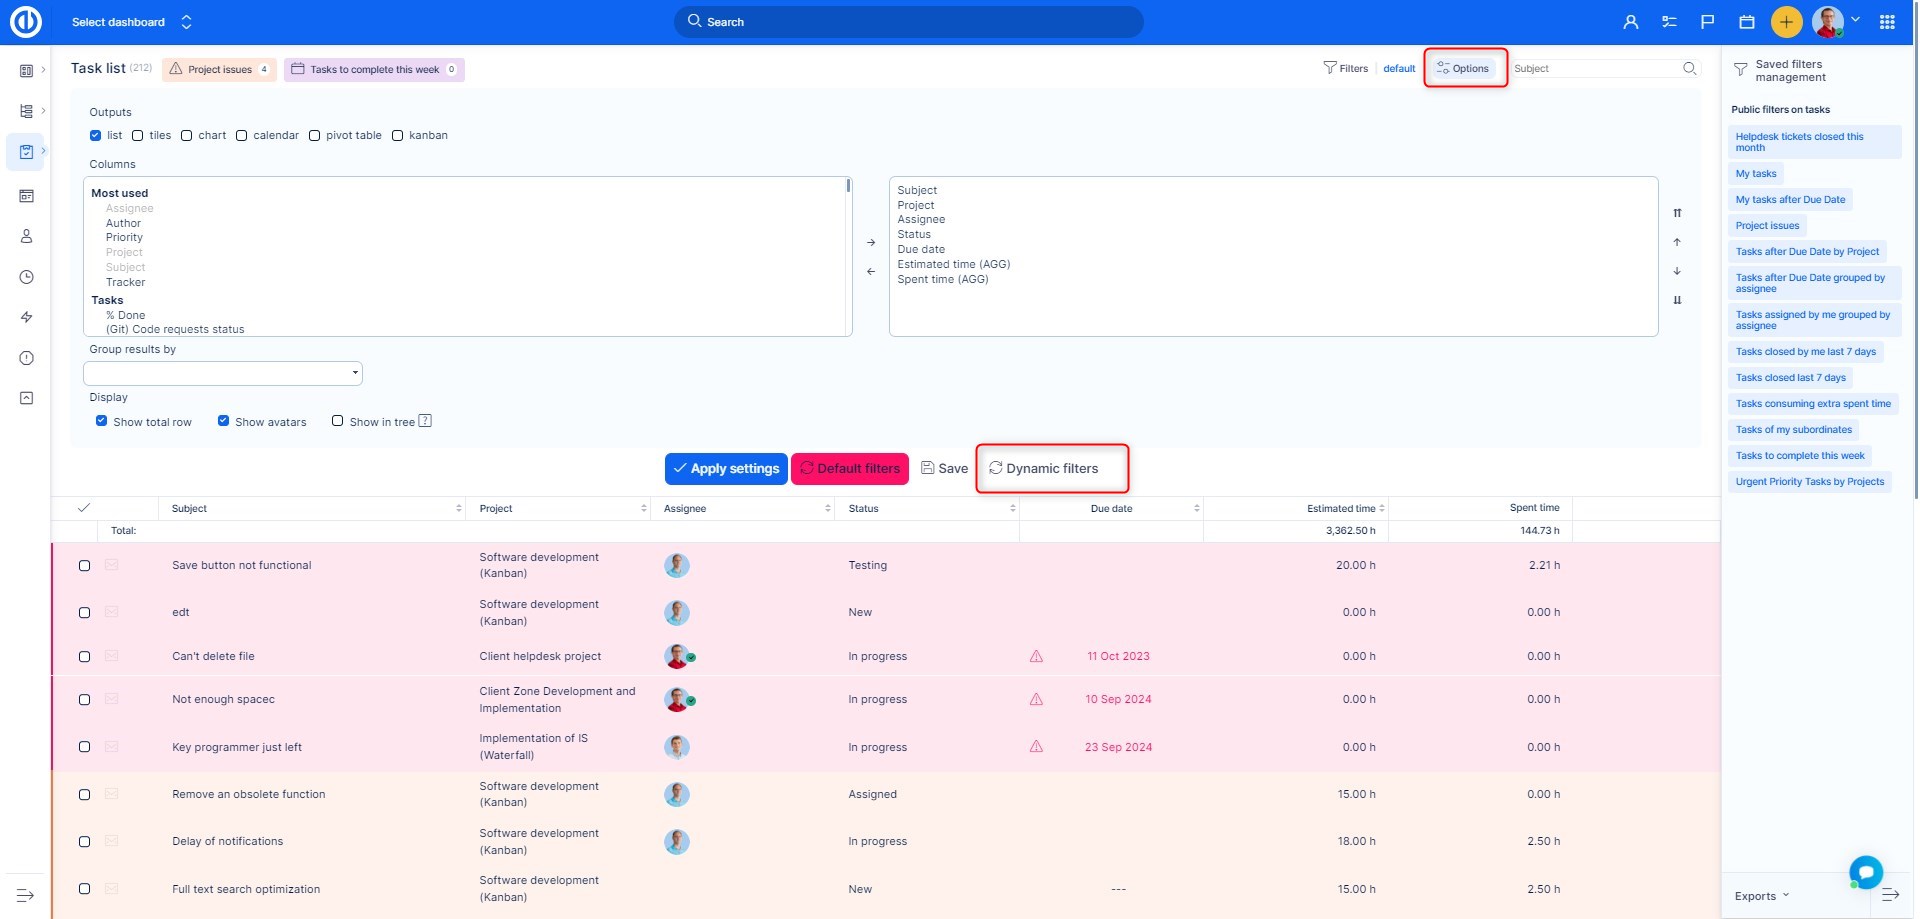
Dynamic filters on the task list
To activate dynamic filters on the task list, open the task list >> "Filters" or "Options" >> "Dynamic filters".
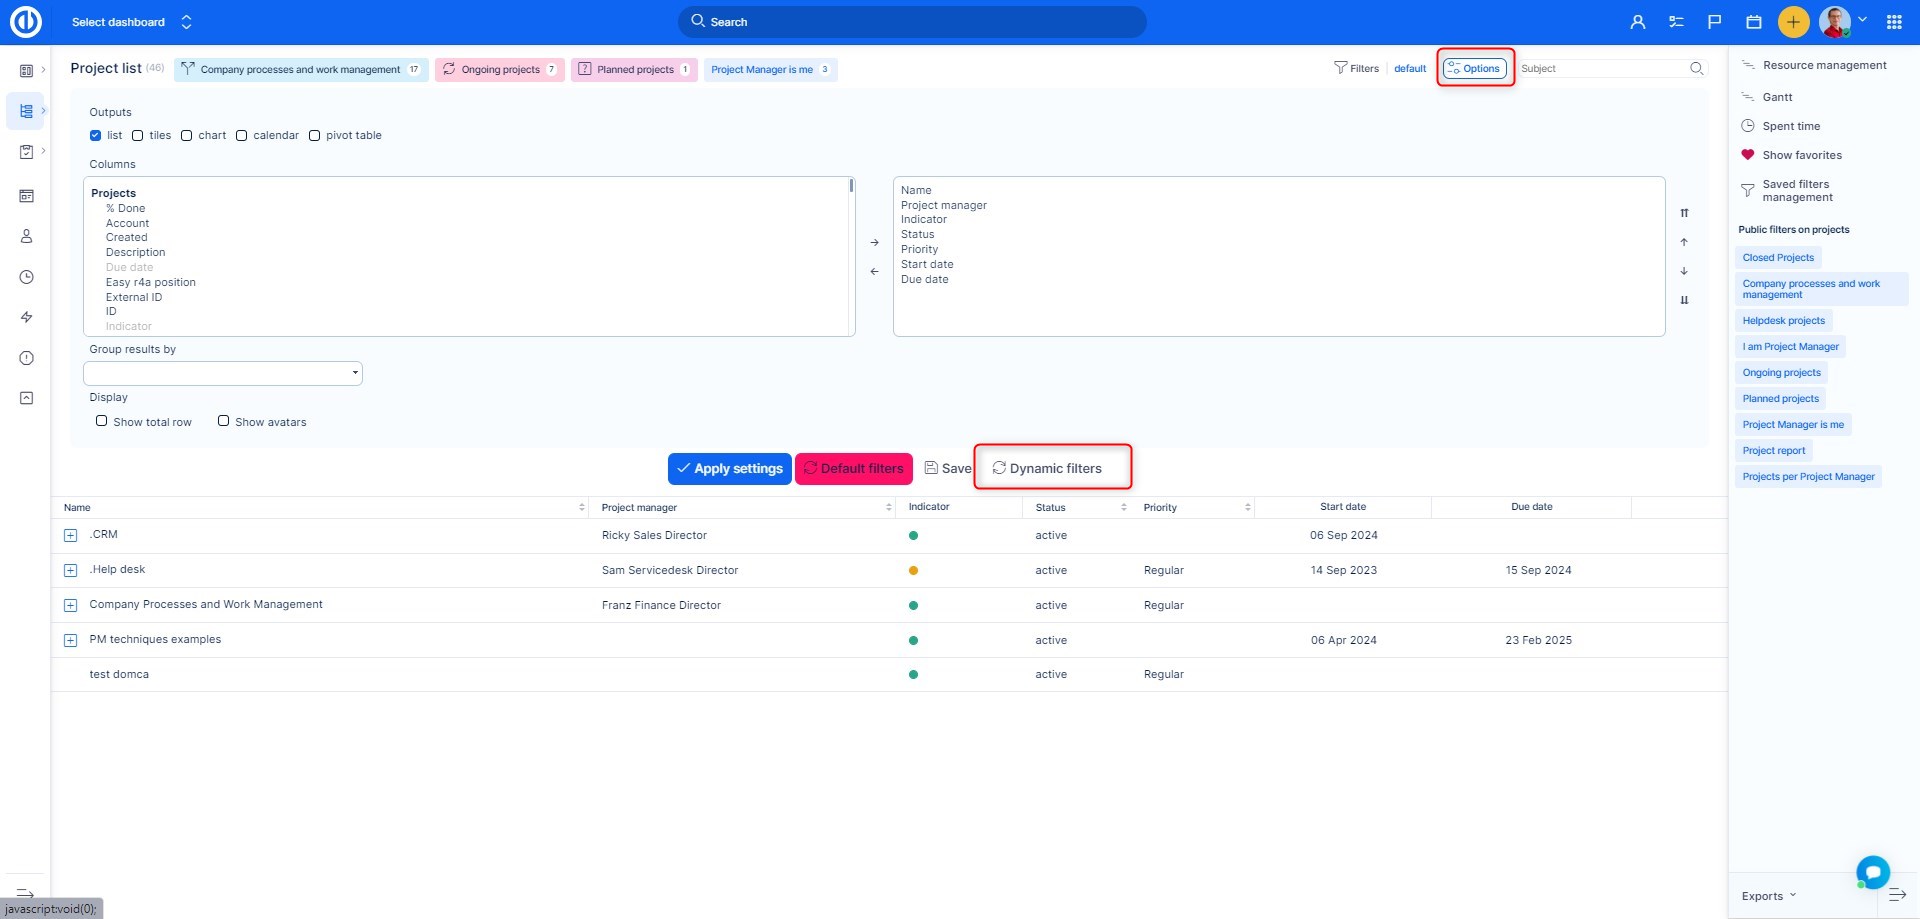
Dynamic filters on the project list
To activate dynamic filters on the project list, open the project list >> "Filters" or "Options" >> "Dynamic filters".
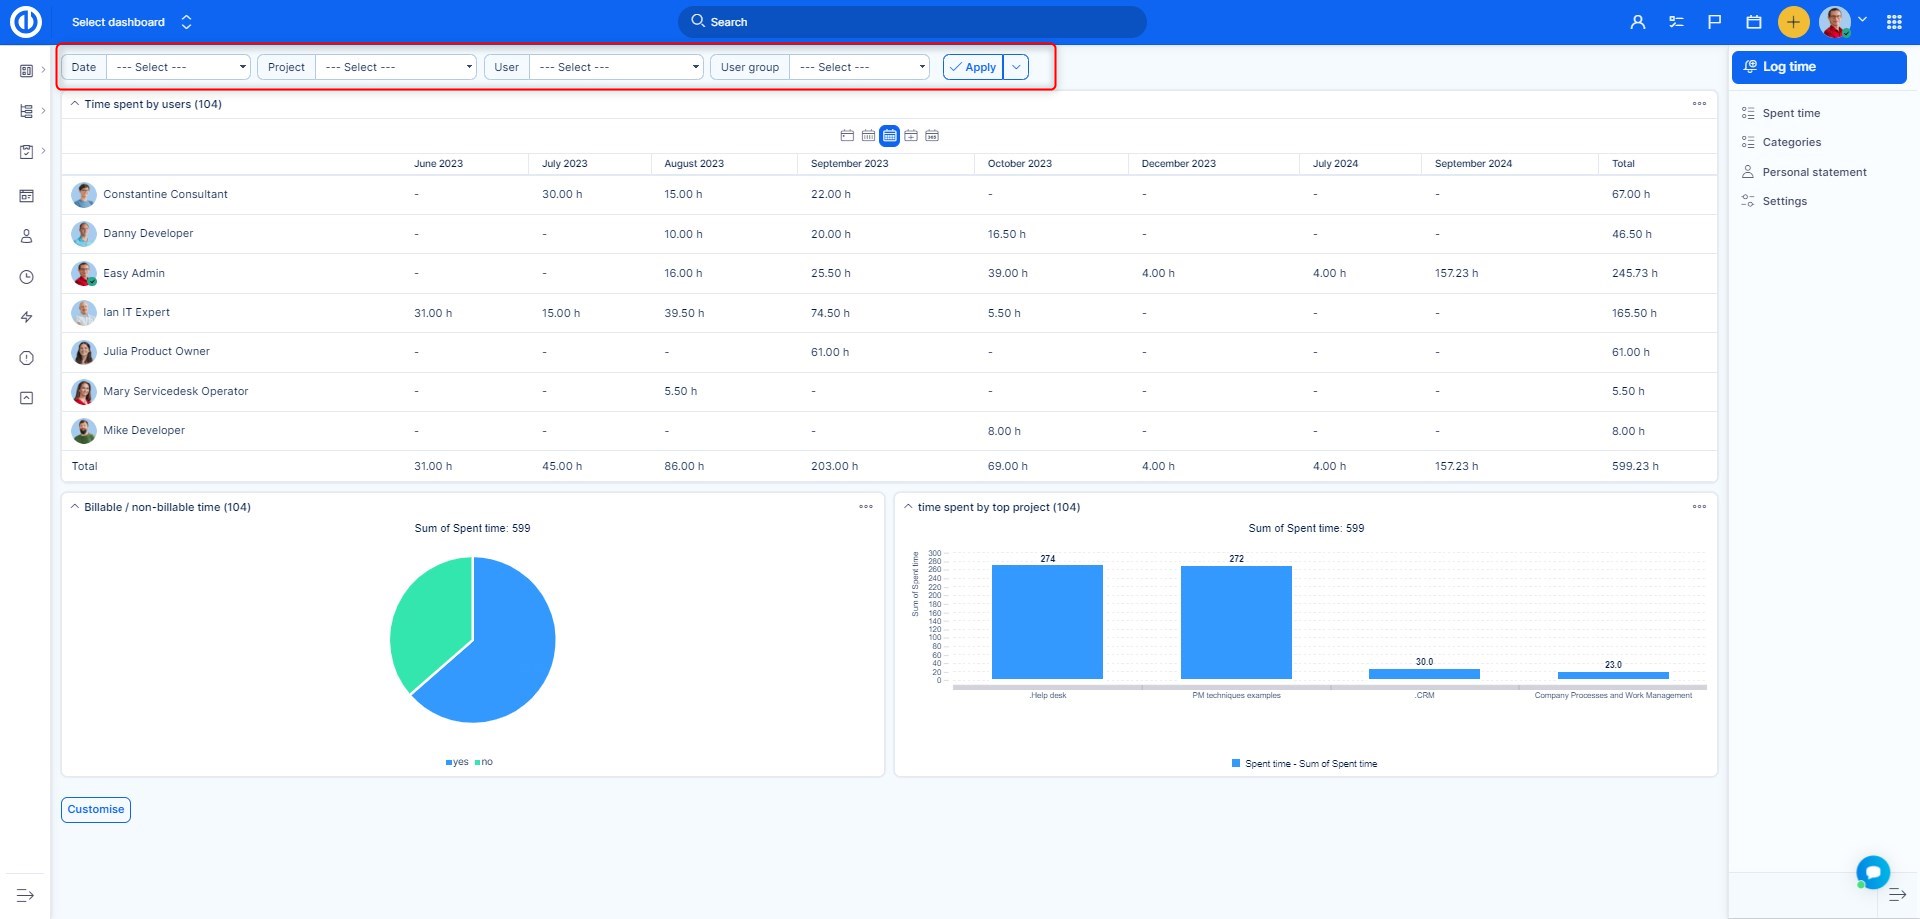
Dynamic filters on spent time entries
To activate dynamic filters on spent time entries, navigate to the Global menu >> Time reports >> Spent time or Personal statement >> "Filters" or "Options" >> "Dynamic filters".
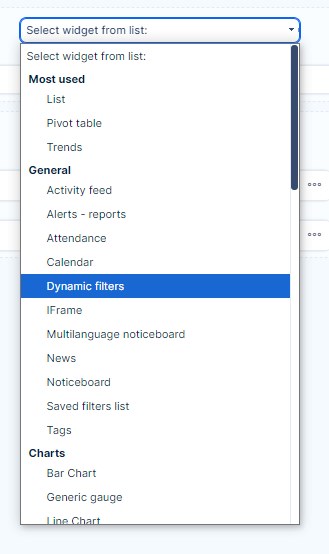
Dynamic filters as a configurable module on any personalized page
To add dynamic filters as a configurable module on any personalized page, click the "Customize this page" button (on the bottom of the page) and select module "Dynamic filters" from the list of available modules.
How to set up and control dynamic filters
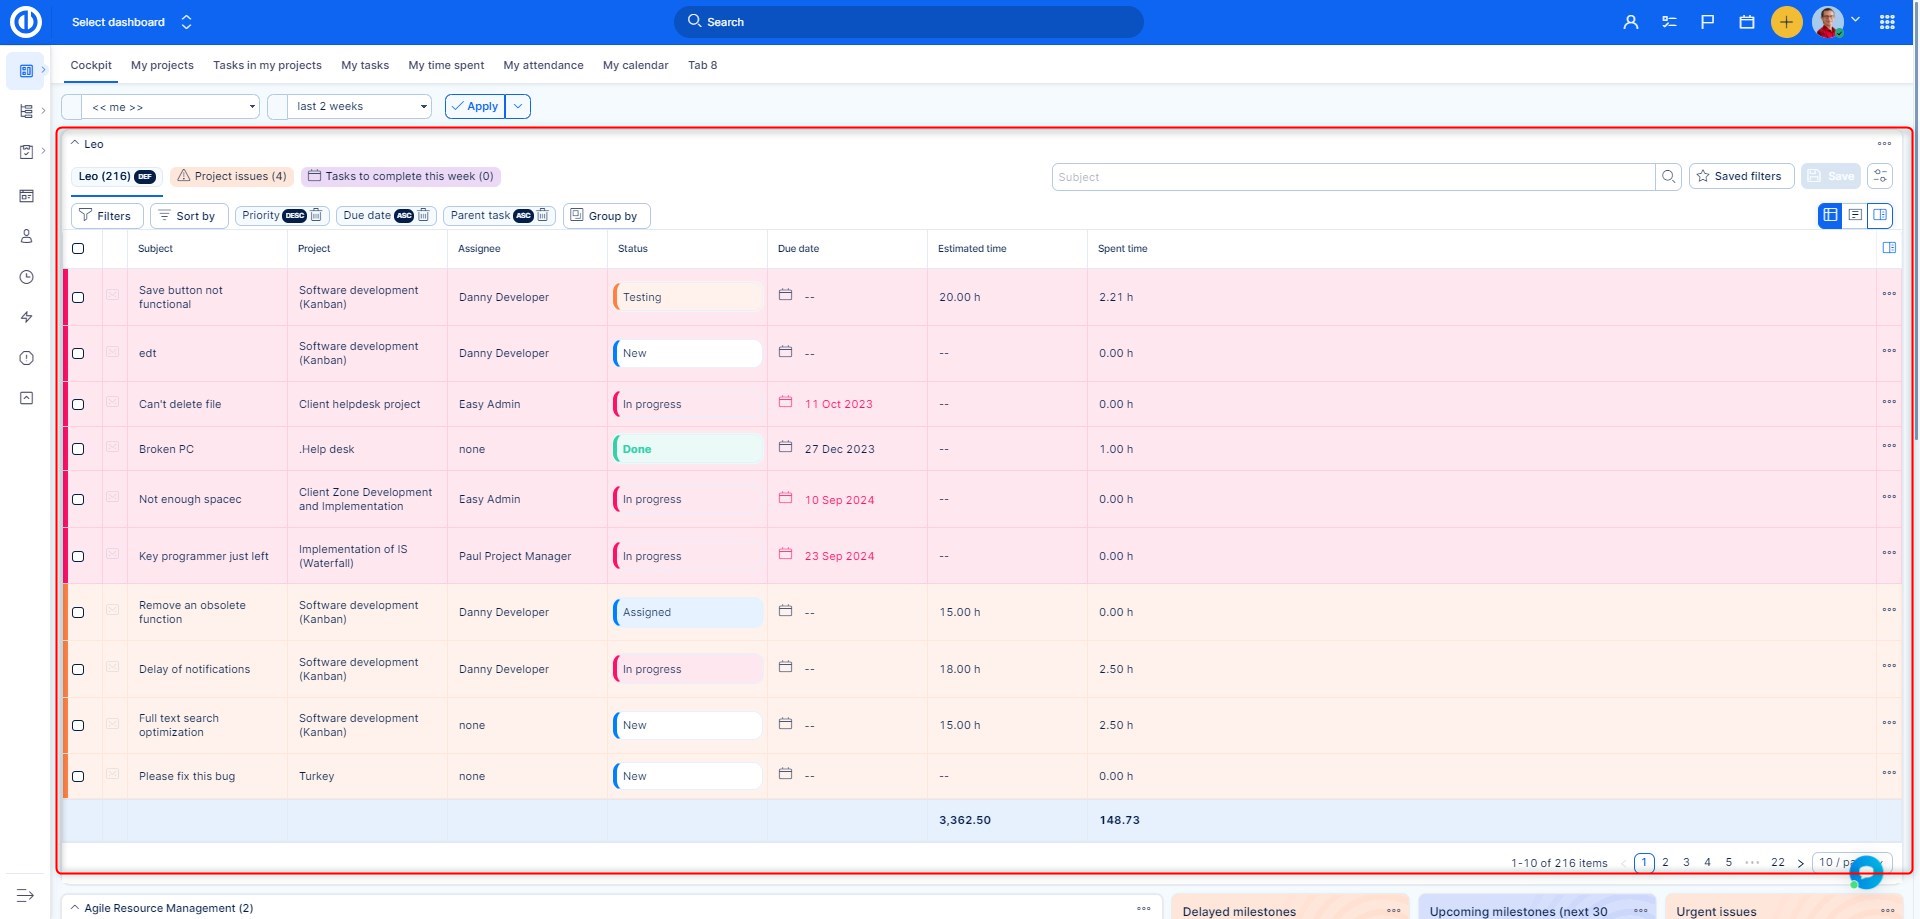
Here we explain how to set up and control dynamic filters using the example of a configurable module on any personal page.
At the very top right of the module under the 3 dots, you can find three icons (trash bin, pencil, arrow) to delete, edit, and collapse/expand the module. Using the pencil icon to edit the module, you can change the filtered entity type (tasks, spent time, projects), name your filter, load an already saved filter, or import a filter from a specific URL address that you enter here.
Under the Settings icon, you can refresh the filter to display the most up-to-date data, copy the URL of the current filter to easily export it on any other page, save the filter (by clicking "New filter") as well as change the filter layout (bordered, display filters, show total row). The Save button next to it allows you to update an already saved filter with the current changes (not working for an unsaved filter). The Saved filters button enables you to quickly select and apply one of the existing filters. The upper search field is used to look for items of the selected entity.
Using the Filters button below, you can select filtering criteria (such as "Date" or "User is"). Next to it on the right side, you can change "Sort by" attributes (maximum 3 attributes such as date, task type, or activity), "Group by" attributes (such as date, year, or activity), "Show as" attributes (list or cards), or you can customize the filter columns (change their order or remove some) by clicking the "Add columns" button on the far right.
Below is the matrix with filtered results and column names complemented by triangular icons that allow you to easily sort the results by that particular column in ascending or descending order. Next to the column names, there are also 3 dots, which you can use to insert, pin, or remove a particular column. To edit any particular item in the columns, just click on any – some fields can be edited just by typing a new value into the field, some fields have a drop-down menu with available values to select from, and some fields have an edit icon, which redirects you to the editing page of that particular item.
In the leftmost column, there are checkboxes that allow you to select one or more rows to edit, delete, or change a specific attribute in bulk (the Actions menu pops up automatically just after the row selection). Finally, in the lower right corner, you can set the number of items per page and browse through the pages of the dynamic filter.
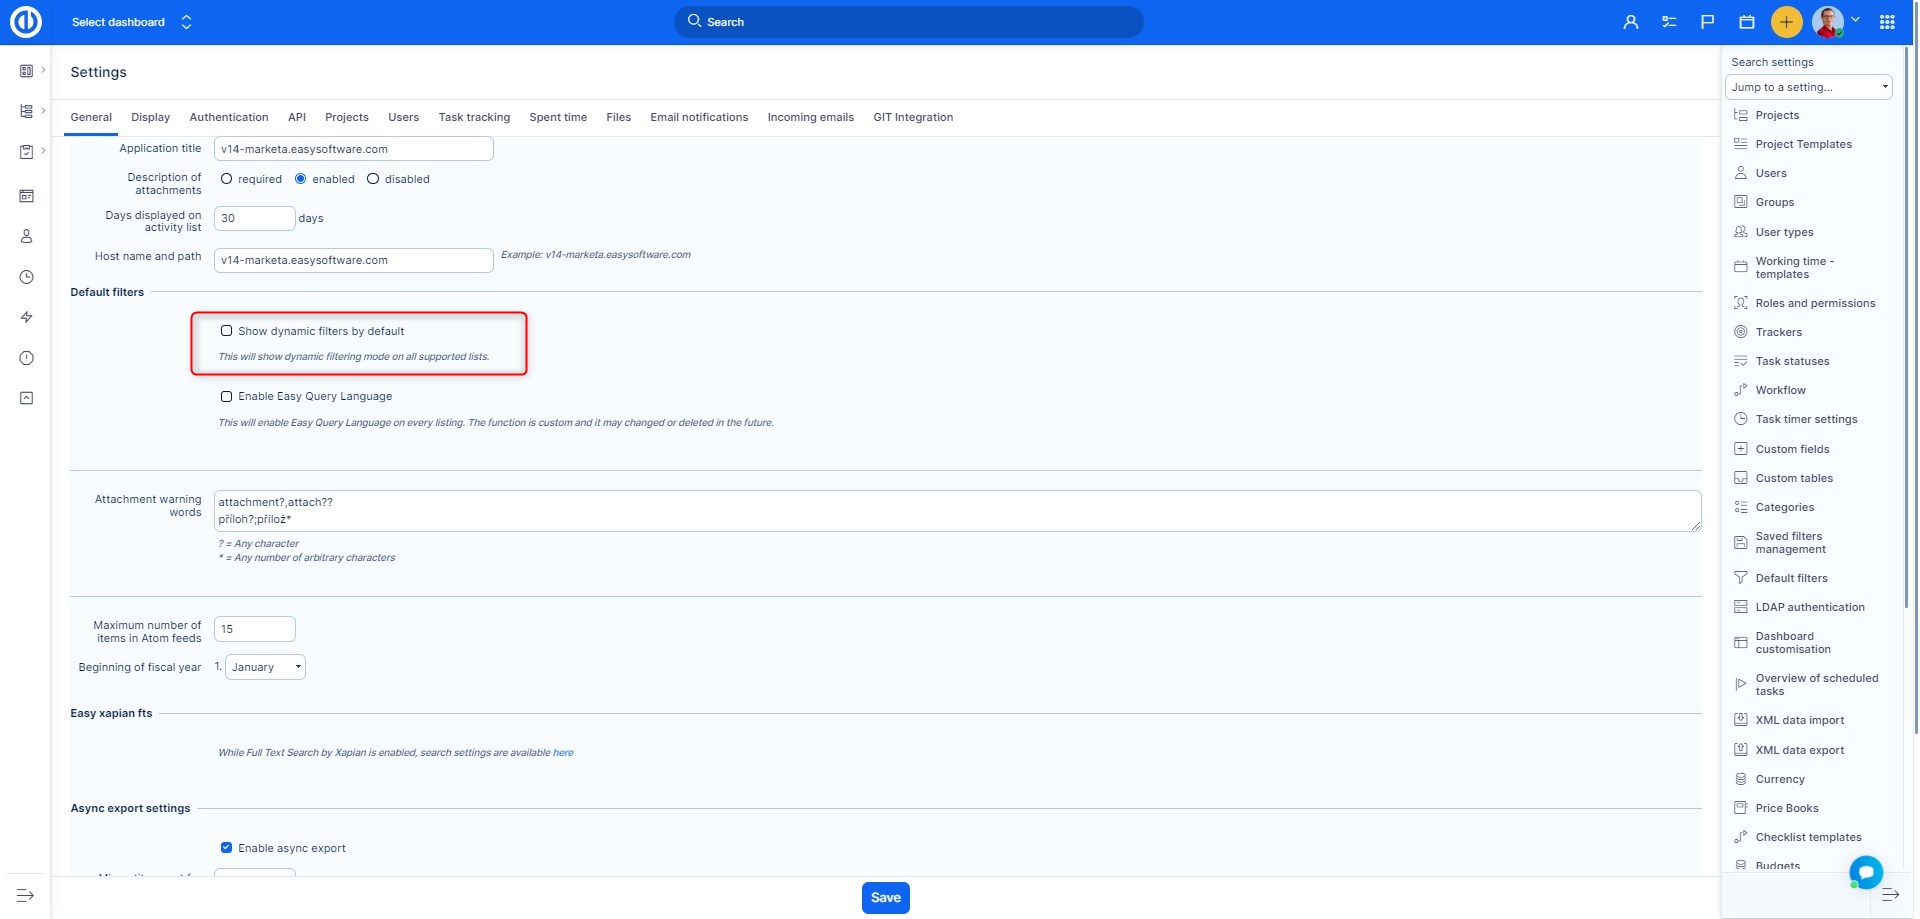
To show dynamic filtering mode on all supported lists by default, navigate to the Global menu >> Administration >> Settings >> General - Dynamic filters' settings >> check "Show dynamic filters by default".
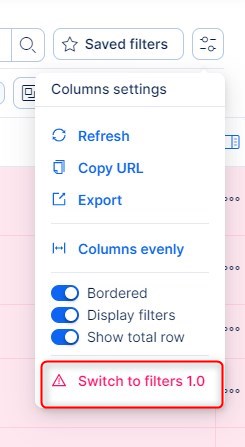
To get back to Filters 1.0, open the Table settings and select " switch to filters 1.0"
This setting will not affect the global setting in Administration, it will disable the dynamic filters for the moment for the current user. If you close the page and open fe. task list again, you will see the dynamic filters again.
Async export
You can use Async export to export the currently applied dynamic filter. This ensures that the export does not affect your work, as it runs in the background.
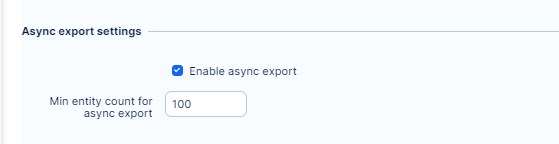
First, make sure that this option is enabled in Administration >> Settings >> General >> Async export.
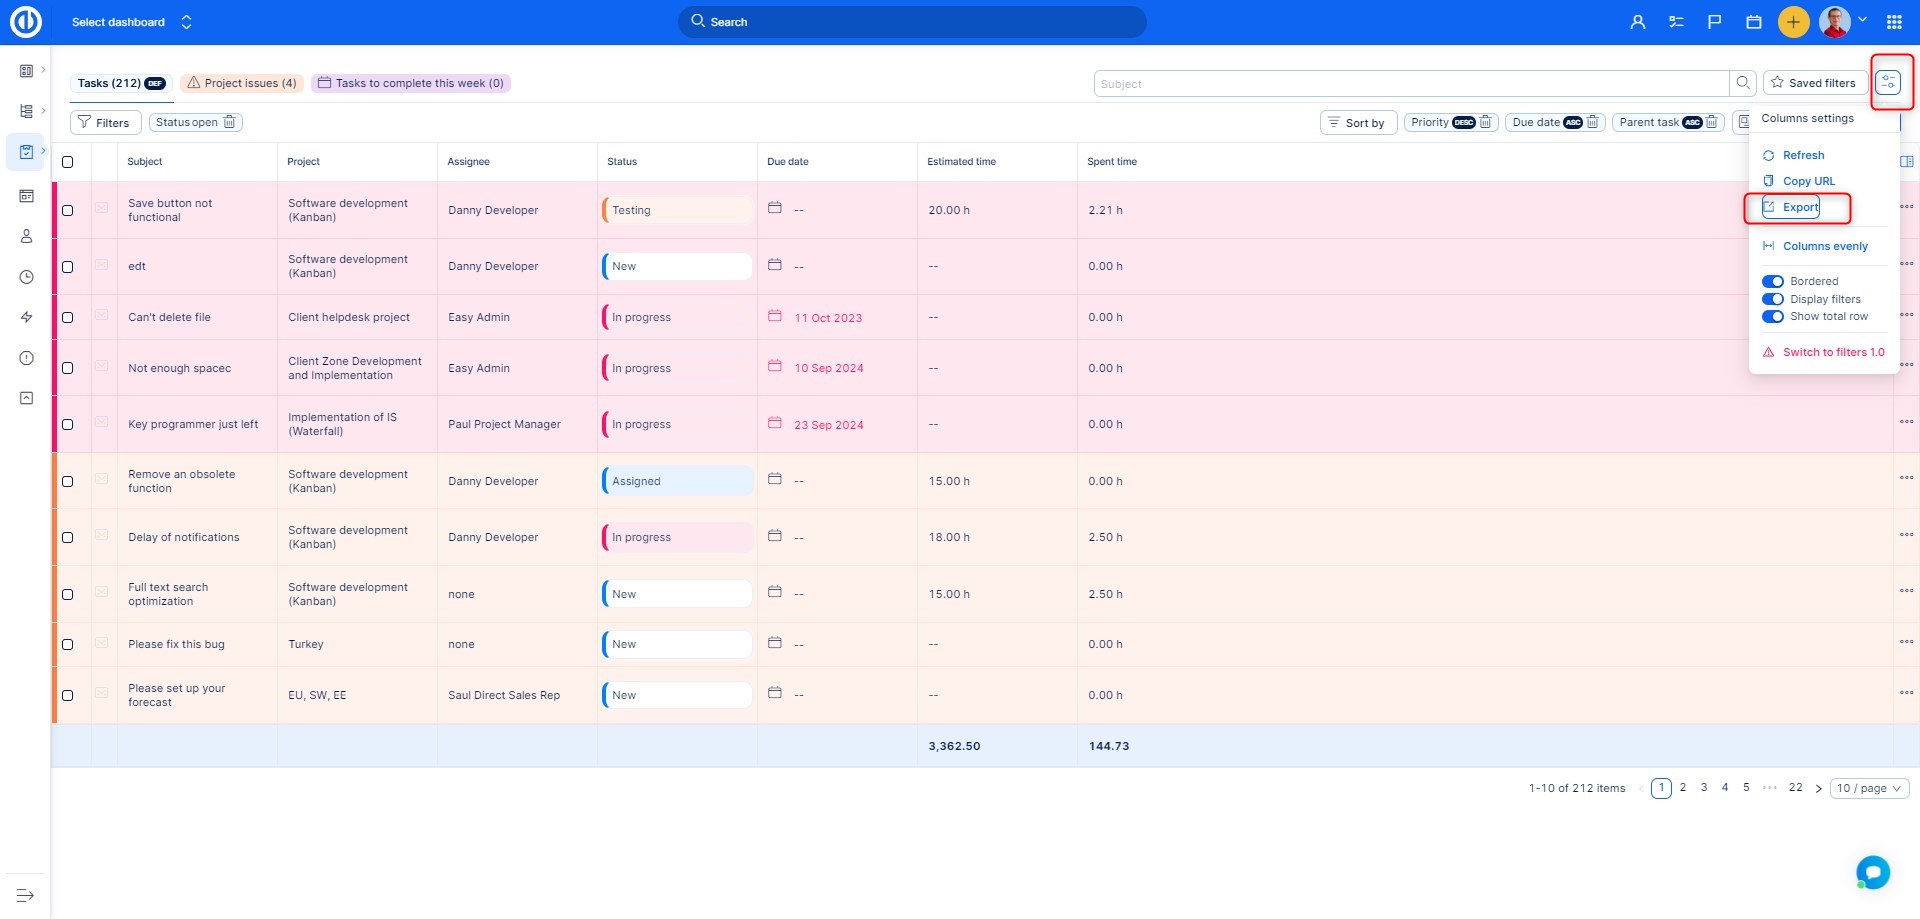
To export a dynamic filter, click on the Table settings in its upper right corner and select Export from the menu. The filter is exported in its current settings and does not need to be saved first.
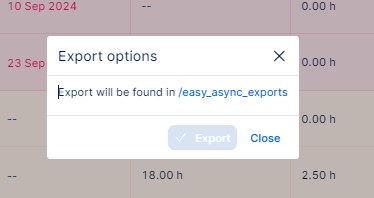
In the dialog window that opens, select the export format. The export will run on the backround, and you will be provided with a lin to the Async export list.
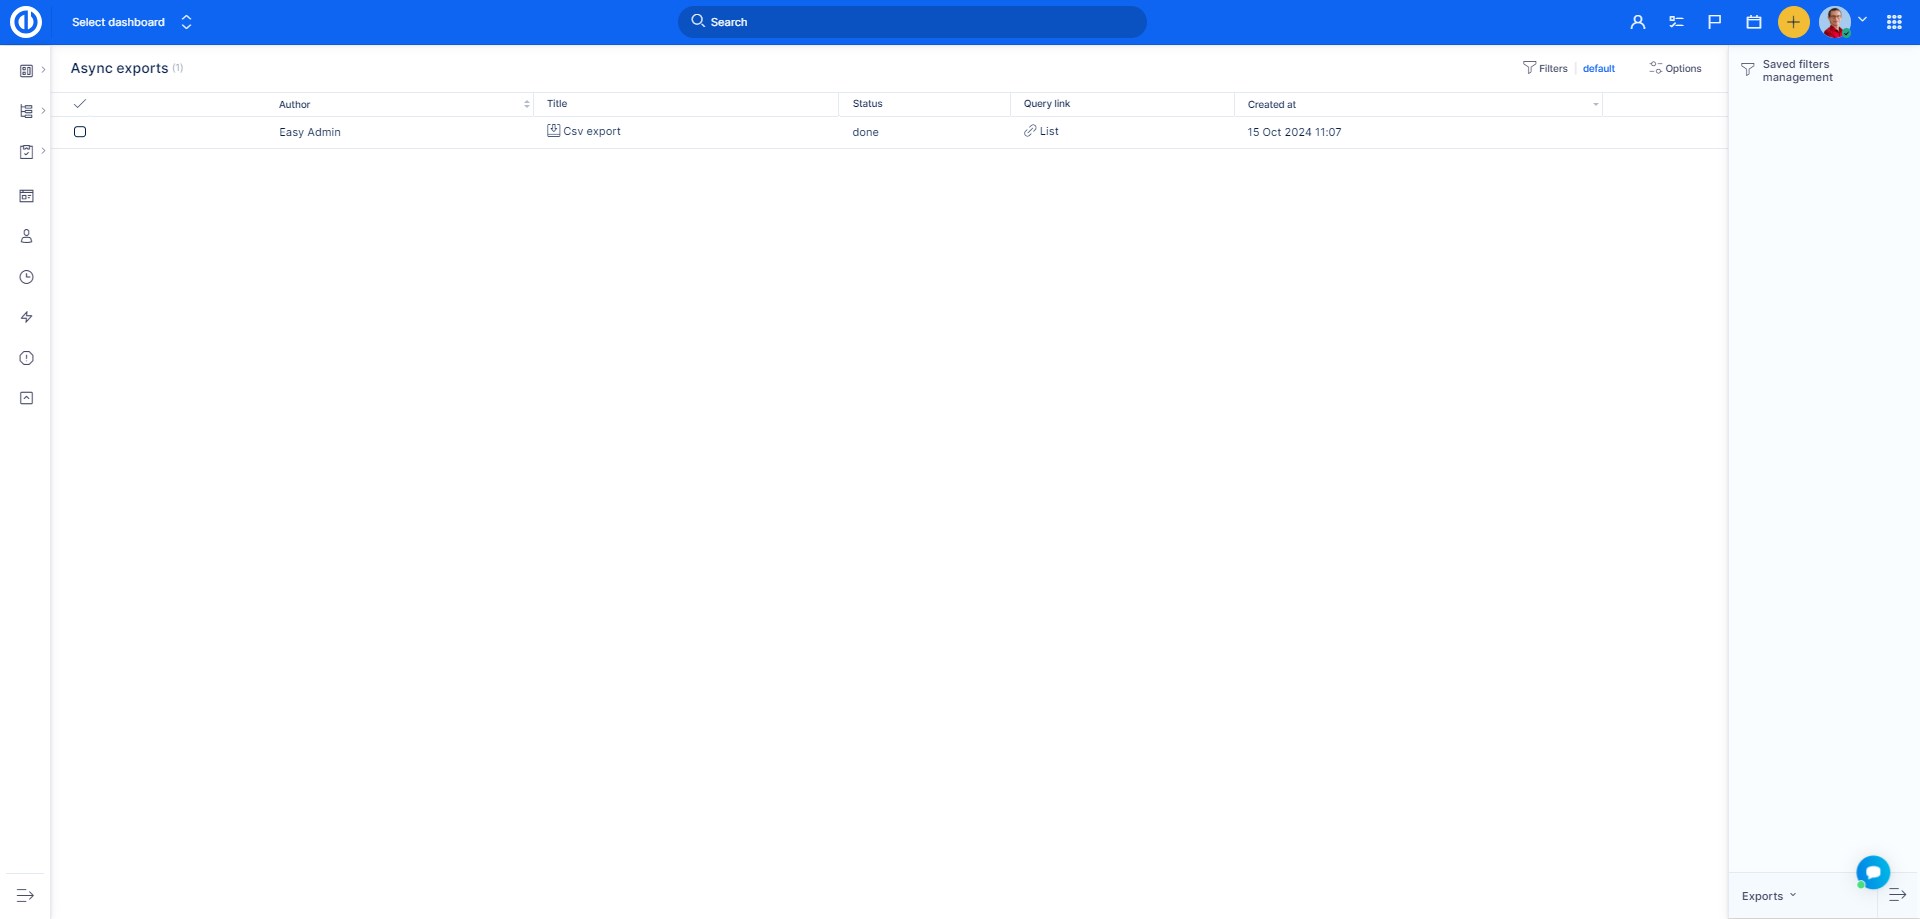
A list of all dynamic filter exports saved in this way is then available on the /easy_async_exports page, from where individual exports can be downloaded or deleted.
Permissions related to filters
Dynamic filters use the same permissions as standard filters (Filters 1.0), so you cannot set up any extra permissions for them. Permissions related to filters can be set up in the Global menu >> Administration >> Roles and permissions.
Corner situations
- The "+" and "-" icons to expand/collapse a project tree are always a part of the first-from-left column in the matrix of dynamic filters, no matter what particular column it is.

