


Knowledge base - detailed manual
Rename and move pages
Redirects
Subpages
Create page directory
Using Droplets and Editor
Search Features
Working with categories
Namespace Management
Namespaces
Books
Templates
Page assignment
Special Pages
Setting Up Dashboard Widget
Creating an article
You can create a new article directly in the knowledge base or through the Easy software:
- By clicking the "New article" link under Easy Redmine
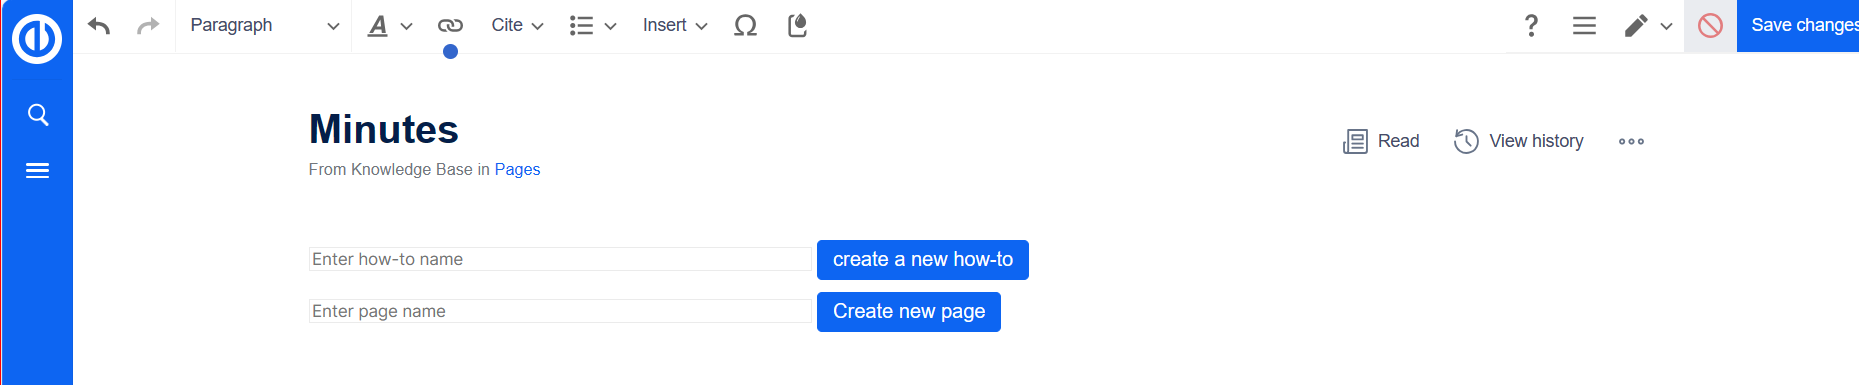
- By clicking the "New page" link in the knowledge base
To create an article, follow these steps:
- Click the + button on any page.
- Enter a name for the new page. If the page does not exist yet, a red link will appear.
Creating a new page: 3. Click the "Create page" button.
- Choose either the "Blank Page" option or a page template on the next page. The page will open in edit mode. Make at least one edit to activate the "Save" button.
- Save the article, and it will now exist in the main namespace of the knowledge base.
To find articles, you can:
- Search by typing the article name in the search bar if you know the article's name.
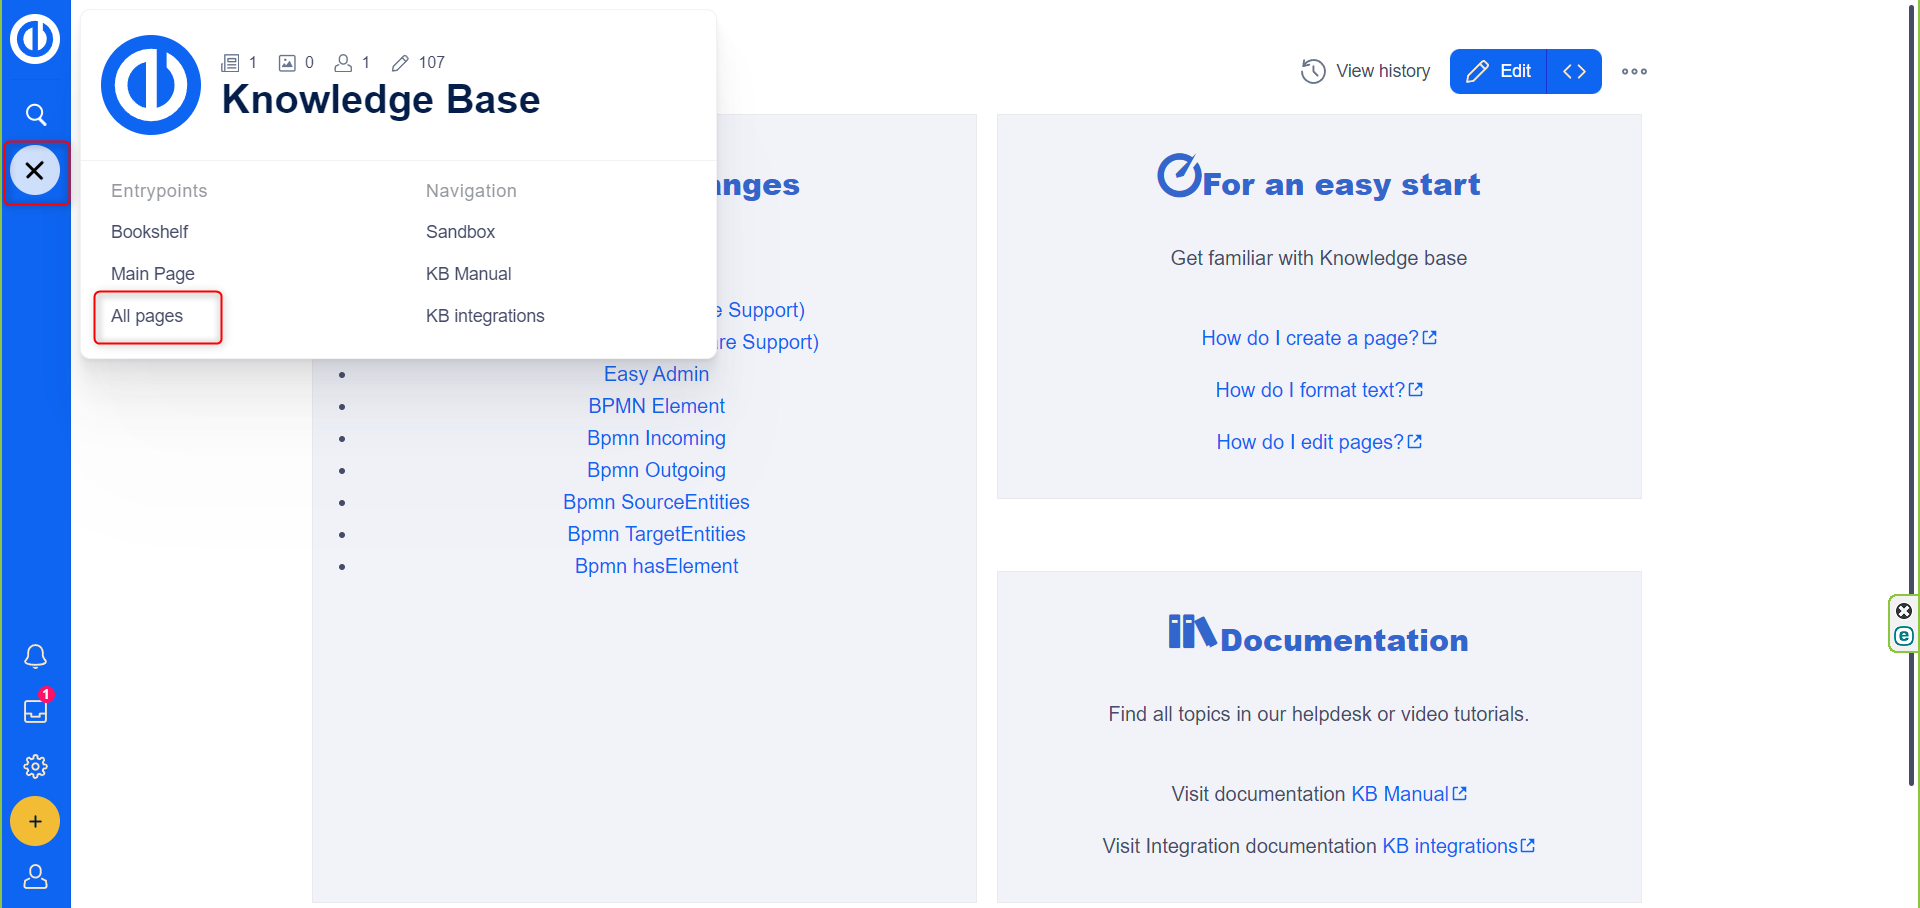
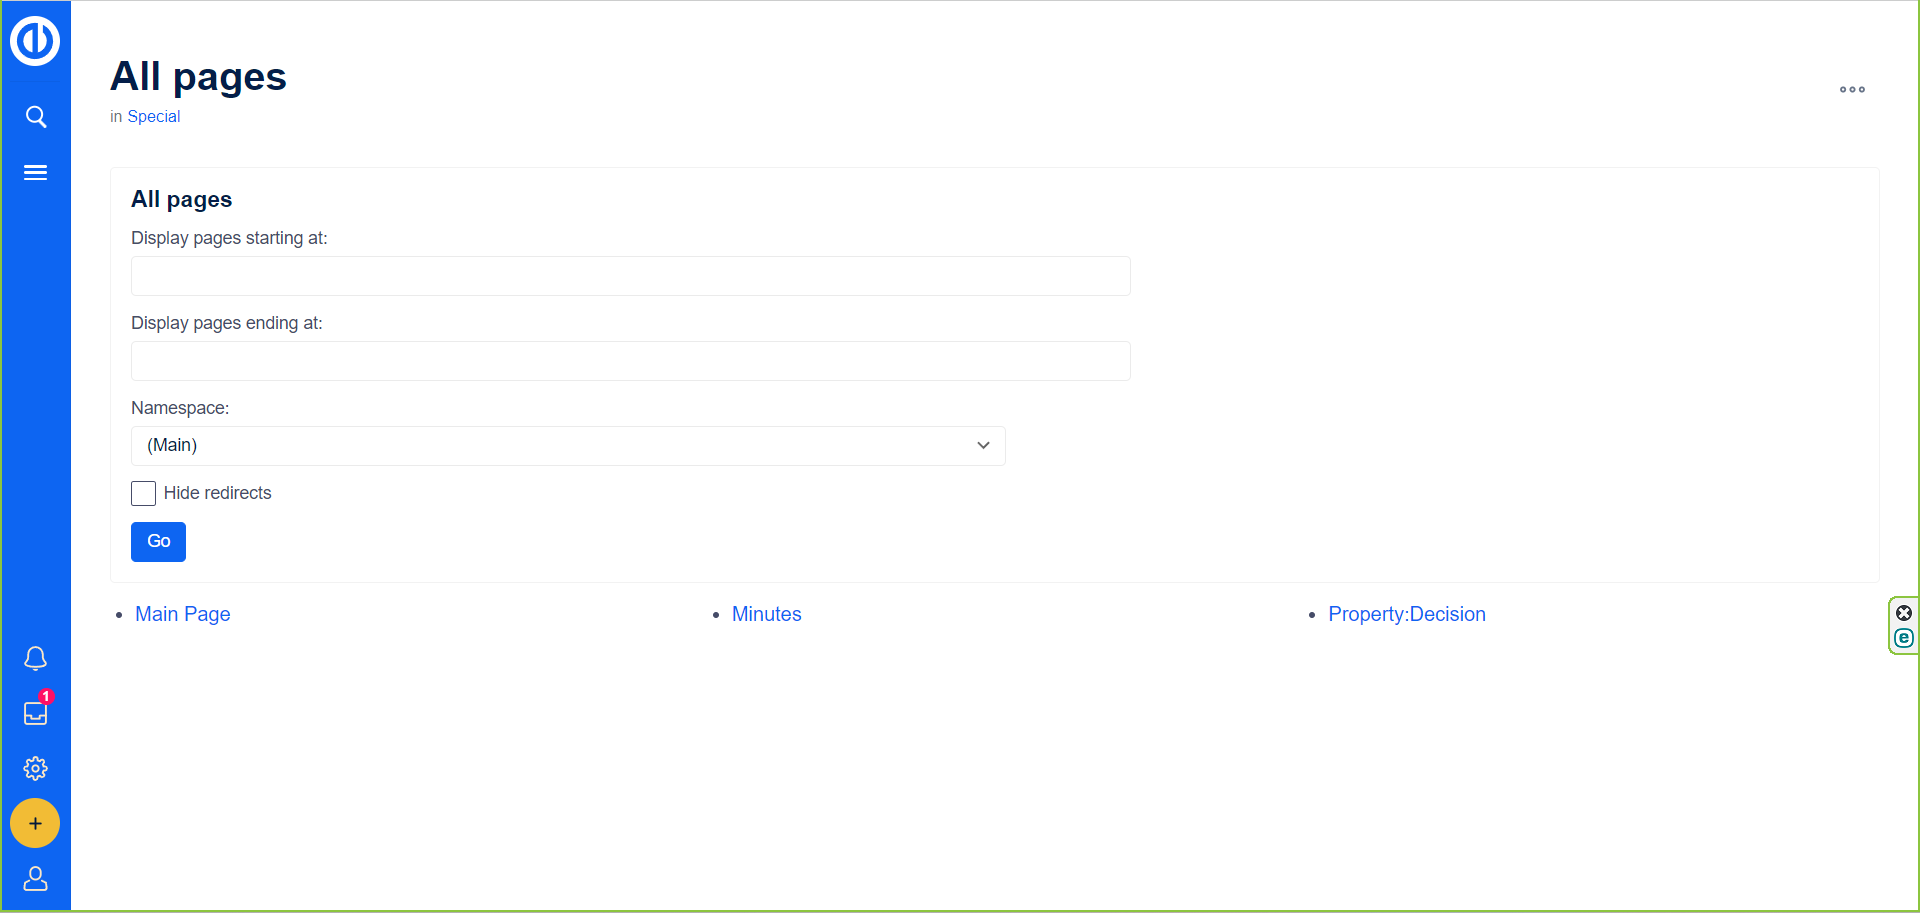
- Access "All pages" by going to the page Special:All pages, usually linked from the main navigation.
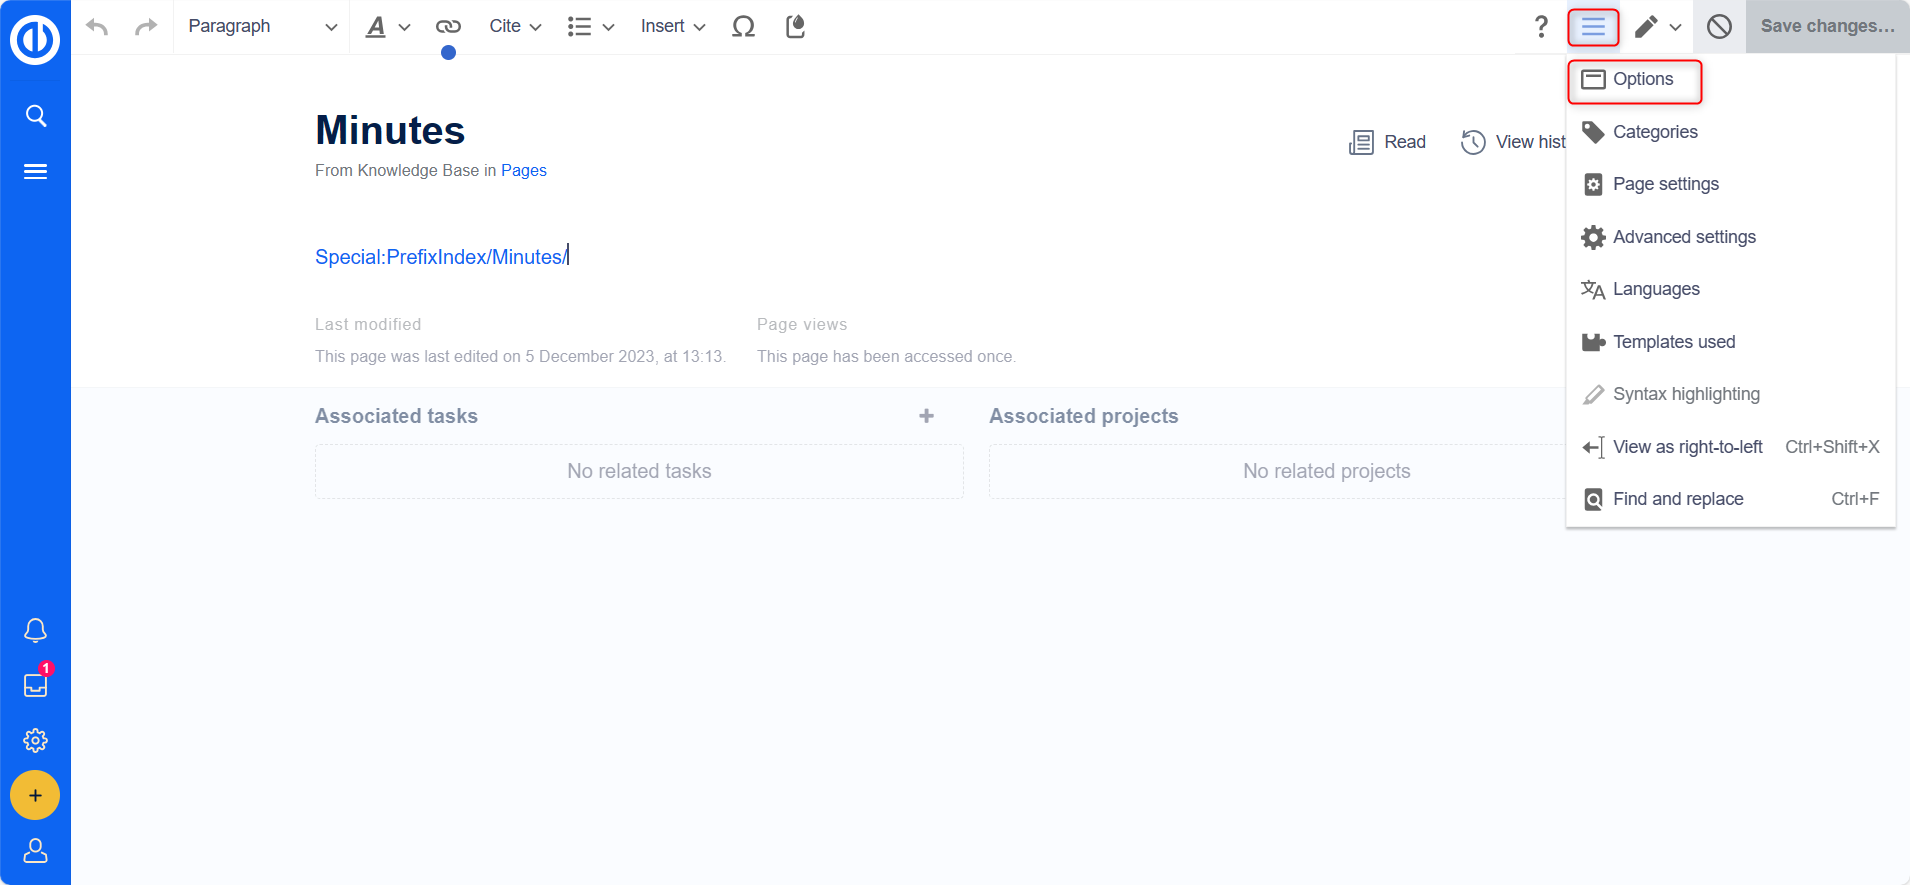
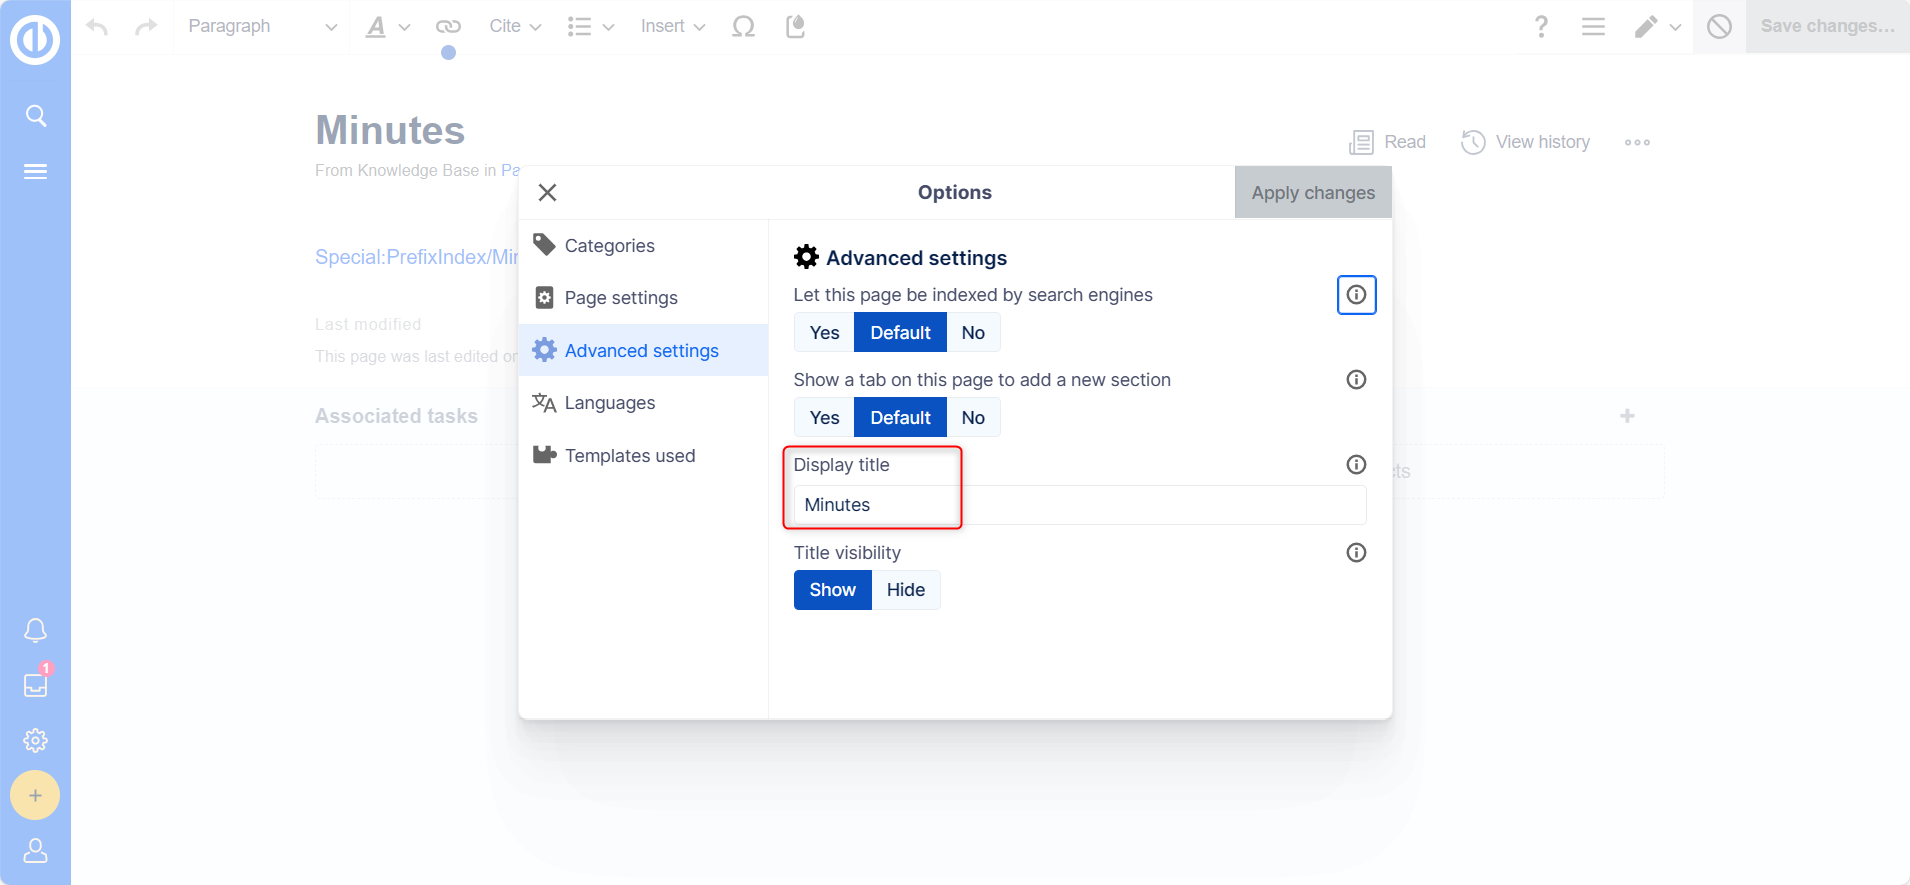
If you wish to change an article's name, use the move feature. To display a different title on the article page without moving the page, set a display title by following these steps:
- Click "Options" > "Advanced settings" in the editor toolbar.
- Change the "Display title."
- Click "Apply changes."
Regarding naming conventions:
- Page names should be chosen thoughtfully to help users quickly find information. Single words or short phrases like "Coding best practices" work well.
- Namespaces require a namespace prefix before the article name.
- Avoid using special characters like { } & ? < > \
- Pay attention to spelling when linking to an existing page via source text mode.
For alternative article creation options:
- Search for existing pages related to your topic before creating a new page.
- Use a redlink to create a non-existing page.
- Create a page directly from your web browser's address bar by replacing the title of the current page with a new page name and pressing Enter.
Droplets can be used to add various types of attachments or features directly to the knowledge article page. Learn more in the "Using Droplets" article.
Here's an example of creating a new knowledge base article on "Effective Task Management" in Easy Redmine:
User Scenario: John, a senior project manager, wants to contribute his knowledge by creating a new article in the Easy Redmine knowledge base on "Effective Task Management" to benefit his colleagues and team members.
Steps:
- John logs in to his Easy Redmine account with the necessary permissions to create new knowledge base articles.
- He navigates to the knowledge base section within Easy Redmine, which offers options to create and manage articles.
- John clicks on the "Create New Article" or a similar button to initiate the article creation process.
- He enters a descriptive title for the article, such as "Effective Task Management," and selects an appropriate category or tag, such as "Project Management" or "Productivity."
- As the content editor, John writes the article, sharing his insights and best practices related to effective task management, including headings, bullet points, and possibly images or diagrams.
- John uses the formatting tools provided by Easy Redmine's knowledge base editor to format the text for readability and visual appeal.
- If John references external sources, he includes proper citations within the article.
- Before finalizing the article, John reviews and proofreads it for spelling and grammatical errors, as well as logical organization.
- John uses the preview feature to see how the article will appear to other users, making any necessary adjustments.
- Satisfied with the article's content and formatting, John clicks the "Publish" or "Save" button to make the article accessible to other users in the organization.
- John adds relevant tags or metadata to help users find the article easily when searching the knowledge base.
- After publishing, John shares the link to the newly created article with his colleagues, encouraging them to read and provide feedback or comments.
Outcome: By following these steps, John successfully creates a new knowledge base article on "Effective Task Management" within Easy Redmine. His article becomes a valuable resource for his colleagues and team members, helping them improve their task management skills and contributing to a culture of knowledge sharing and collaboration within the organization.
Rename and move pages
About Moving Pages
A wiki page can only be renamed by moving it. Moving is necessary because the web address of the page changes during the renaming process. Typically, there are many links to a wiki page, making it important to ensure that these links continue to work after the page has been renamed.
A page can be moved with or without redirecting the original page. Let's delve into the differences.
What Happens When You Move a Page?
When you move a page:
- You change the page name, and thus, the page title.
- The page content is displayed on the new page.
- The version history of the original page is transferred to the new page.
If you move from the original page to the new page, an additional page with the old page name will be created. This page then serves as a redirect to the new page. If you choose not to create a redirect, the original page is simply replaced. In such cases, you should verify and update the links to the old page within your wiki.
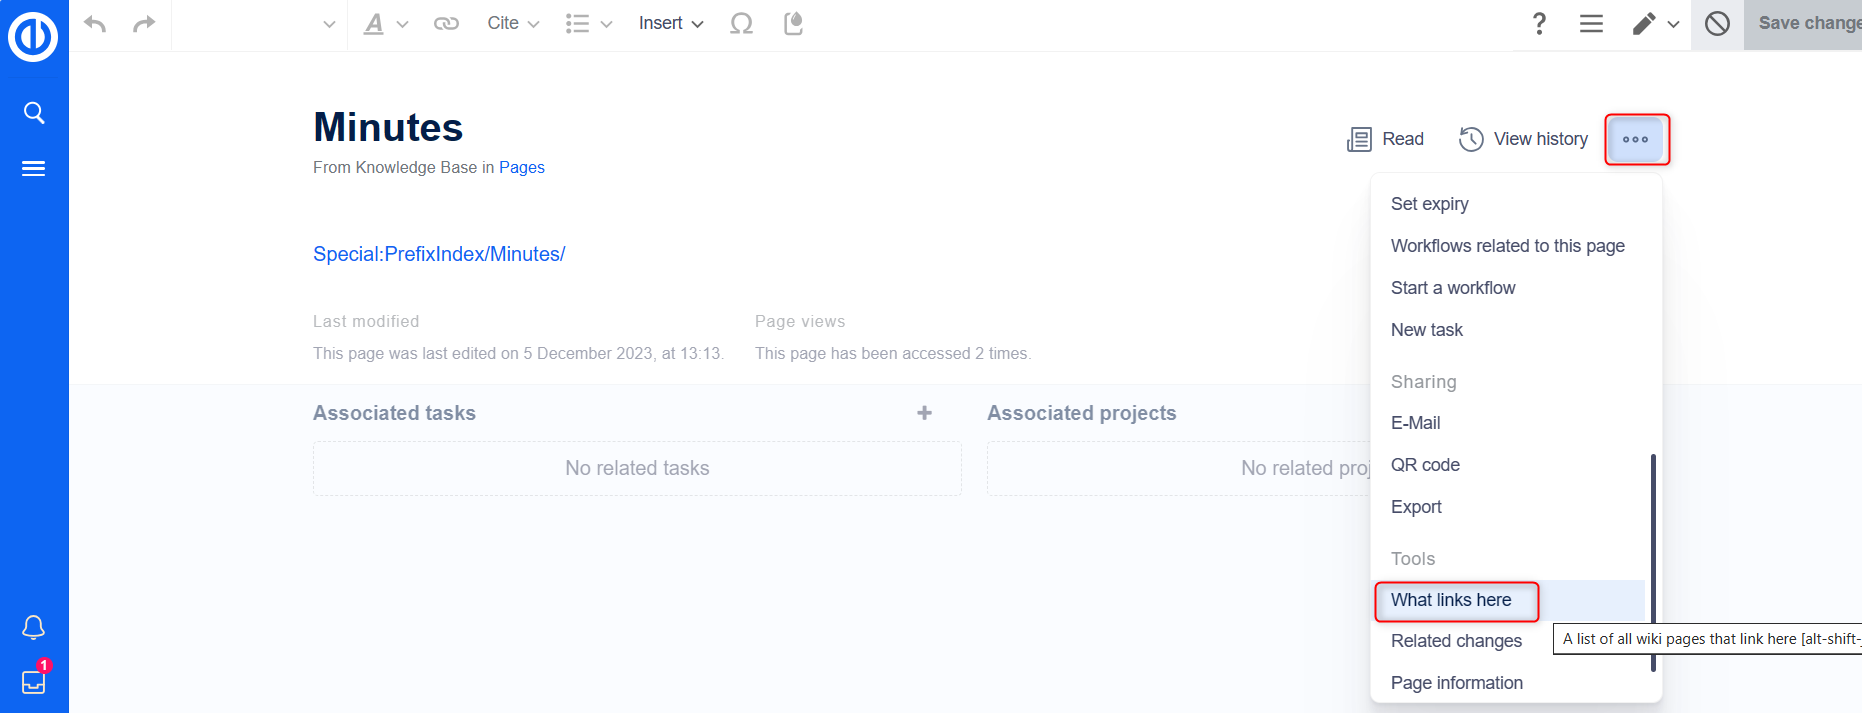
Checking Links to the Page
Before moving a page, it's important to check if other pages link to that page name. To do this, navigate to "What links here" under "All actions" in the page tools. If there are many links listed here, it's advisable to create a redirect when moving the page.
The following diagram shows how to rename an "Emobile" page to a page called "Electric Vehicles" page:
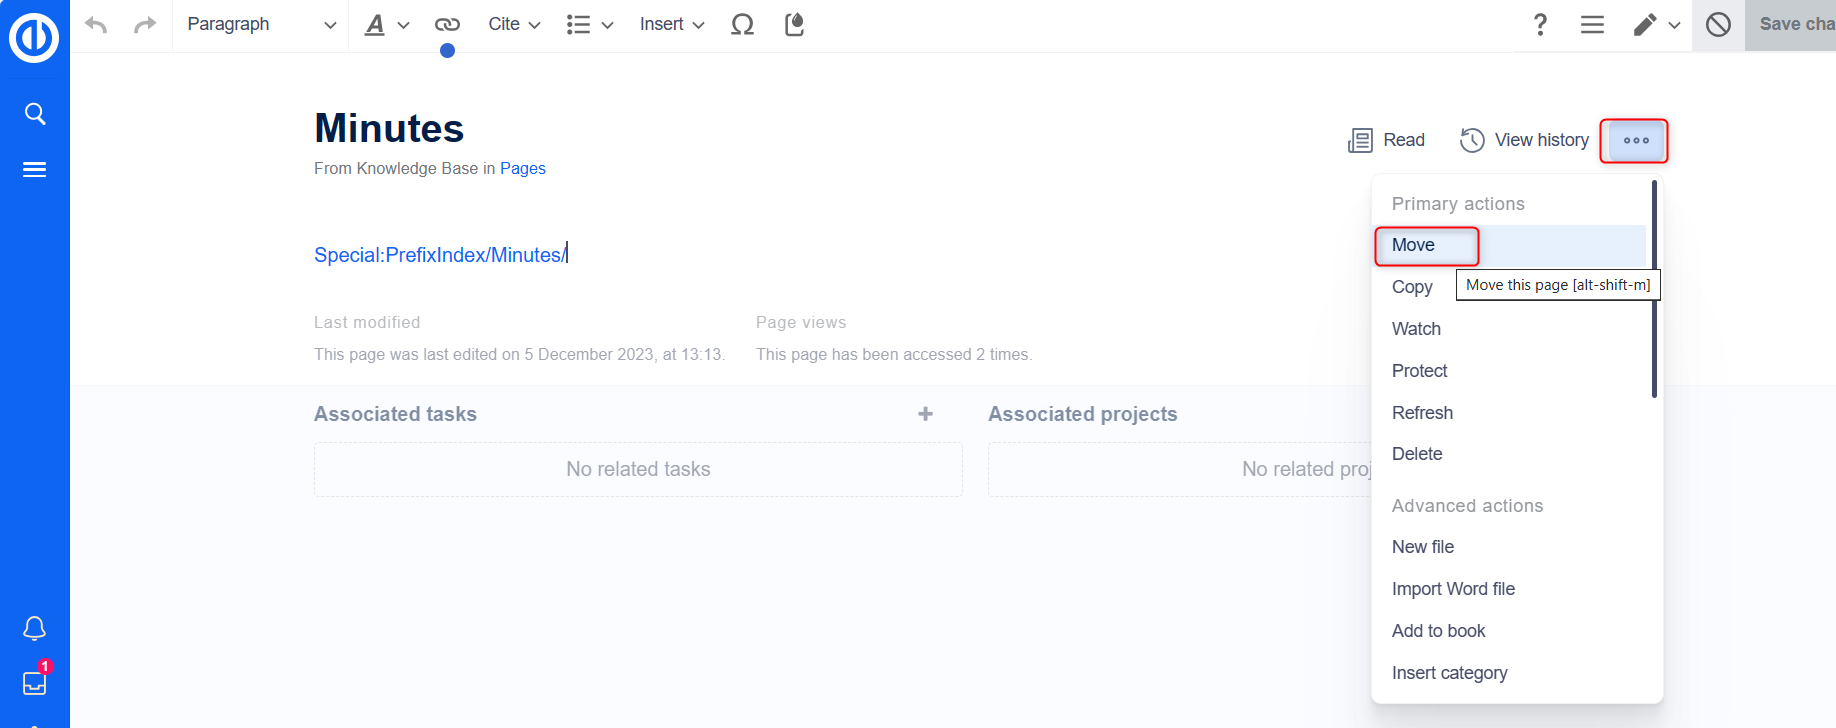
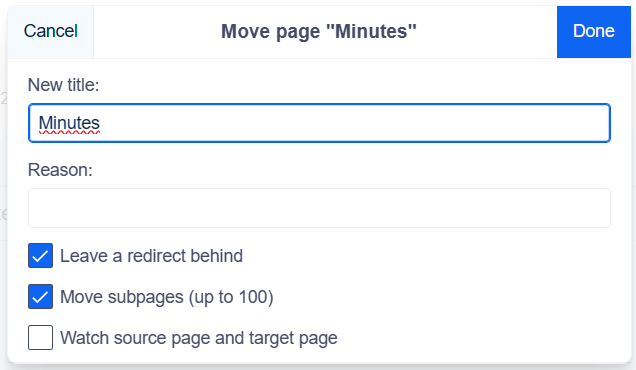
Moving a Page
- Click on "Move" in the page tools under "Actions."
- Enter a new page name. If you are moving the page to a different namespace, make sure to include the namespace prefix as well.
- Optionally provide a reason for the page move, which will be recorded in the logs.
- Decide whether to leave a redirect. Depending on the linking status or the purpose of the page, you must choose whether to move the page with or without a redirect. Creating a redirect keeps the original page title searchable.
- Specify whether you want to monitor changes on both the source page and the target page.
- Click "Done." The page has now been moved.
Moving with a Redirect
Creating a redirect makes sense in the following cases:
- The original page is linked to many other sites, such as external websites or other internal wiki pages.
- The title of the original page is sometimes used in searches, and the page should be discoverable in both cases.
Moving without a Redirect
In these cases, it makes sense to move without creating a redirect:
- Correcting a spelling error in the title. There are only a few links to the page, and they are easy to locate and update.
- The original title should not appear in searches.
- Avoid unnecessary redirection through a forwarding page.
Updating References to the Page
If no redirect was created when the page was renamed, it is sometimes necessary to check if existing links to the original page exist in the knowledge base. These links must then be adjusted to reflect the new page name.
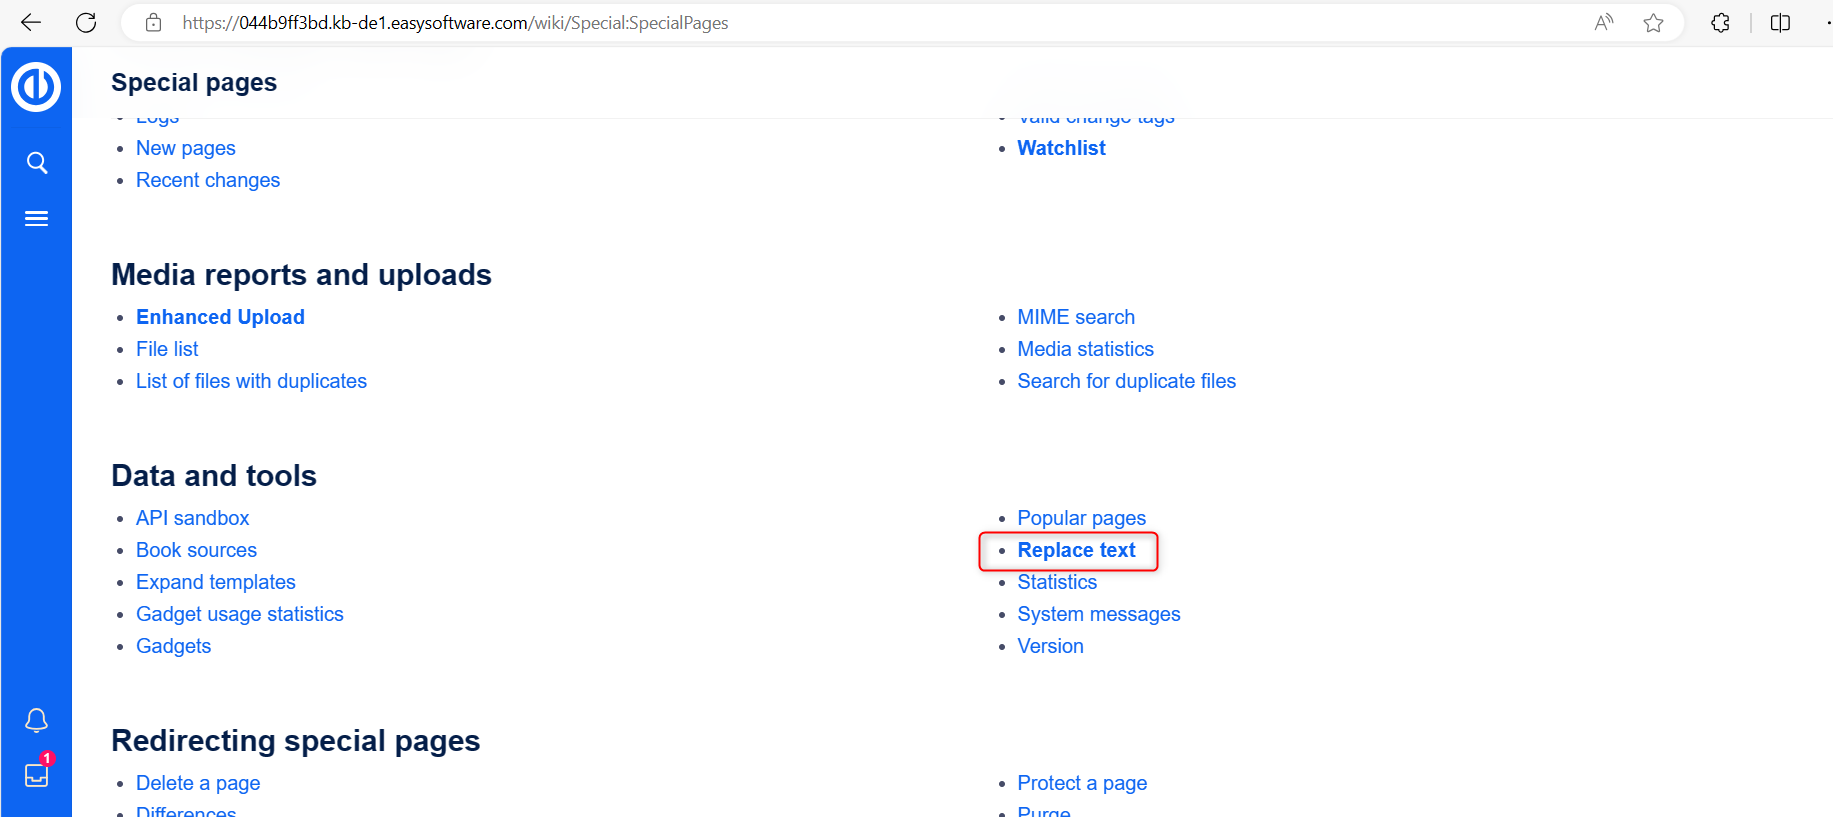
Users with admin permissions can go to the page Special: Replace Text to find references to the previous page name.
Enter the original page title under "Existing text" and the new page title under "Replacement text."
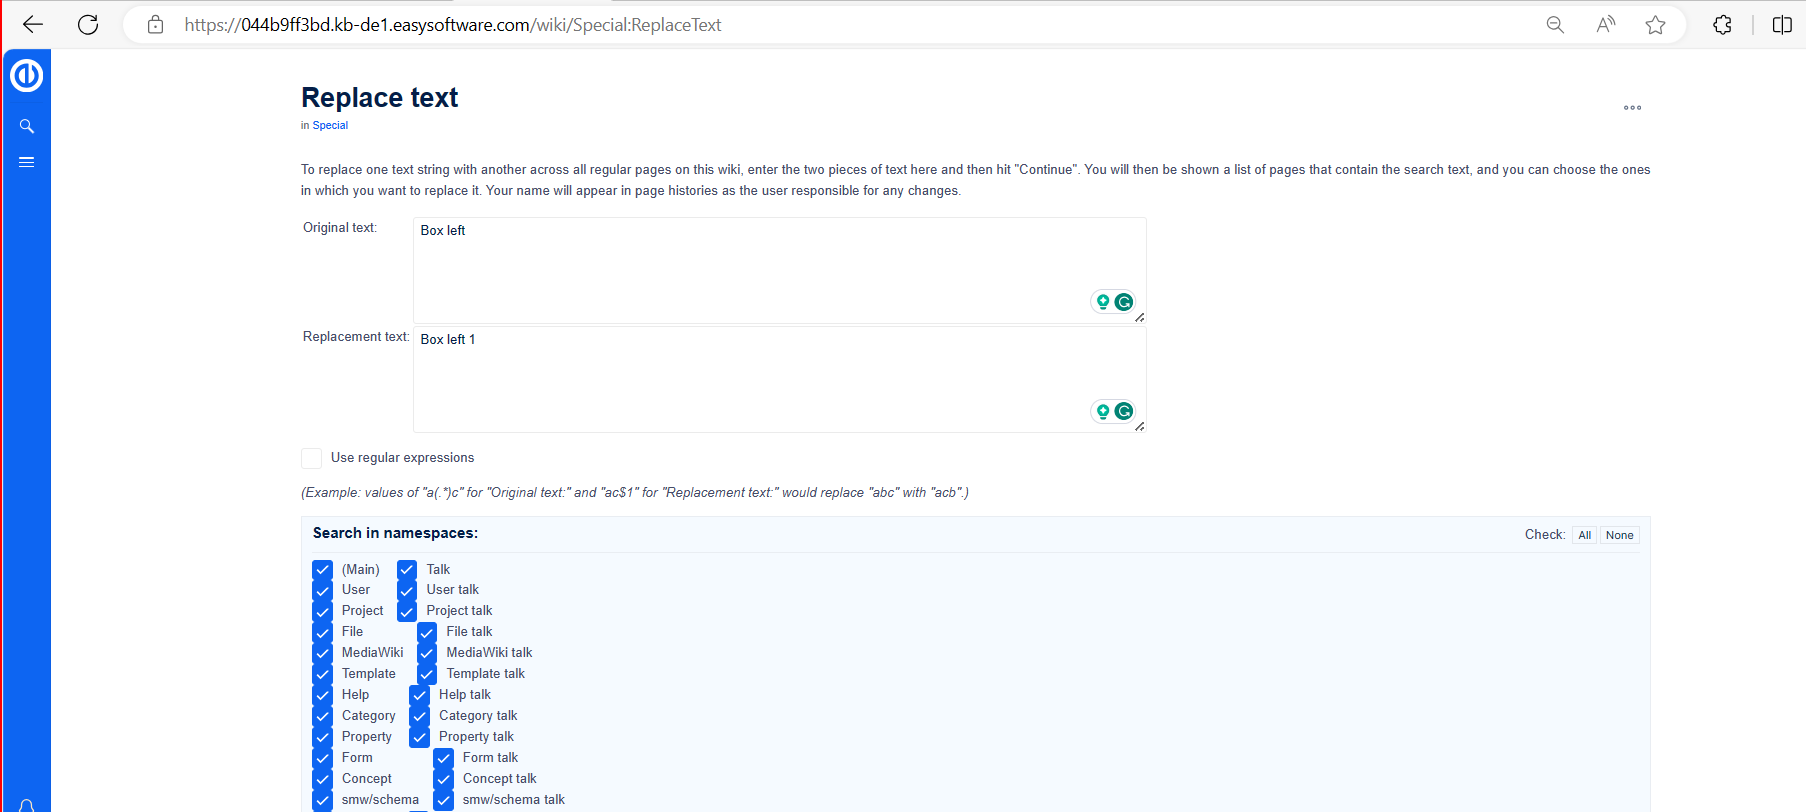
Select all wiki sections using the "All" button to find existing references to the original page.
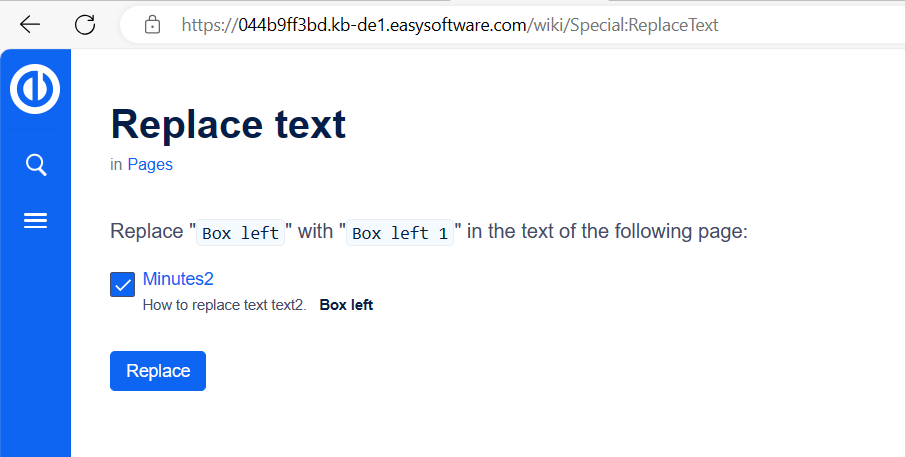
If you click on "Continue," the text will not be replaced immediately. First, an overview page with the results found will be displayed. Check which results you want to replace and check the corresponding boxes. Click "Replace" to perform the replacement.
The last page will confirm that the wiki has now completed the text replacements.
- Your wiki is now correctly linked, and the page renaming process is complete. Depending on the number of replacements, it may take some time before the changes become visible, as the changes made through this special page are processed in the background queue.
Redirects
What is a Redirect?
A redirect is a technique that automatically guides users from one page to another. When you redirect a page that contains content, users won't see the content of the redirected page but only the content of the target page.
When to Use a Redirect
Pages are typically redirected in the following scenarios:
- Abbreviations
- Synonyms
- Duplicate content
- Spelling variants
- Plural/singular forms
- Renaming/moving a page
How to Redirect a Page
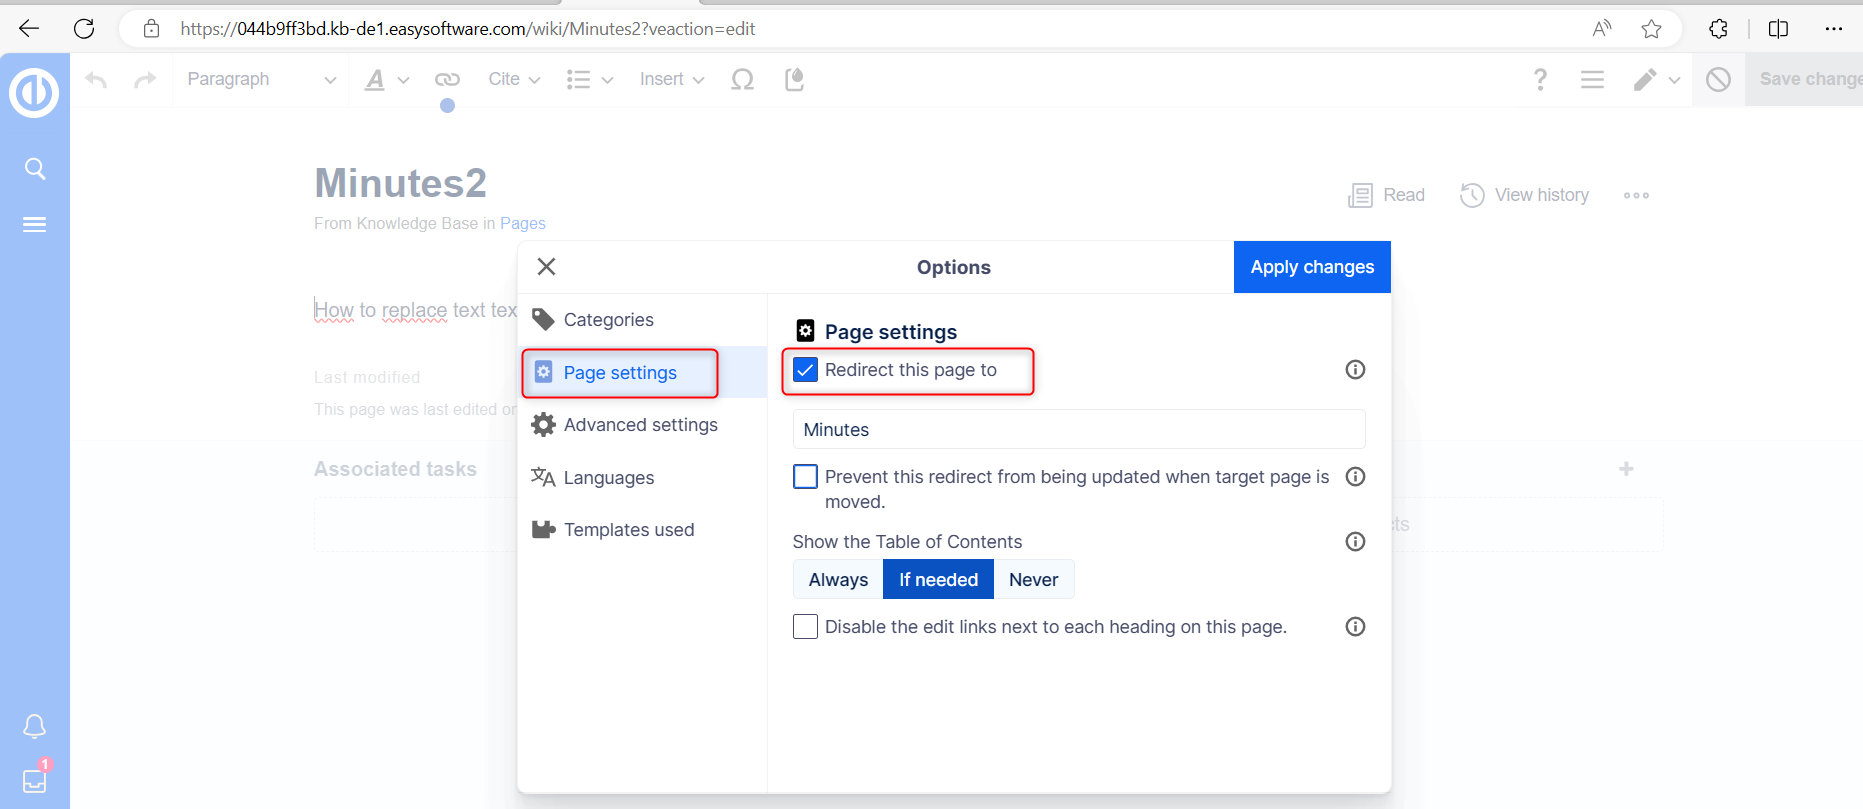
In Editing Mode
- Click the options menu in the visual editor toolbar and select the "Page settings" link.
- Activate the checkbox "Redirect this page to" and enter the name of the target page.
- Click "Apply changes."
Source Editing Mode
At the very beginning of the page, insert the redirect instruction and save the page:
There's no need to delete the content of the page. The content remains, but readers won't see it as long as the redirect is in place. If you remove the redirect code, the original content will become visible again.
At the very beginning of the page, insert the redirect instruction and save the page:
#REDIRECT [pagename of target page]
There is no need to delete the content of the page. The content is simply no longer visible to readers as long as the redirect is included on the page. If you remove the code for redirecting the page, the original content will be loaded again.
Clicking on the page name of the redirected page opens the original page.
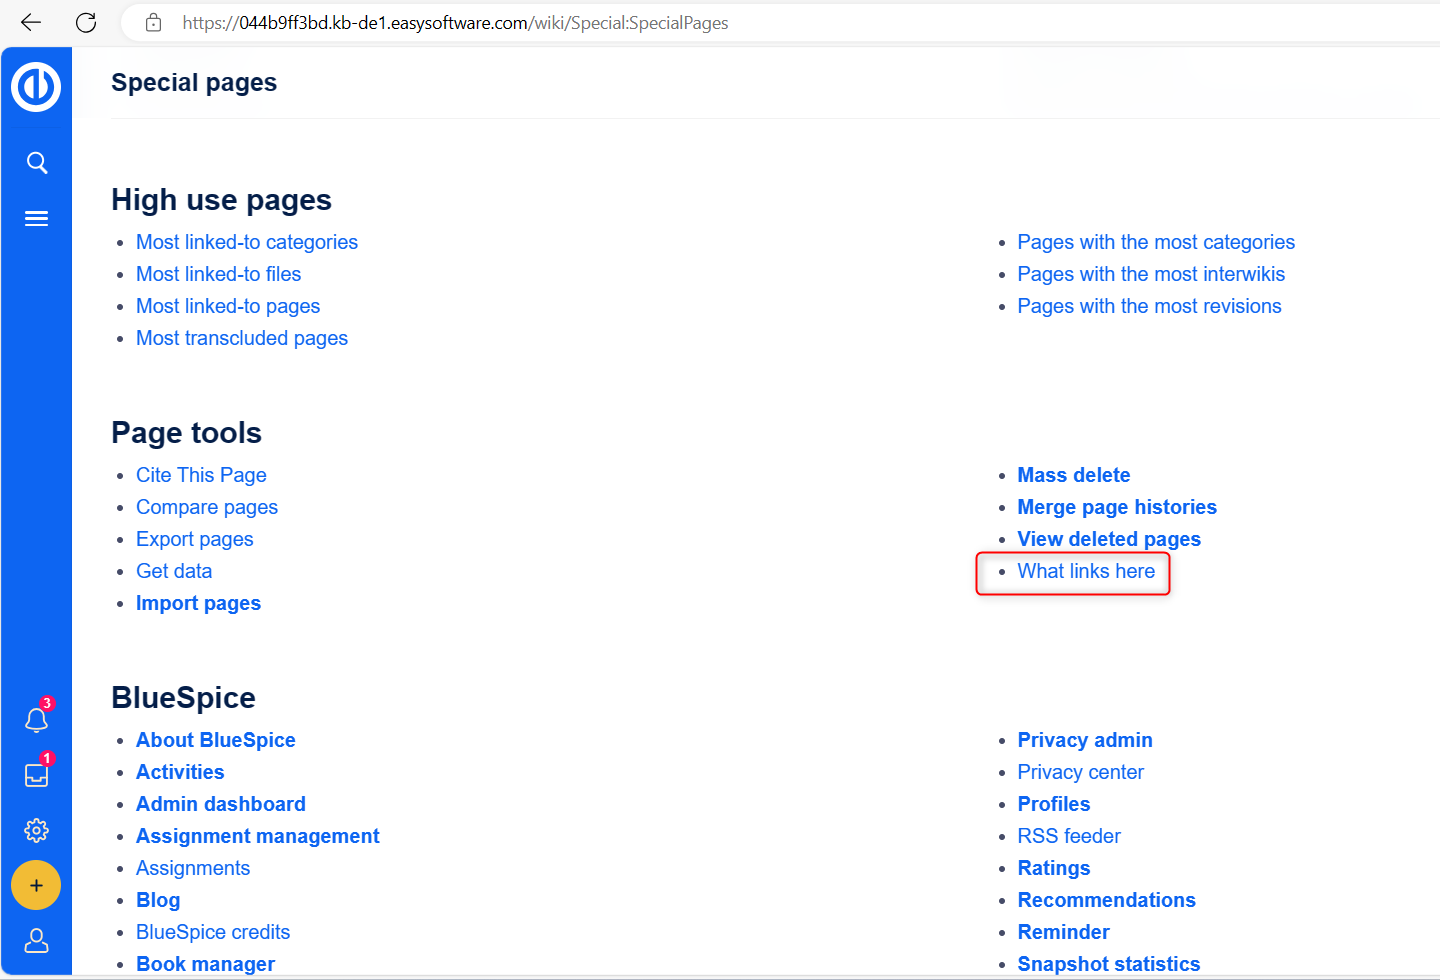
Managing Page Redirects
Special Pages
All redirected pages on the wiki are listed on the special page "Special:ListRedirects." Additionally, pages for broken redirects and double redirects can be found in the maintenance reports on the Special pages. You can access these from "Global actions" > "Special pages."
To maintain the quality of your wiki, it's important to regularly review these pages and fix any broken or double redirects.
Deleting a Redirect
When you navigate to a redirected page, it shows the source of the redirect. Click on the link to the redirected page to access it. You'll see that the page contains a redirect instruction. When you open the page in edit mode, you'll be asked if you want to remove the redirect.
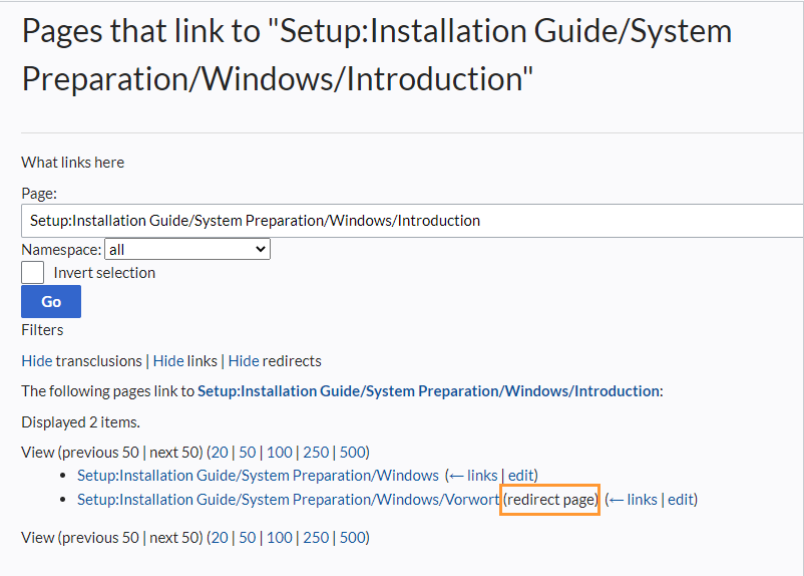
Existing Redirects to the Current Article
The "What links here" page shows if there are redirects to a specific page. You can access this page via the "...all actions" link in the page tools.
Clicking on the page name of the redirected page opens the original page.
Resolving Double Redirects
The page "Special:DoubleRedirects" lists all pages that are redirected from an already redirected page.
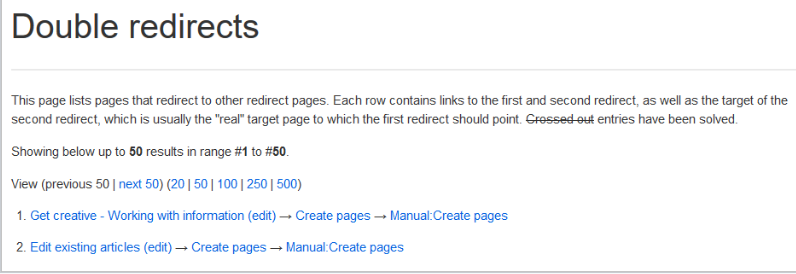
For example, let's consider the page "Edit existing articles," which is redirected to "Create pages," which is in turn redirected to "Manual:Create pages." This double redirect may have occurred when moving the "Create pages" page to the "Manual" namespace.

To resolve the double redirect, you can open the "Edit existing articles" page in the source view. This page is not only redirected but also contains a bookshelf tag. Therefore, you need to decide whether the page should redirect to the final target page or a completely different page. In some cases, it may make more sense to delete the page.
Before deleting an article, always check what other pages link to it by reviewing the information under "Special:WhatLinksHere/Redirects."
Subpages
What is a Subpage?
To organize and structure wiki content, you can create subpages for an article. This is particularly useful when you have a larger topic that you'd like to break down into more manageable sections of information. Subpages can, in turn, have their own subpages, creating a hierarchical structure of content.
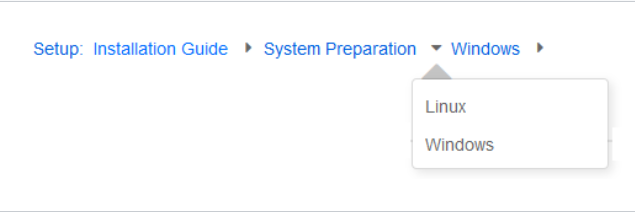
Subpages are automatically displayed in the breadcrumb navigation of the page.
Characteristics of a Subpage
- Syntax-based:A subpage is created by using a slash in the page title (e.g., "parent-page/subpage").
- Navigation:Subpages create navigation points, enhancing the breadcrumb navigation.
- Hierarchy:They enable the creation of "strongly associated" page hierarchies.
- Language Versions:Subpages can be used to manage language versions of a page.
Creating a Subpage
To create a subpage, you append it to the parent page's name with a slash. A subpage can be created for a parent page that does not yet exist. For example:
Installation Guide/System Preparation
Installation Guide/System Preparation/Windows
Installation Guide/System Preparation Windows/IIS
Reasons for Using Subpages
Common applications for subpages include:
- Creating Modular Pages:For larger topics, you can create a main page and link it to individual detail pages. This approach allows detailed pages to be specifically linked from other pages.
- Managing Meeting Minutes:Subpages are often used to collect meeting minutes. For instance, to collect the minutes for Project A, you could generate them as Project A/Minutes/2022-12-02.
- Template-Based Content:Templates can be used to create sets of pages that consistently follow the same structure. Subpages are valuable in such contexts.
- Translation:If you need content from a page to be available in multiple languages, you can create subpages. For instance, you can create a subpage in German for an English page.
- Documenting Templates:For complex templates, you can document their functionality in subpages of the template.
Creating a List of Subpages
To list the subpages of the current page, add the following tag to the source text of the page:
{% raw %}
{{Special:PrefixIndex/{{FULLPAGENAME}}/}}
{% endraw %}
Example:
To display the subpages of the page Edit articles, the syntax is:
{% raw %}
{{Special:PrefixIndex/Edit articles/ |hideredirects=1 |stripprefix=1}}
{% endraw %}
The correct display of the subpages is visible in read mode after saving the page. The list is automatically displayed in a multi-column layout. For more flexibility in the output of subpages, you can work with the Subpage tag.
Output:
Subpages
What is a Subpage?
To organize and structure wiki content, you can create subpages for an article. This is particularly useful when you have a larger topic that you'd like to break down into more manageable sections of information. Subpages can, in turn, have their own subpages, creating a hierarchical structure of content.
Subpages are automatically displayed in the breadcrumb navigation of the page.
Characteristics of a Subpage
Subpages possess several characteristics:
- Syntax-based:A subpage is created by using a slash in the page title (e.g., ">
- Insert images or files
- Tables
- Use this droplet
- Set Template in droplet
- If you want the page to get to a specific NameSpace user Prefix
- Save and done
- The category of document was added from the template
- Think about other categories, like in this demo - team to which the page relates
- Predefined headings serve not only as visual improvement of text but also create a table of contents (at the top of the page)
- New:Supports copy and paste of Excel files
- various text formatting (bullet points, lists, tables, style...)
- The insert function allows to insertion of pre-created templates
- The droplets function is found in the editor bar
- Page options are found in the editor bar
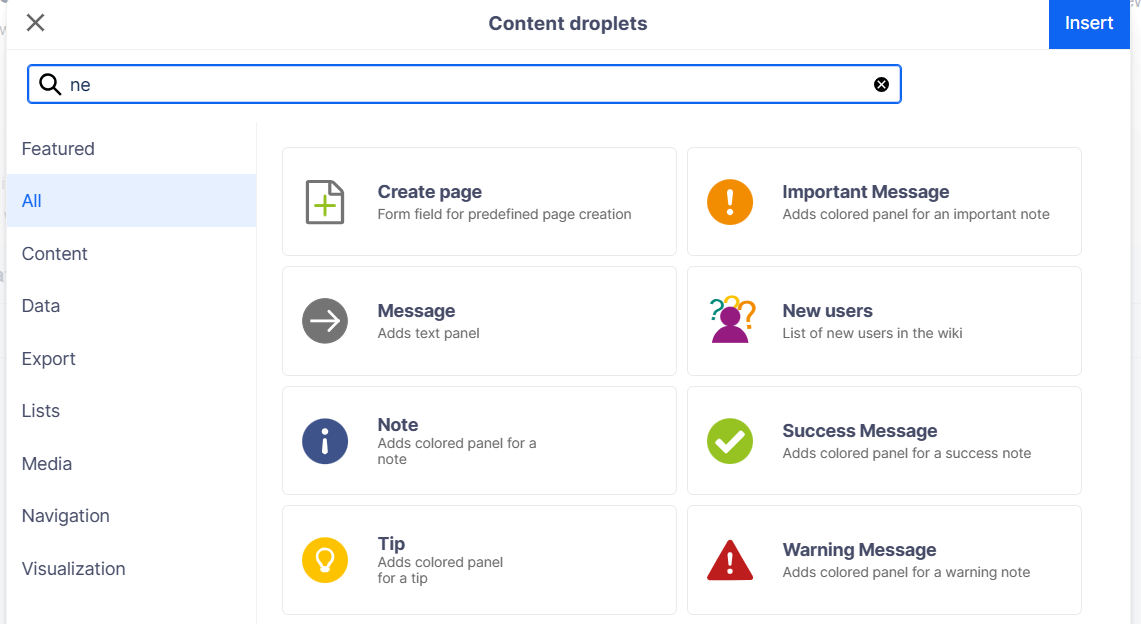
- Click the Content Droplet icon in the VisualEditor toolbar:
Choosing the droplet type - Continue specifying the droplet settings
In the case of a button, the options allow to specify the target URL, the label on the button, and its color. We can also mark the link as external. - Droplet button
- Other droplets feature their own set of configuration options based on the droplet type.
- Save the page. You will now see the droplet in the article.
- Quick Search:This feature searches article and file names and titles, but does not perform full-text searches.
- Search Center:Conducts a full-text search across all articles and files in the knowledge base. It also includes searches in Easy Tasks and Projects
- Primary Results: Direct matches for the search term, with exact matches shown in bold.
- The best match often includes a thumbnail preview.
- For example, typing "qual man" when looking for "quality management" initiates the search.
- Tools and Secondary Results: Tools are displayed in the top portion and include buttons to create a page with the current search term as the title (if the user has permission) and to initiate a full-text search for the current term, leading to the Search Center.
- Secondary results in the bottom portion are matches not directly aligned with the given term but may be relevant.
- Term AND other
- Term OR other
- Term NOT other
- Plus-button:Generates a page with the current search term as the title (visible only if the user has permission to create pages).
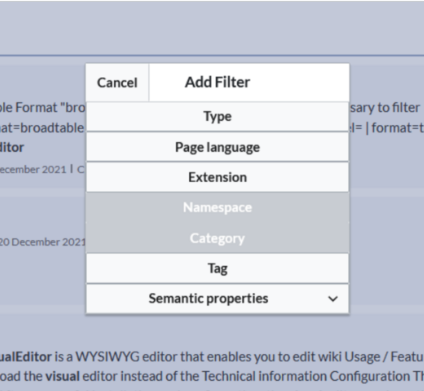
- Funnel button:Opens a dialog allowing users to choose additional filters.
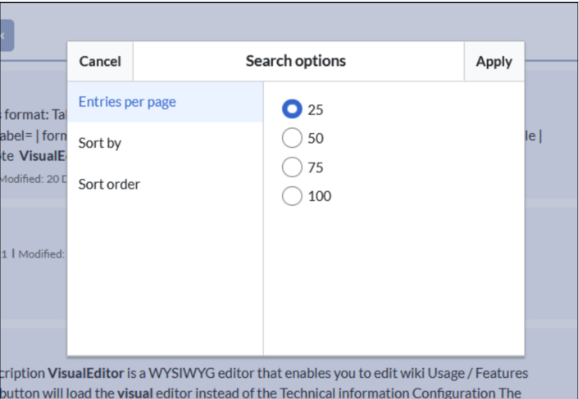
- Gear-button:Provides formatting options such as the number of results per page, sorting field, and order.
- Export-button: Opens a dialog for exporting current search results to a dedicated page (visible to authorized users, typically admin users by default).
- Main title of the result (page title, file name...)
- Result type
- Size and extension (for files)
- Thumbnail image (for images) or file type icon (for other file types)
- Redirect information
- Original name (for pages, if the page display title differs from the actual page title)
- Secondary information like page categories, modification and creation date, author, etc.
- A snippet of the matches in the content of the page (if there are matches in the page content)
- Sections with matches in the content (for pages)
- Log in to Easy Redmine:Sarah logs in to her Easy Redmine account.
- Accessing the Knowledge Base:She navigates to the knowledge base section, providing articles and documentation on various topics.
- Using the Search Function:Sarah enters "Agile Project Management" into the search bar and presses Enter.
- Reviewing Search Results:Relevant articles on Agile methodologies, frameworks, and best practices appear in the results.
- Selecting a Relevant Article:Sarah clicks on "Introduction to Agile Project Management" to learn the basics.
- Reading the Article:She reads through the article, understanding Agile concepts and its benefits.
- Finding Additional Resources:Links to related articles on Scrum and Kanban catch her eye, leading her to explore further.
- Bookmarking for Reference:Sarah bookmarks valuable articles for future reference.
- Engaging with the Content:If she has questions, Sarah can use the comments section to seek assistance from administrators or other users.
- Activation of features:Different functions can be activated in each namespace (e.g., page approvals or read confirmations).
- Search function:Search can be limited to individual namespaces (namespace filter).
- One namespace per page:The same page name in a different namespace creates a new page.
- Flat structure:Namespaces cannot contain other namespaces.
- File associations:Uploaded files can be assigned to a namespace.
- Special pages are generated during system installation.
- Media and image pages are created during file upload.
- User pages are created when a user acts on the knowledge base.
- Discussion pages are also created with corresponding pages.
- Go to the Special page "All Pages."
- Leave the input field empty.
- Select a namespace from the Namespace drop-down menu (newly added namespaces appear at the bottom).
- Click Go.
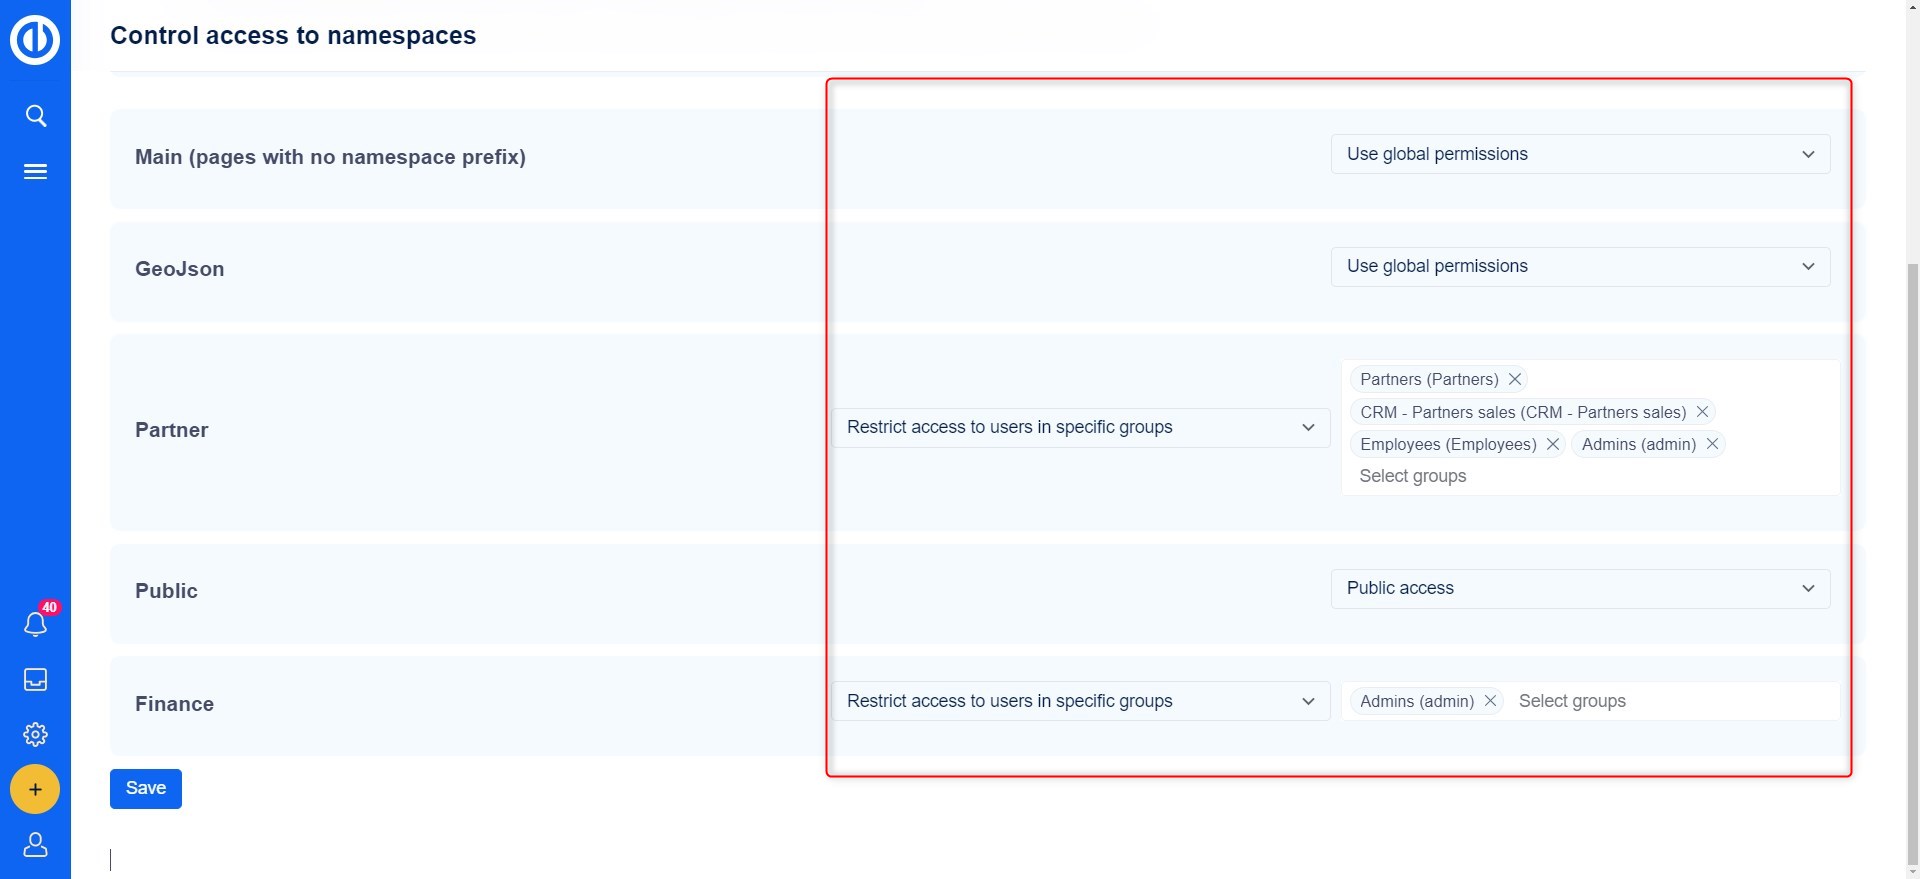
- Use global permissions: No special access control; defaults to global permissions.
- Public access: Anonymous users can read pages in this namespace, but they cannot create/edit pages.
- Restrict access to users in specific groups: Users in specified groups can read and edit pages in this namespace.
- Admins can add page templates to the collection.
- Applicable only for new pages.
- Based on pages in the Template namespace.
- Can be limited to specific namespaces.
- Integration with forms is possible.
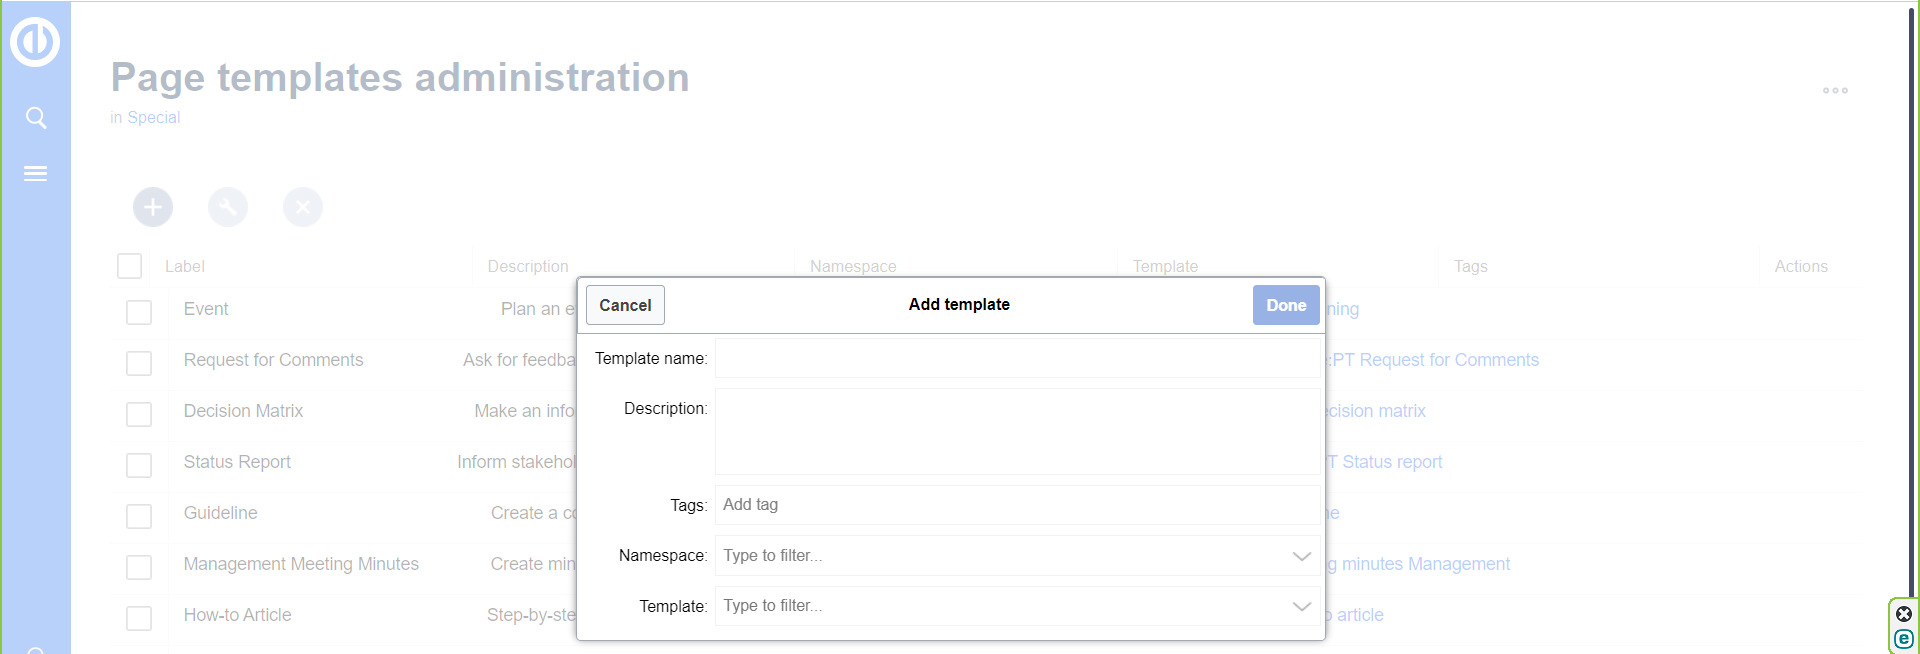
- Name
- Description
- Namespace
- Template (the page in the Template namespace from which to pull content)
- Process - a general template for providing an overview of a process
- How-to - a template designed to guide users through a series of steps
- Troubleshooting - a template created to assist users in systematically addressing and resolving issues
- Use the Content droplet icon in the editor.
- Select the Create Page option.
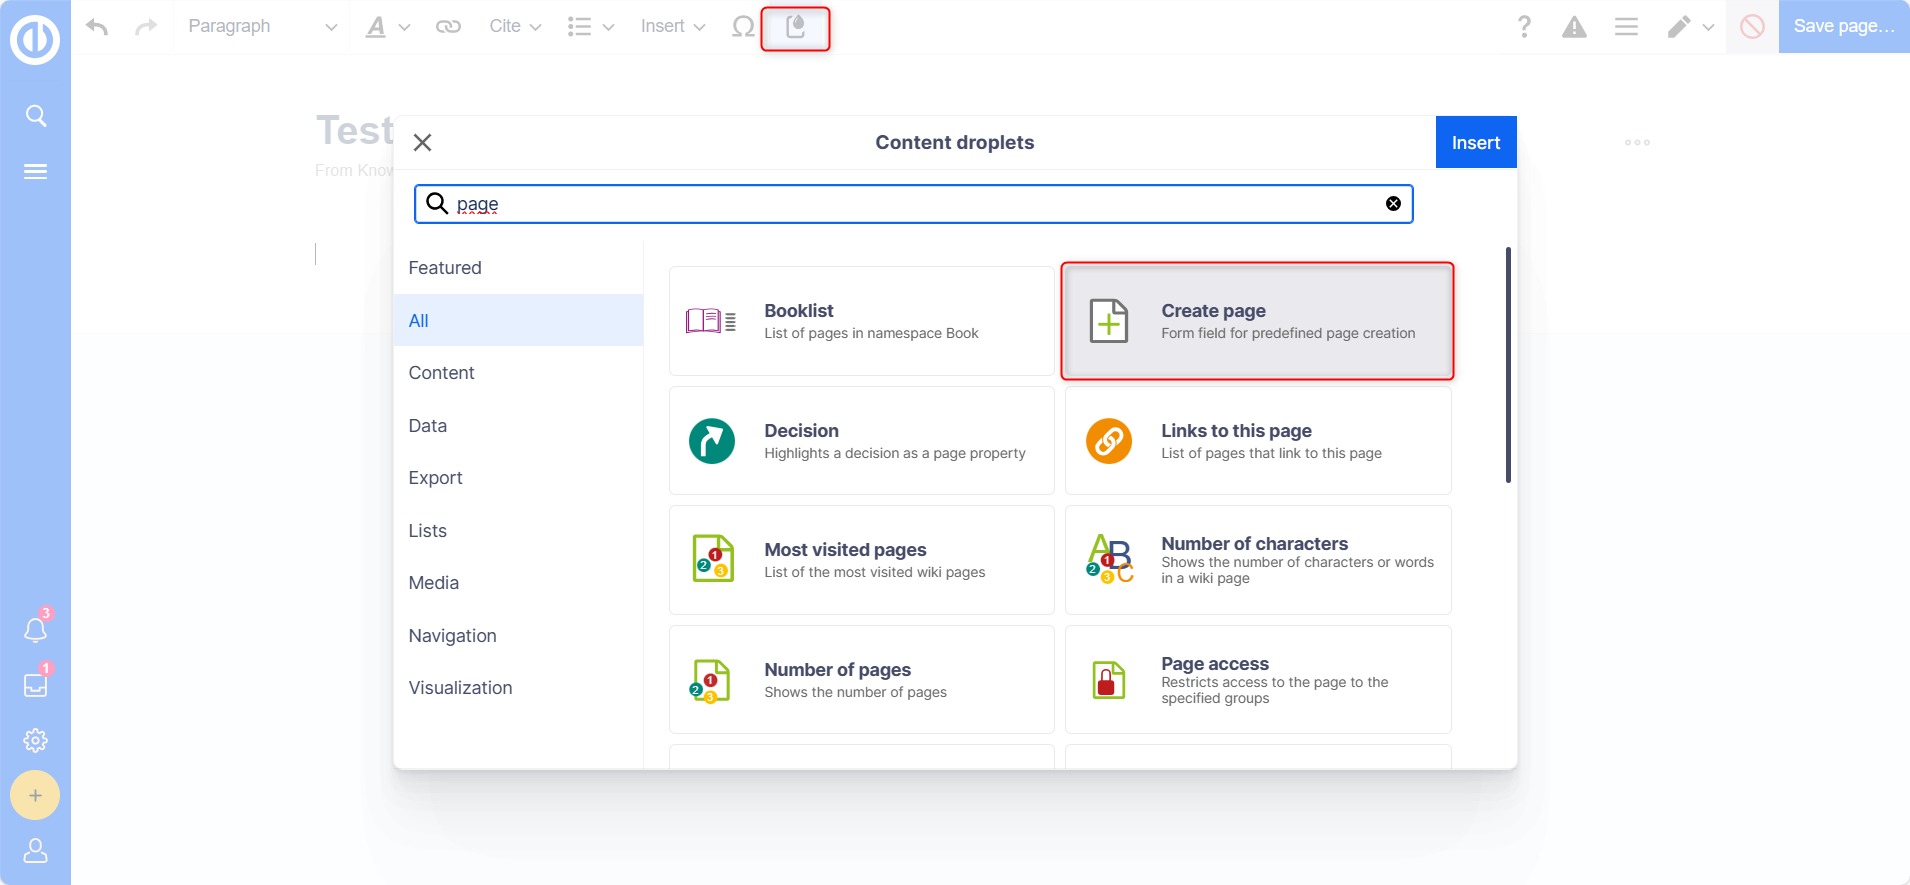
- Define the options and specify the template to be used in the Preloaded Page Content field.
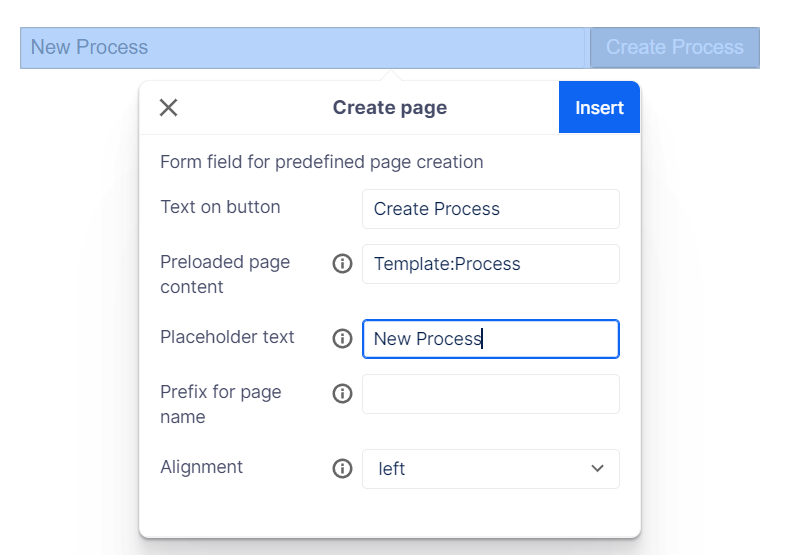
- Click Insert to add the button to the article.
- In summary, page templates offer a versatile and efficient way to maintain consistency and structure in knowledge base content, whether creating extensive documentation or adding structured content within individual pages.
- Read confirmation not enabled:BlueSpiceReadConfirmation is inactive for the page's namespace.
- Not read: BlueSpiceReadConfirmation is active, but assigned users have not read the page.
- Read confirmation log: Links to the page's read confirmation log.
- Request read confirmation: Sends users a reminder to confirm their reading.
- Reminders:Essential for tracking pages (see above).
- Expiration Listing:Necessary for displaying expirations in specific views.
- User-Specific Page Management:Allows viewing and managing pages assigned to a particular user(s).
- Make an assignment.
- View assignments in the Personal Tool under the user icon in the top-right corner.
- Click on Set page assignments in the page tools.
- Type a user or group name in the assignments text box Add assignments...
- Click the Done button.
- Add more users or groups (optional).
- Set a reminder date.
- Make the date a recurring event.
- View and manage a list of personal reminders.
- View a filterable list of all reminders on the wiki.
- Page Creation: Triggers advanced document control.
- Review and edit by a reviewer.
- Approval by the reviewer.
- Validation and approval by an approver.
(Creator, reviewer, and approver should be different users.) - Page Edit: Triggers a simple single-user approval.
- Creates a draft on any saved edit.
- The draft can be reviewed and approved for publishing by the approver.
- The published document remains unchanged until the draft is approved to replace it.
- A comprehensive list of all Knowledge Base pages, filterable by namespace, and accessible through the namespace dropdown window.
- Two special pages handling namespaces: Namespace Manager and Namespace Access, serve functions as described in this article.
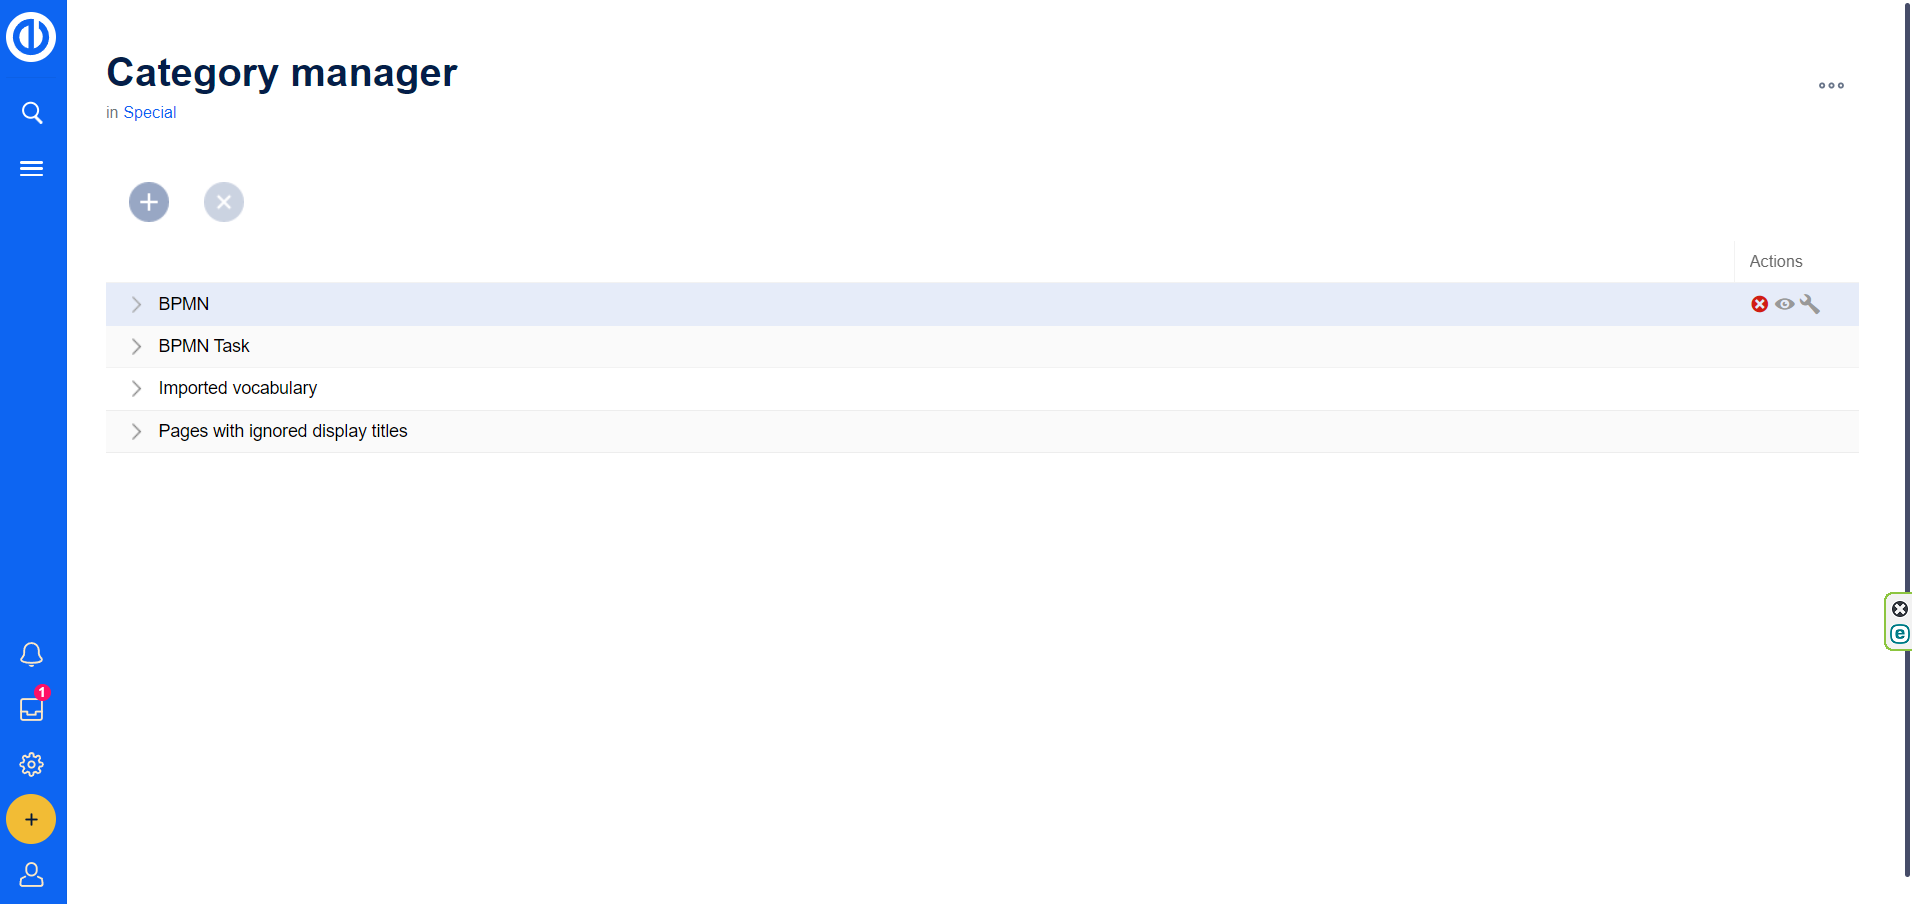
- Allows reviewing, creating, viewing articles, deleting, and renaming categories through intuitive actions.
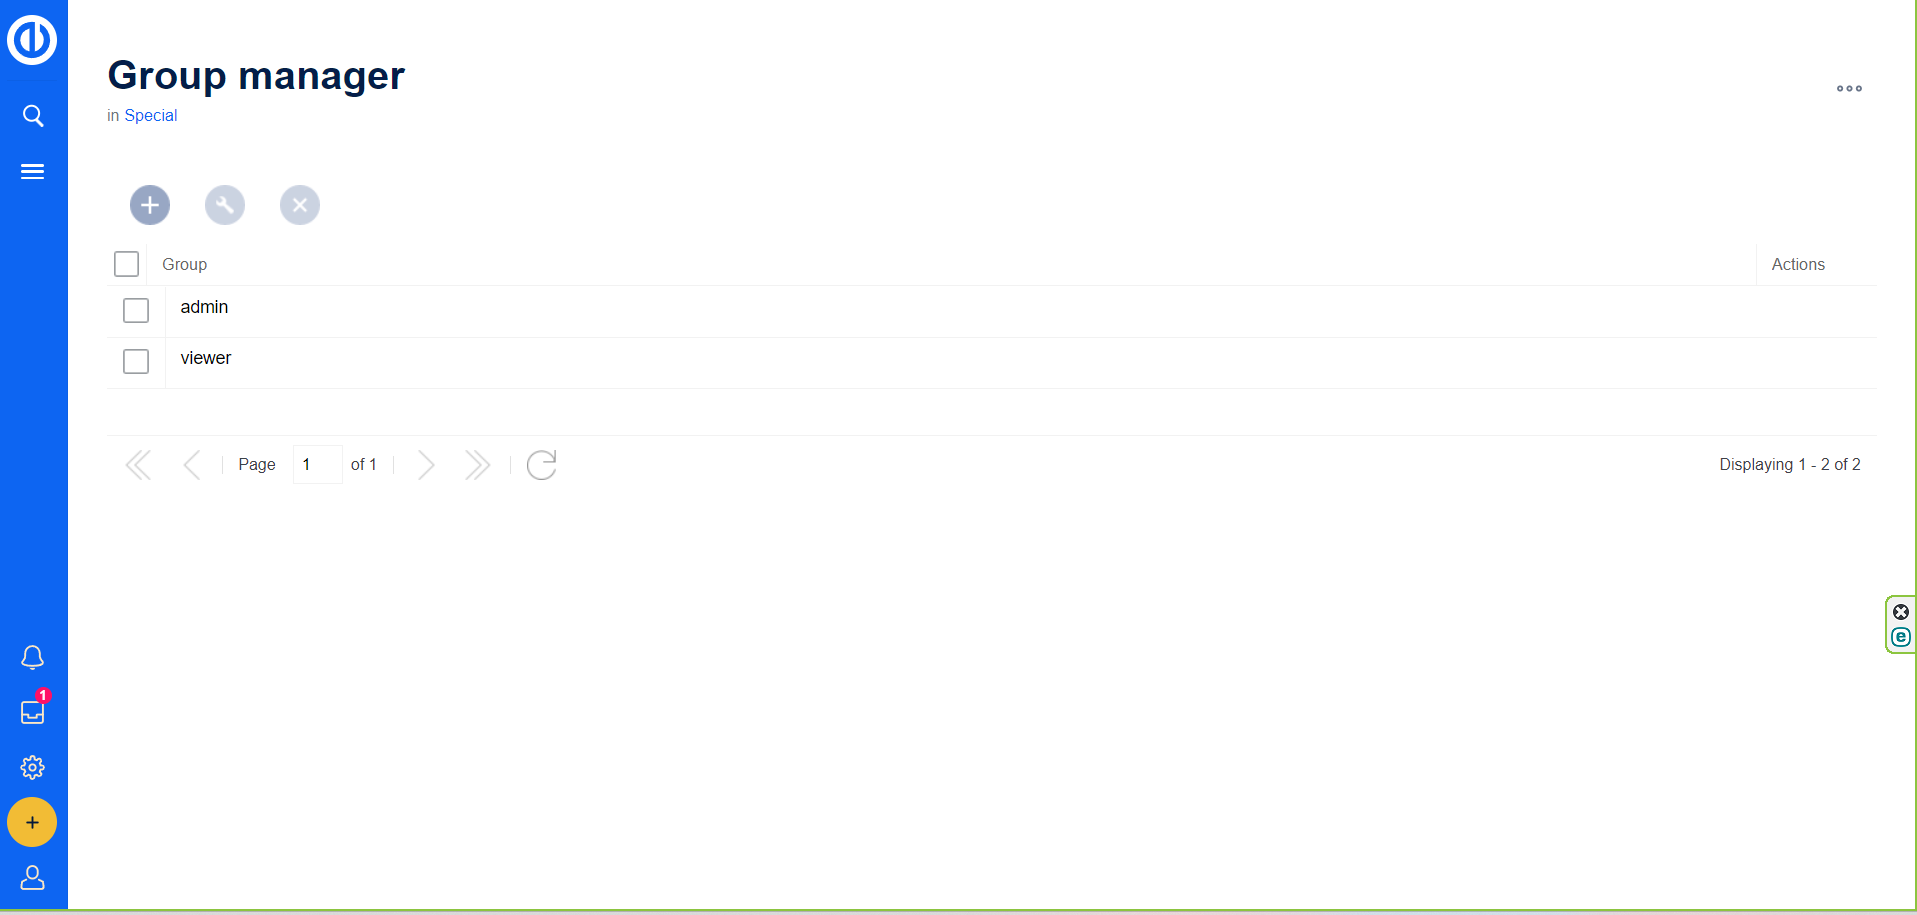
- Manages user groups, facilitating better organization and permission setting, with options to review, create, delete, and rename groups.
- Lists and manages page templates, enabling the creation, deletion, and editing of templates used for new (sub)page creation.
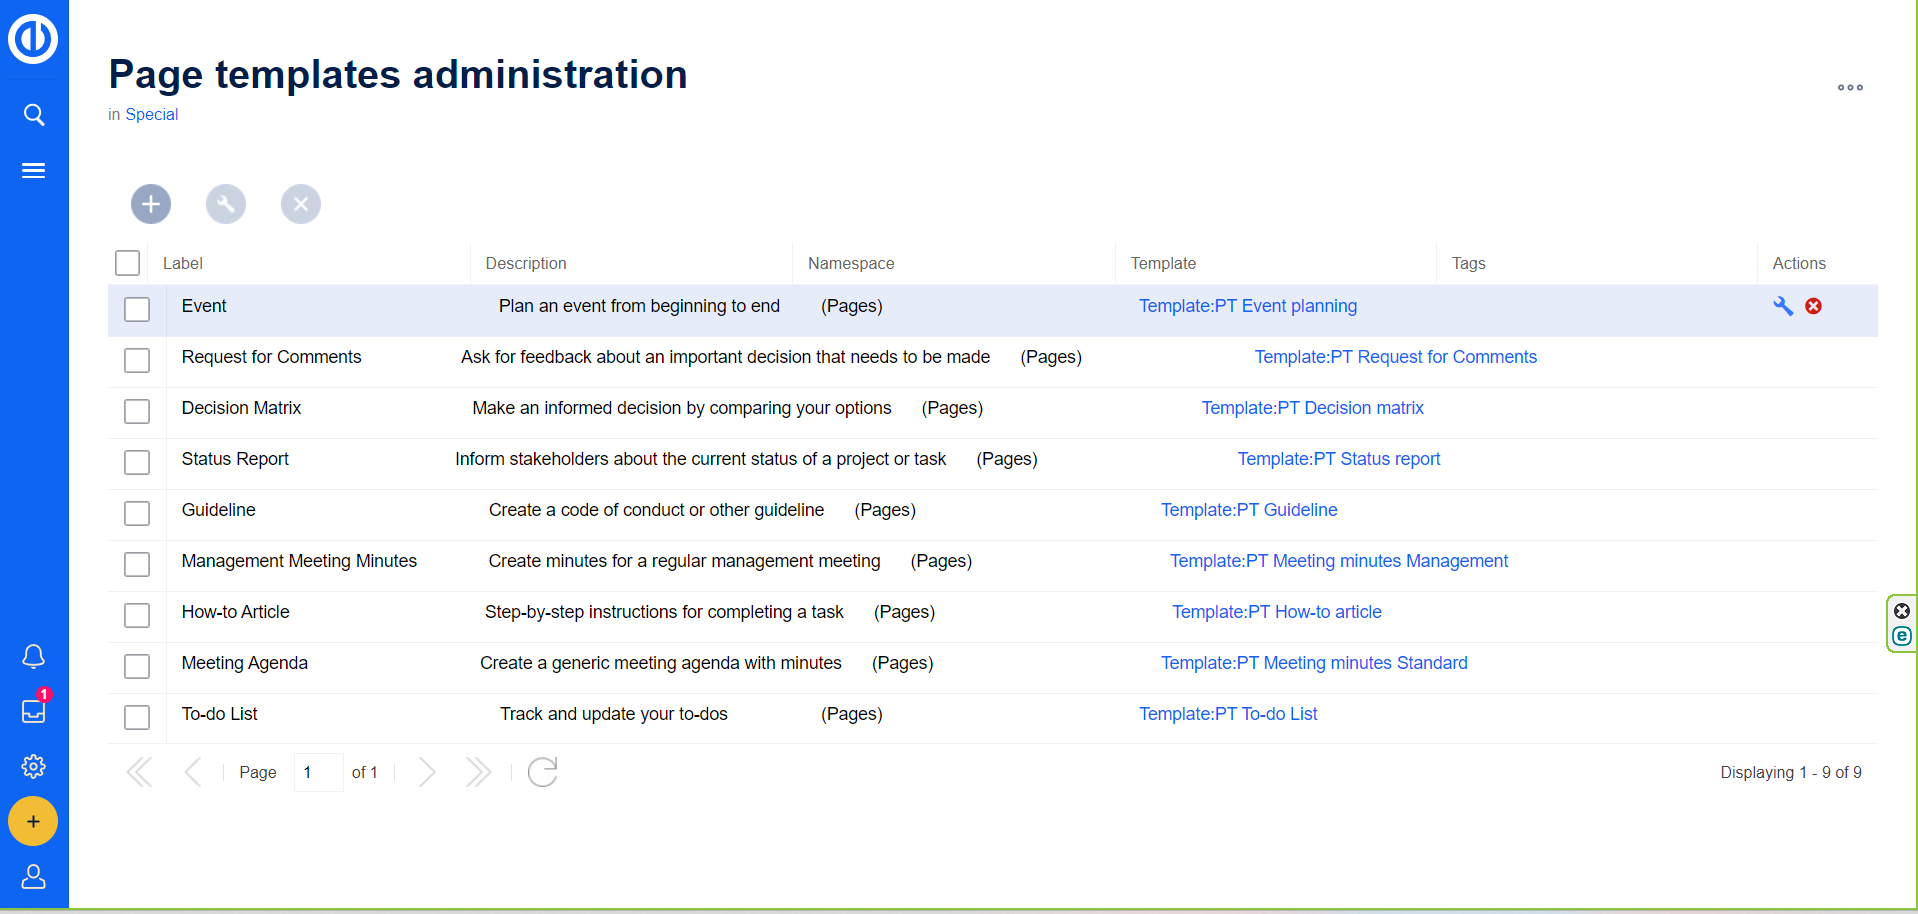
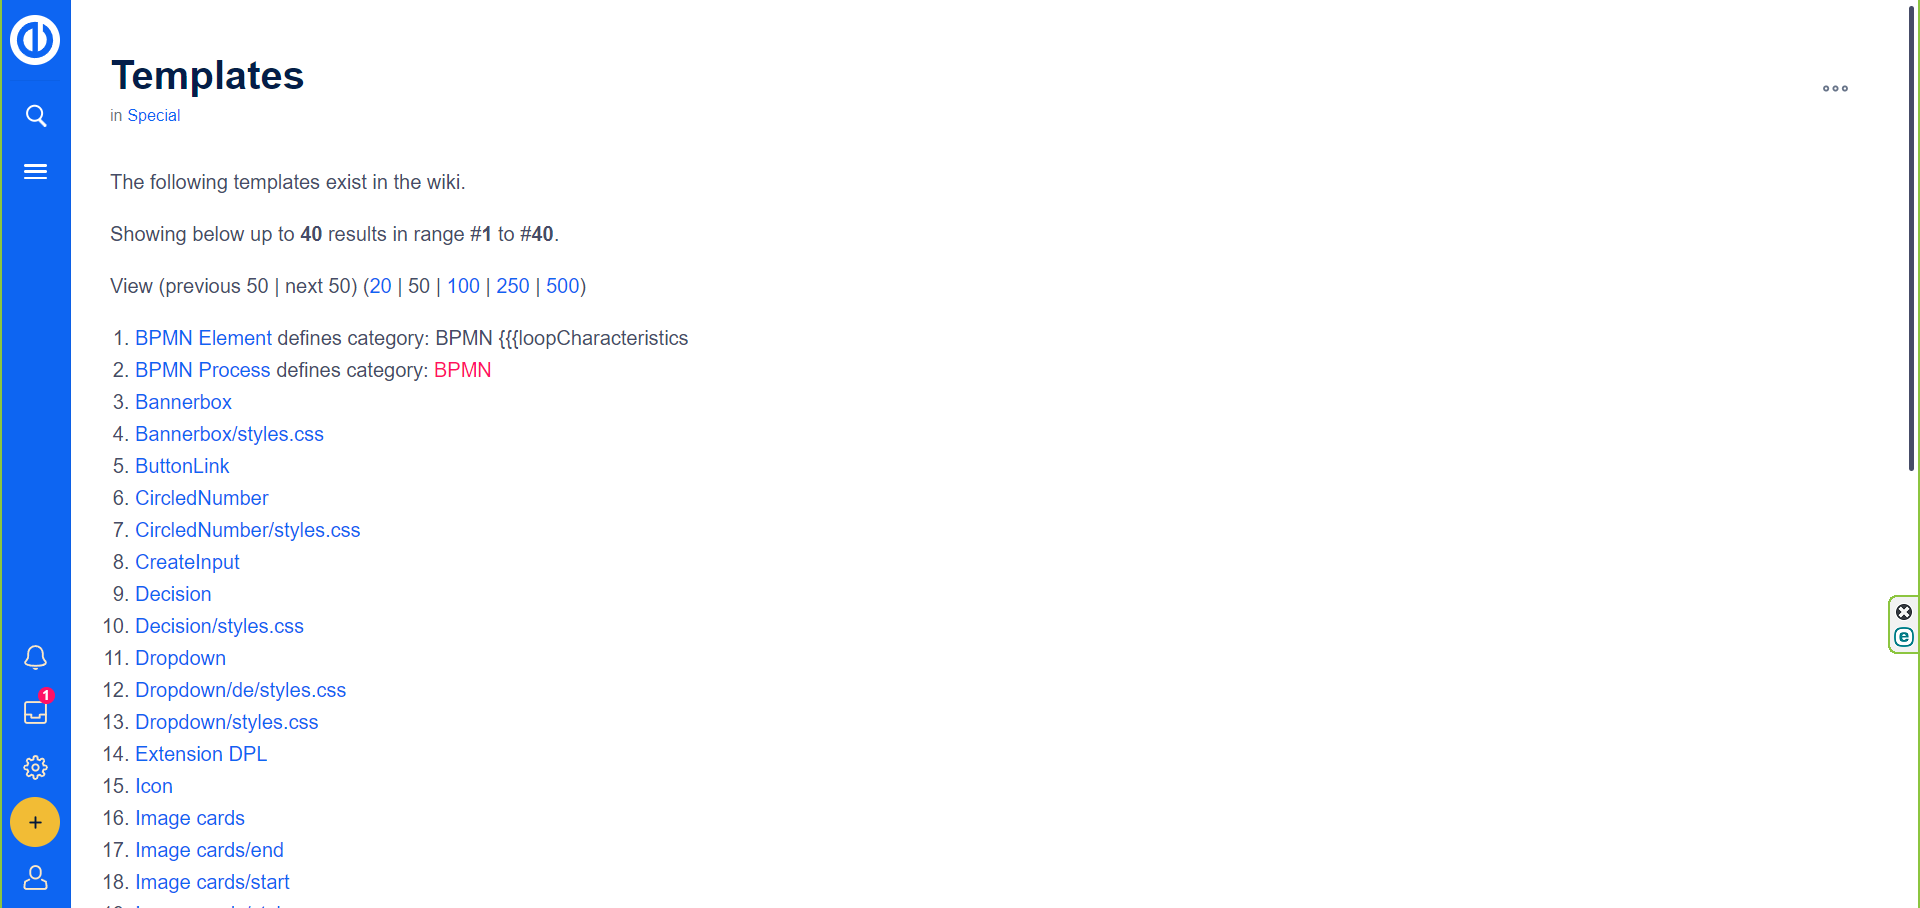
- Lists all templates in the system, used for various purposes, such as page templates, pre-creating article components, and system features.
- Lists redirects leading to non-existent pages, providing useful information on broken links.
- Essential special pages for exporting/importing articles between knowledge bases, allowing diverse uses such as backup, migration, and copying multiple pages.
- For export, pages are added via categories or manually written in the export page box. Exported pages are selected for later use.
- For import, an XML file is uploaded, with attributes like interwiki prefix, user assignment, namespace choice, and the option to import pages as subpages.
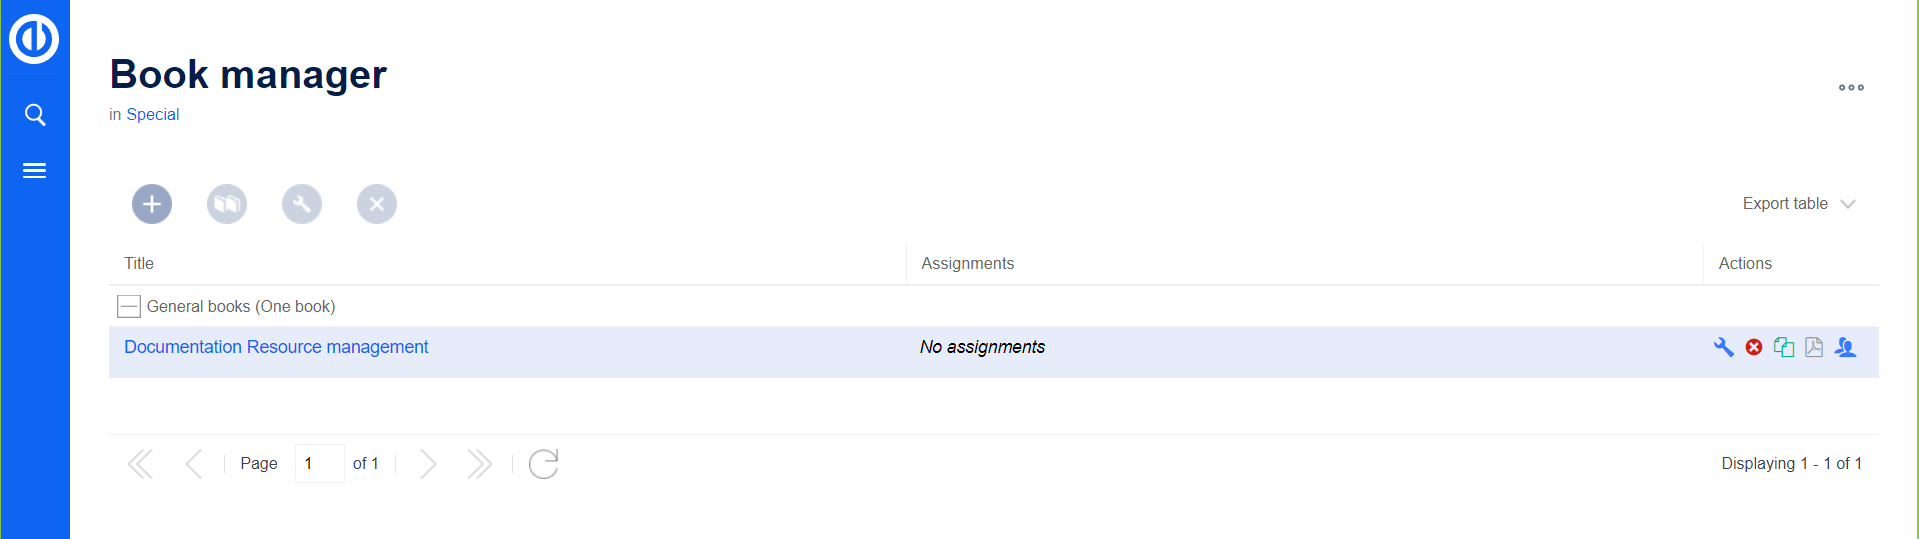
- Lists all created books, with direct links to open and adjust each book's structure. The Book Manager link allows adding new books.
- Click the "Customise" button at the end of the dashboard.

- Select the widget from the list: General > Knowledge article.
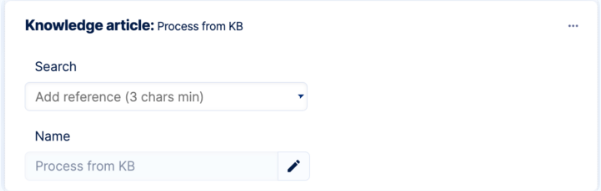
- In the search field, type the article name and choose it from the list. If in a different namespace, type the namespace as a prefix (namespace:article).
- Enter a name for the widget on the dashboard.
- Click "Save the page and go back."
-
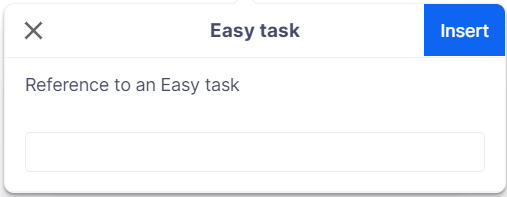
- Type a hash sign (#), opening the Easy task inspector.
- Enter # and a task number or specify the task name.
- Select the task.
- Click "Insert" or use "Insert > Easy Task Reference" from the article editor.
-
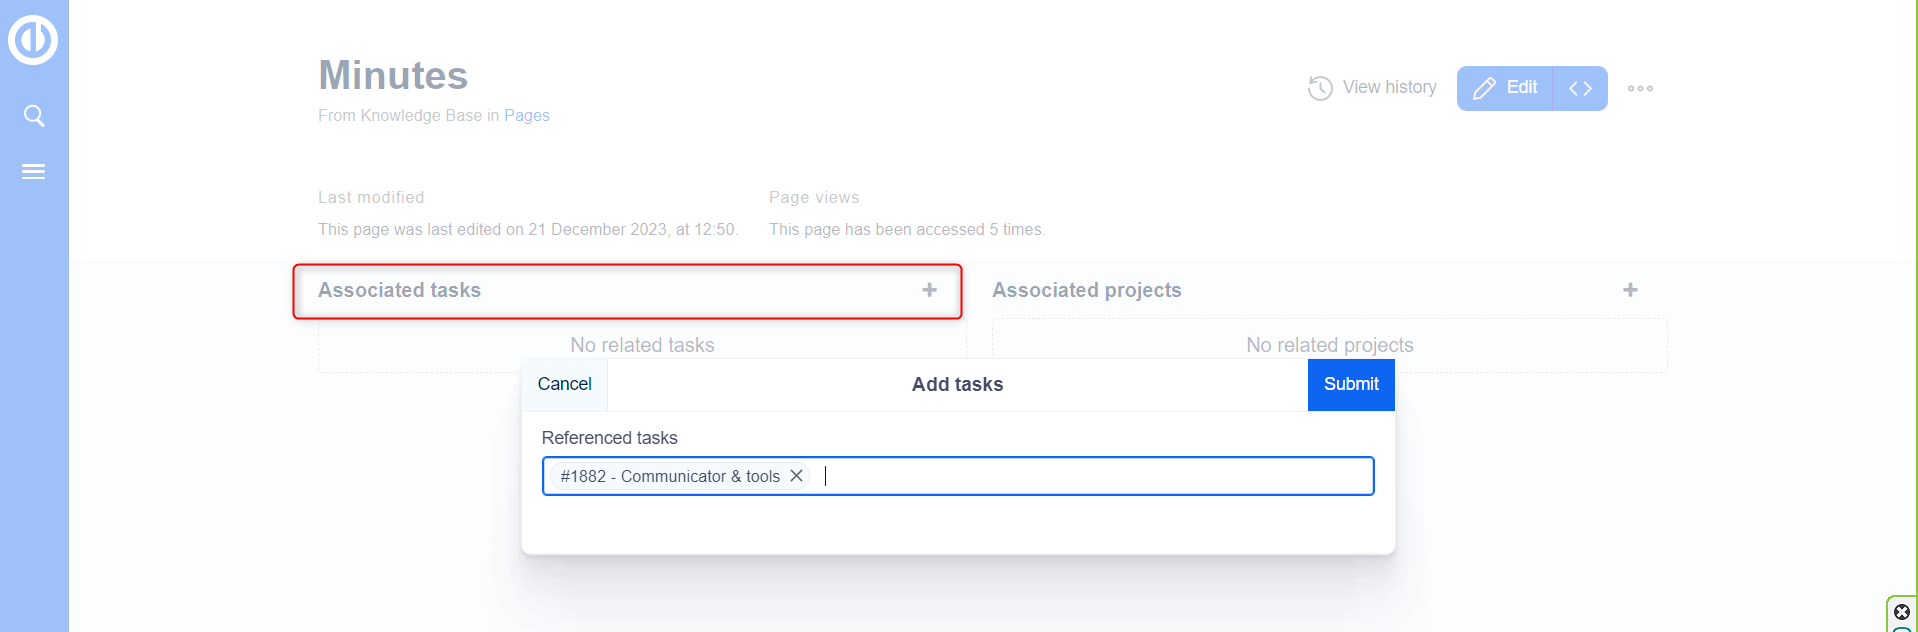
- Find the "Associated tasks" area under the article.
- Click the "Add+" button.
- Enter # and a task number or specify the task name.
- Click "Submit."

- Similarly, associate knowledge articles with projects:
- Find the "Associated projects" area under the article.
- Click the "Add+" button.
- Enter # and a project number or specify the project name.
- Click "Submit."
- The knowledge article references to projects will be listed under the article.
- Droplets will enable the addition of data from Easy Redmine directly to a knowledge article, currently under active development.
Create page directory
Using the droplet Create page allows a user-friendly way to create a page from a template without further know-how.
It is simple:
Using Droplets and Editor
It is possible to add content droplets to upload files anywhere in an article.
Text editor - a few tips and tricks
Creating droplet
The steps to create a new knowledge article are listed in the Creating Articles.
To create file attachments or insert features to a knowledge article:

Search Features
Types of Search
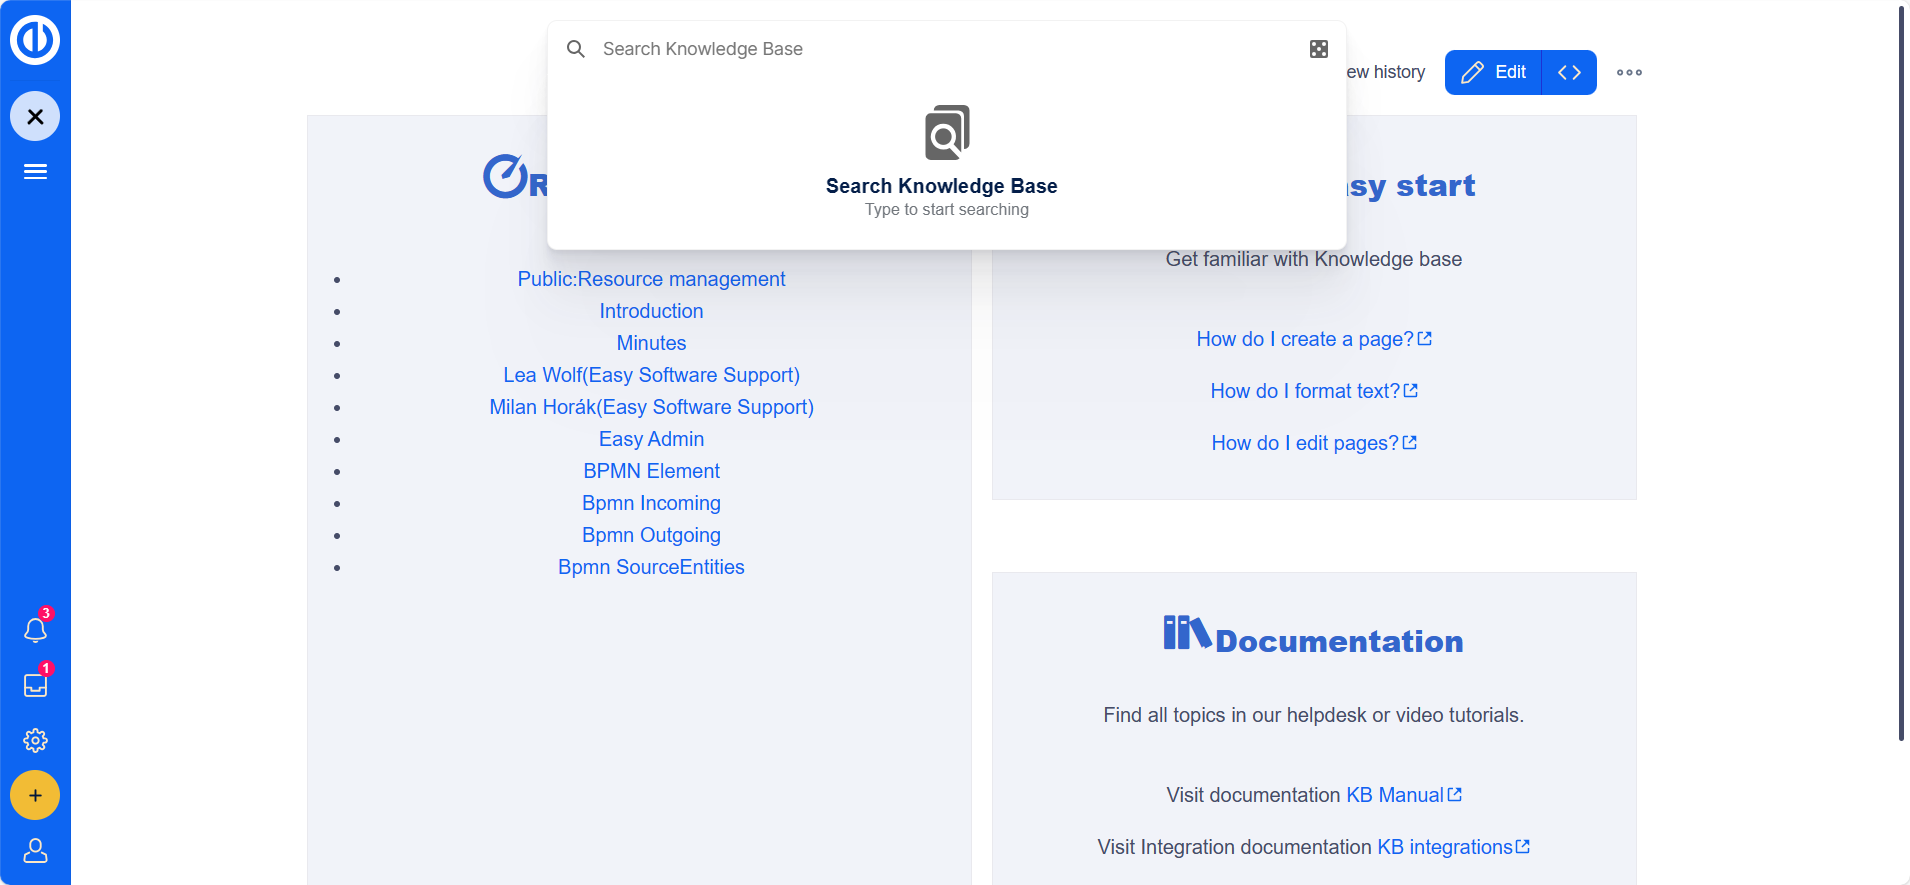
Quick Search
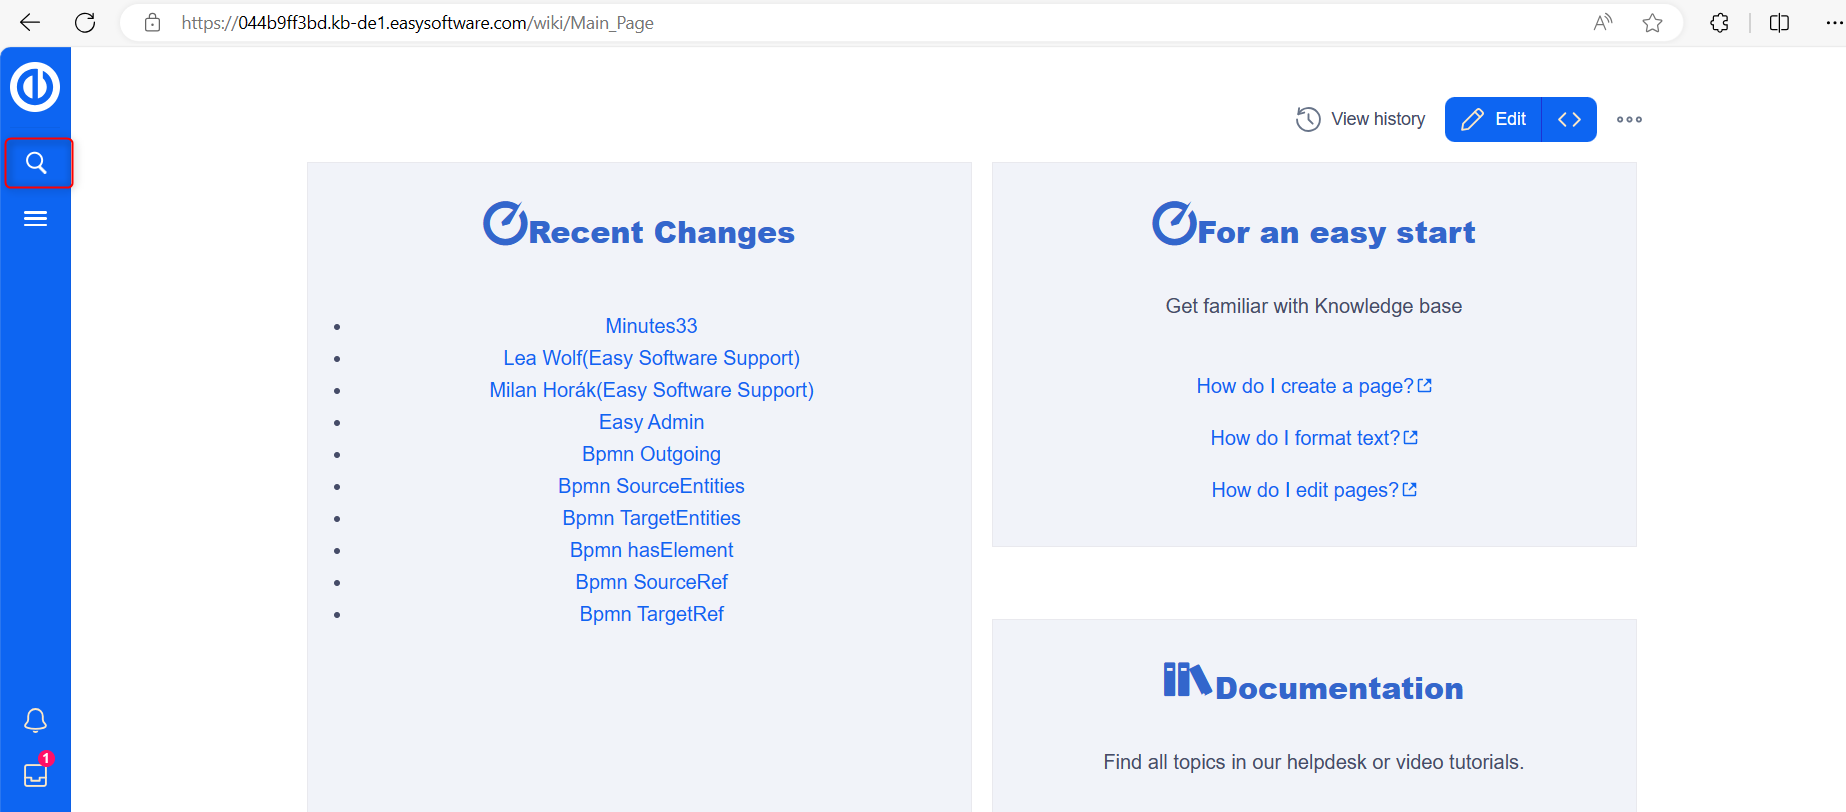
The search box in the Header bar with autocomplete functionality is active when a user is not on the Search Center page. Autocomplete matches only page and file titles, lacking a full-text search.
When typing in the Quick search bar, an autocomplete popup appears.
Autocomplete Popup Structure:
Left Column:
Right Column:
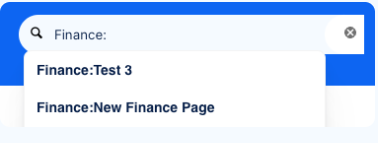
Namespace "Pills"
The autocomplete search bar supports pills for namespaces. For instance, typing "Manual:" limits the search to that namespace.
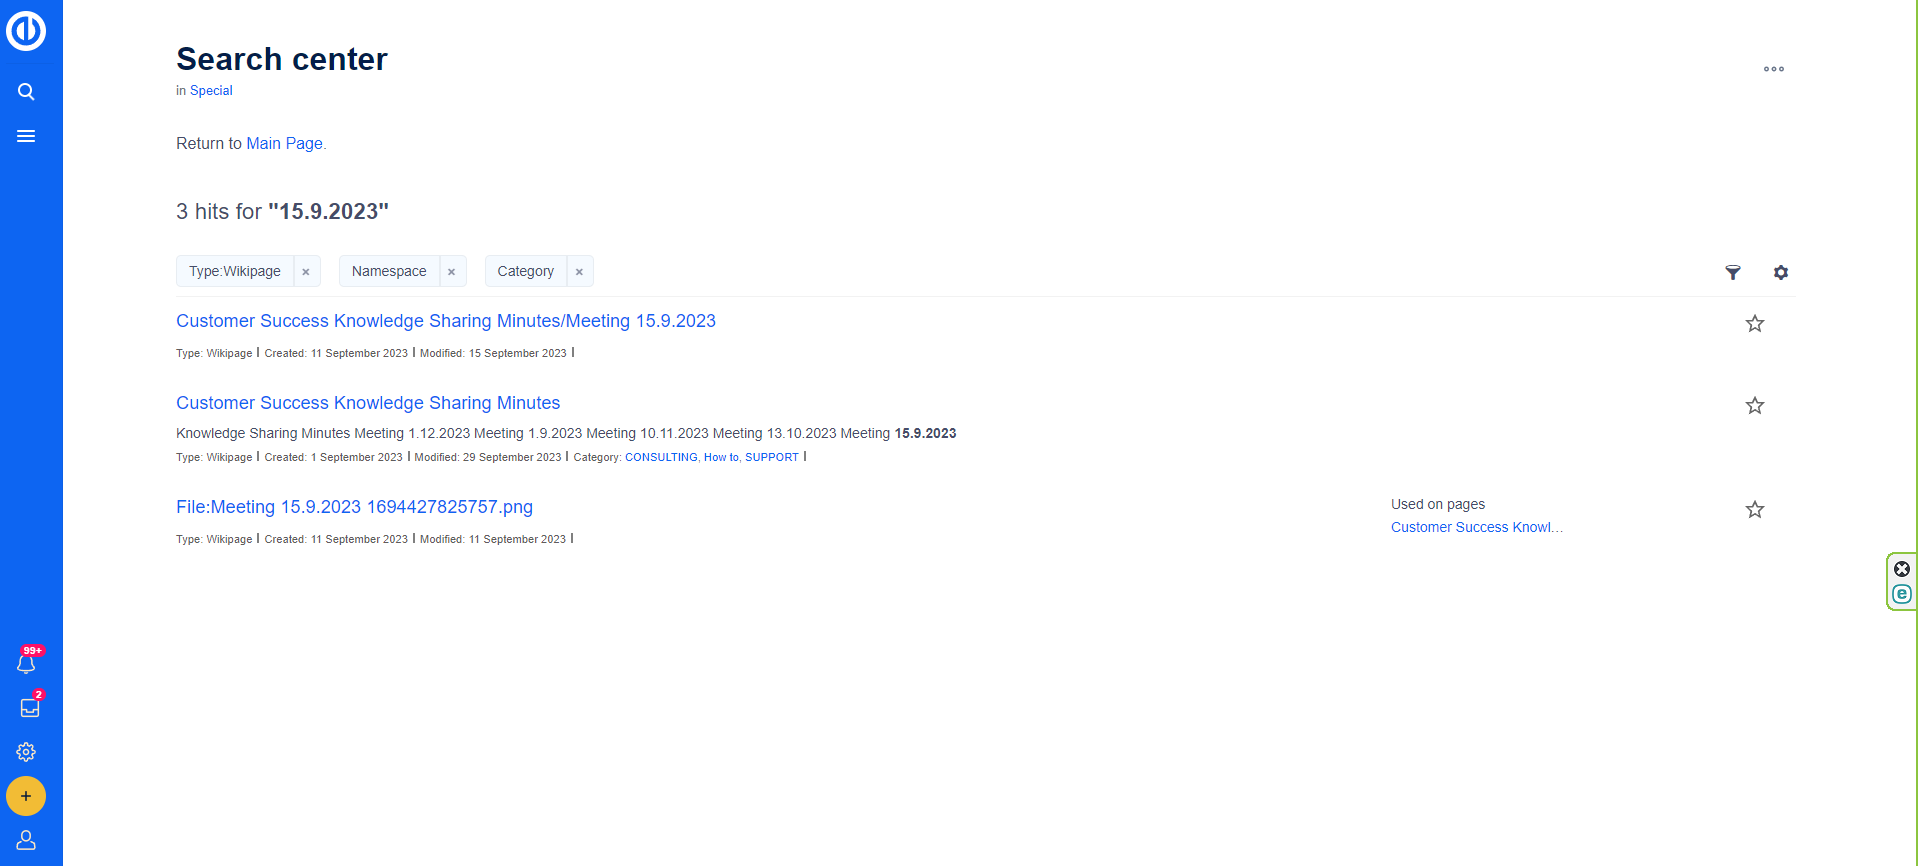
Dates as Search Terms
Certain date formats are recognized, and treated with surrounding quotation marks in the Search Center.
Search Center (Extended Search)
Triggering the full-text search with the magnifying glass symbol or the Enter key switches to the Search Center.
Search Operators
While the Quick Search only searches for titles, search operators such as AND or NOT are supported in the Search Center. The syntax includes:
Operators must be written in uppercase letters. Wildcards are necessary to broaden the search (e.g., Sandbox* AND Widget*).
Elements:
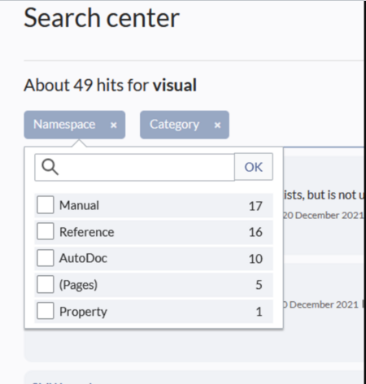
Hit Count: Indicates the number of matches returned by a search. The count may be exact or approximate due to dynamic permission checks, where some results might not be visible to users lacking the necessary permissions, even if they match the search term.
Tools: Positioned in the top right as a set of buttons:
Filter: Displayed as "search pills" below the results counter. Filter values can be adjusted by clicking on the filter pill and selecting desired options from the popup. Filters can be removed by clicking on the "x" button on each pill.
Results:If the current search criteria yield any results, a list is displayed. Information in the results depends on the result type:
If there is an exact match for a given search term, the result matching exactly is showcased as a "featured" result.
Easy Tasks/Projects
To find articles related to Easy Redmine Tasks or Projects, click the light bulb icon in the top menu.

Search Usecase: Finding Information on Agile Project Management
User Scenario:Sarah, a project manager, wants to adopt Agile project management methodologies for her team and uses Easy Redmine's knowledge base to find relevant information.
Steps:
Outcome:Sarah successfully finds relevant articles on Agile project management, gaining insights and resources. She can implement Agile practices effectively, fostering collaborative learning within her organization.
Working with categories
Categorization plays a crucial role in a knowledge base, enabling the organization of content for easy retrieval. Typically, primary categorization revolves around the article type (such as process description, how-to, manual, etc.) and the target audience, often corresponding to specific departments within an organization. However, the utility of categories extends beyond these conventional boundaries.
These categories are arranged in a tree structure to maintain a structured and comprehensible namespace within the knowledge base.
Through effective categorization and the use of namespaces, one can streamline search outputs, develop overview pages, and structure formal documentation, enhancing the overall organization of information.
Categorization output examples
Simple page list for your dashboard:
Getting a list of processes for the sales department (using 2 categories with AND operator on one page):

Detail Listing
View of all processes, with dates, so we can watch the document aging, as well as learn who is the responsible person:

Droplets list - easy to use
Filtering all pages from Namespace Finance
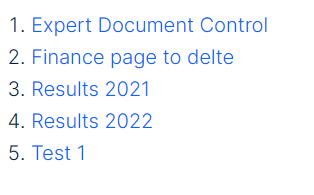
Output:
Namespace Management
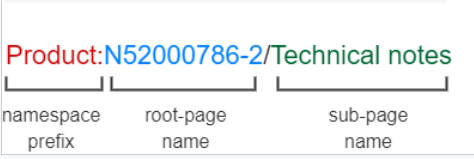
A namespace serves as a defined area within your knowledge base, recognizable by the namespace prefix in the page title format:
<namespace>:Page title
Predefined namespaces exist in your knowledge base, and administrators have the flexibility to create custom namespaces based on specific needs. Before creating a namespace, it is essential to understand its characteristics and the reasons for opting for a custom one.
Custom namespaces can be created to segregate articles (e.g., Meeting minutes, Work instructions, Processes) from other content types or to categorize articles by department.
The article "Namespaces" provides an overview of the logic behind namespaces, including:
What is a namespace?
A namespace defines an area in your knowledge base, identifiable by the namespace prefix in the page title:
<namespace>:Page title
In your knowledge base, predefined namespaces are available, and administrators can create custom namespaces as needed. Consider certain aspects of namespaces before creation, understanding their characteristics and the reasons for using a custom namespace.
You can establish your namespaces to segregate articles (e.g., Meeting minutes, Work instructions, Processes) from other content types or to categorize articles by department.
Characteristics of a namespace:
Standard namespaces:
The system utilizes 15 standard and two pseudo namespaces from the MediaWiki base:
Standard namespace: A page is assigned to the "Main" namespace unless another namespace is specified.
Pseudo namespaces:The two pseudo namespaces (Media, Special) function like normal namespaces but cannot be edited or have pages added to them.
Most pages in namespaces are created automatically:
This leaves only the default namespaces (Main), [knowledge base name], Template, Help, and Category namespaces where pages can be freely created.
Creating a new namespace:
Additional namespaces can be created by going to Global Actions > Management > Namespaces.
Accessing pages in a namespace:
To access or create a page in a specific namespace, its name is placed in front of the page title and separated by a colon:
[Setup:Installation|]
In the example, the pipe symbol is added, ensuring the namespace won't be displayed for the link label.
If you provide a namespace unknown to the knowledge base, the page is created in the standard namespace Main. The specified namespace becomes part of the title and is not recognized as a namespace label.
Viewing all pages of a namespace:
To view all pages in a namespace:
Namespaces
Namespace Manager
Global actions > Management > Namespaces
This interface allows the configuration of individual namespaces and their permitted features. New namespaces can be added or existing ones deleted. The "hide non-content" option, when checked, conceals system namespaces, displaying only content namespaces suitable for the article population.
The Namespace Manager, accessible through Global actions > Management > Namespace access, controls access to namespaces. Users can regulate access levels for individual namespaces, ensuring that only designated users can read the articles.
Options for managing access include:
Access settings are configured directly on the individual namespaces listed on the page.
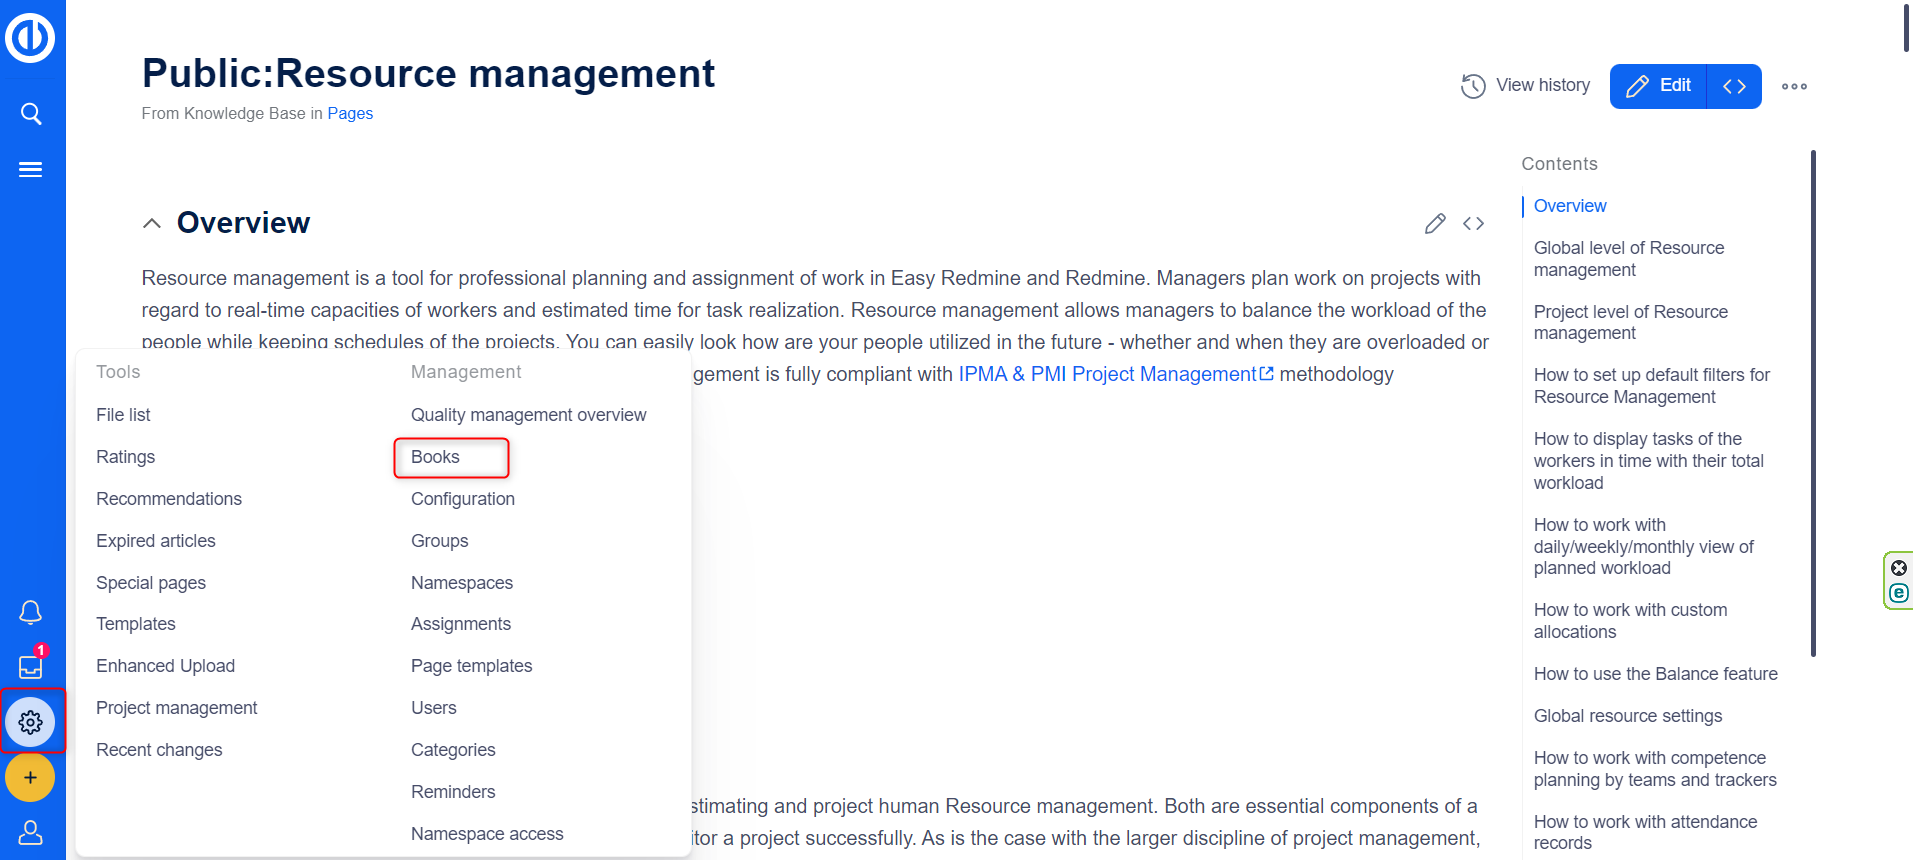
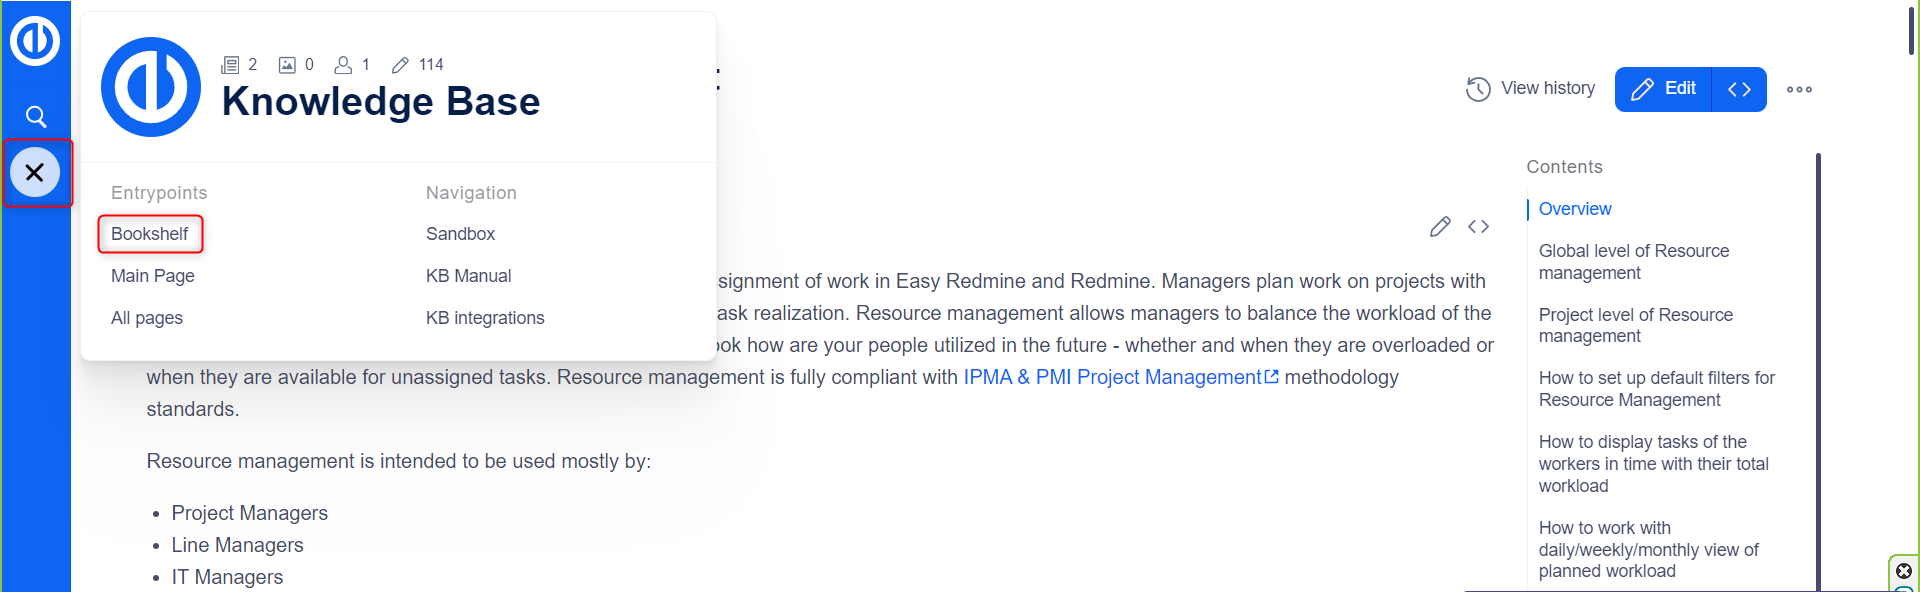
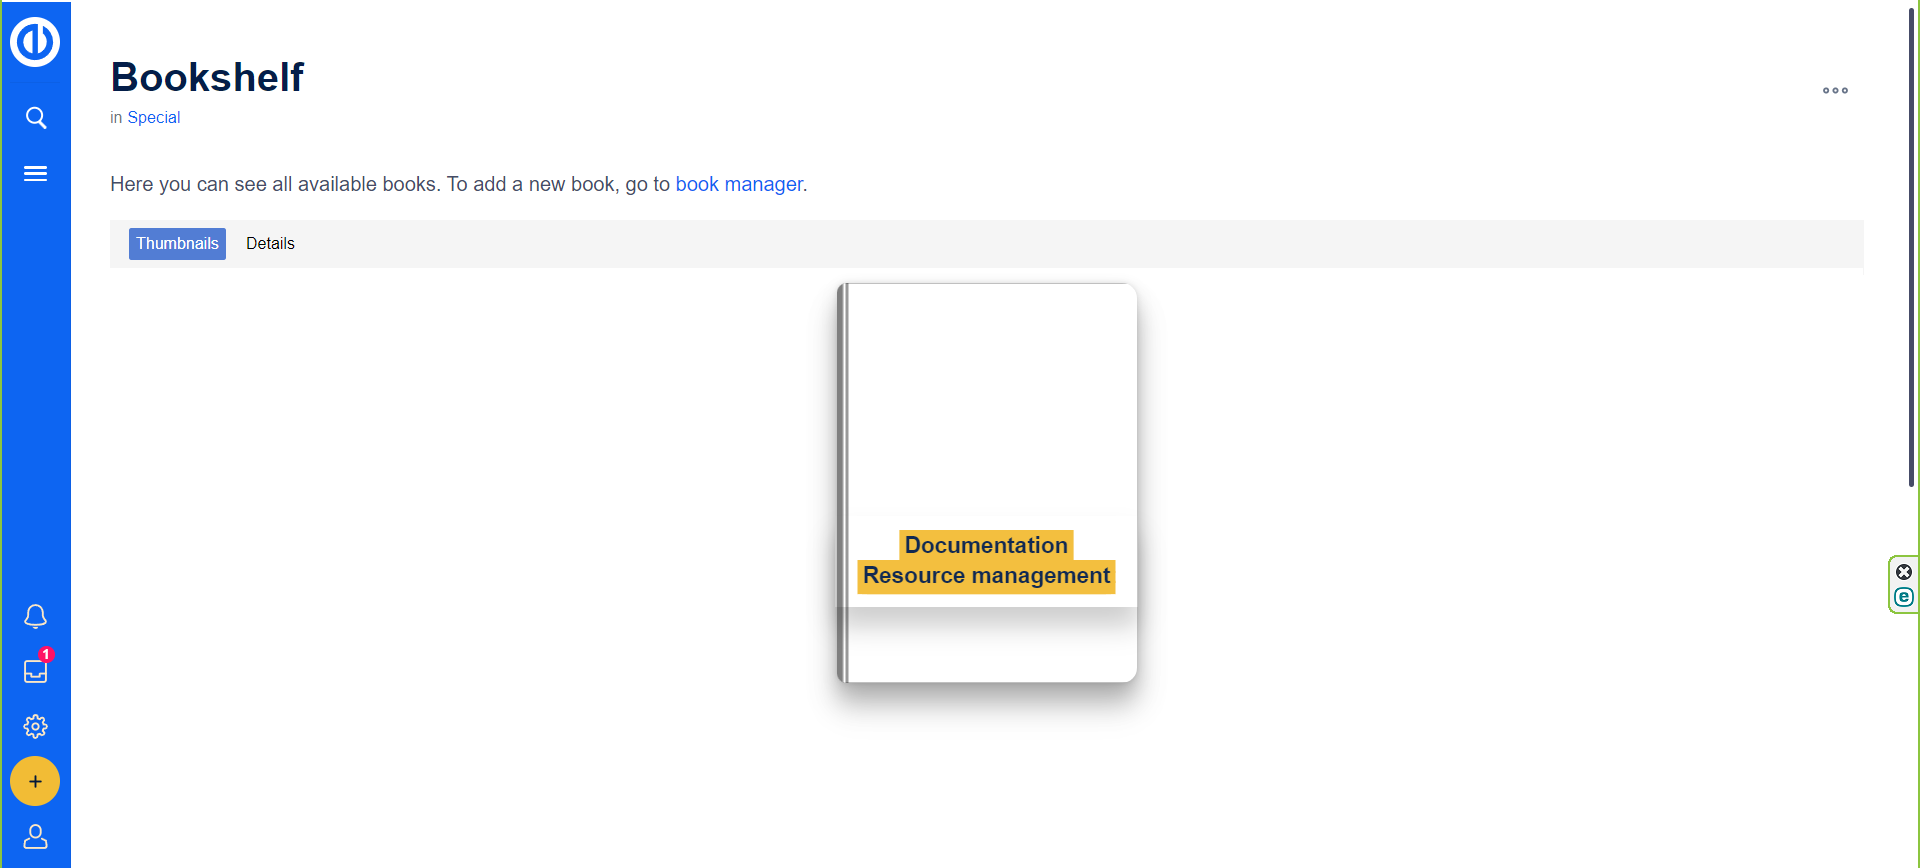
Books
Usage: The Books feature enables the creation of extensive manuals, guides, documentation, or similar content by assembling existing pages into a cohesive book.
How it Works: Pages can be arranged according to the author's preferences, establishing a hierarchy and organizing sections. Consequently, when viewing a book, a left navigation pane is provided, facilitating user orientation through the extensive content.
The content of a book is dynamic, allowing updates to individual pages to automatically reflect in the book's content without any additional action.
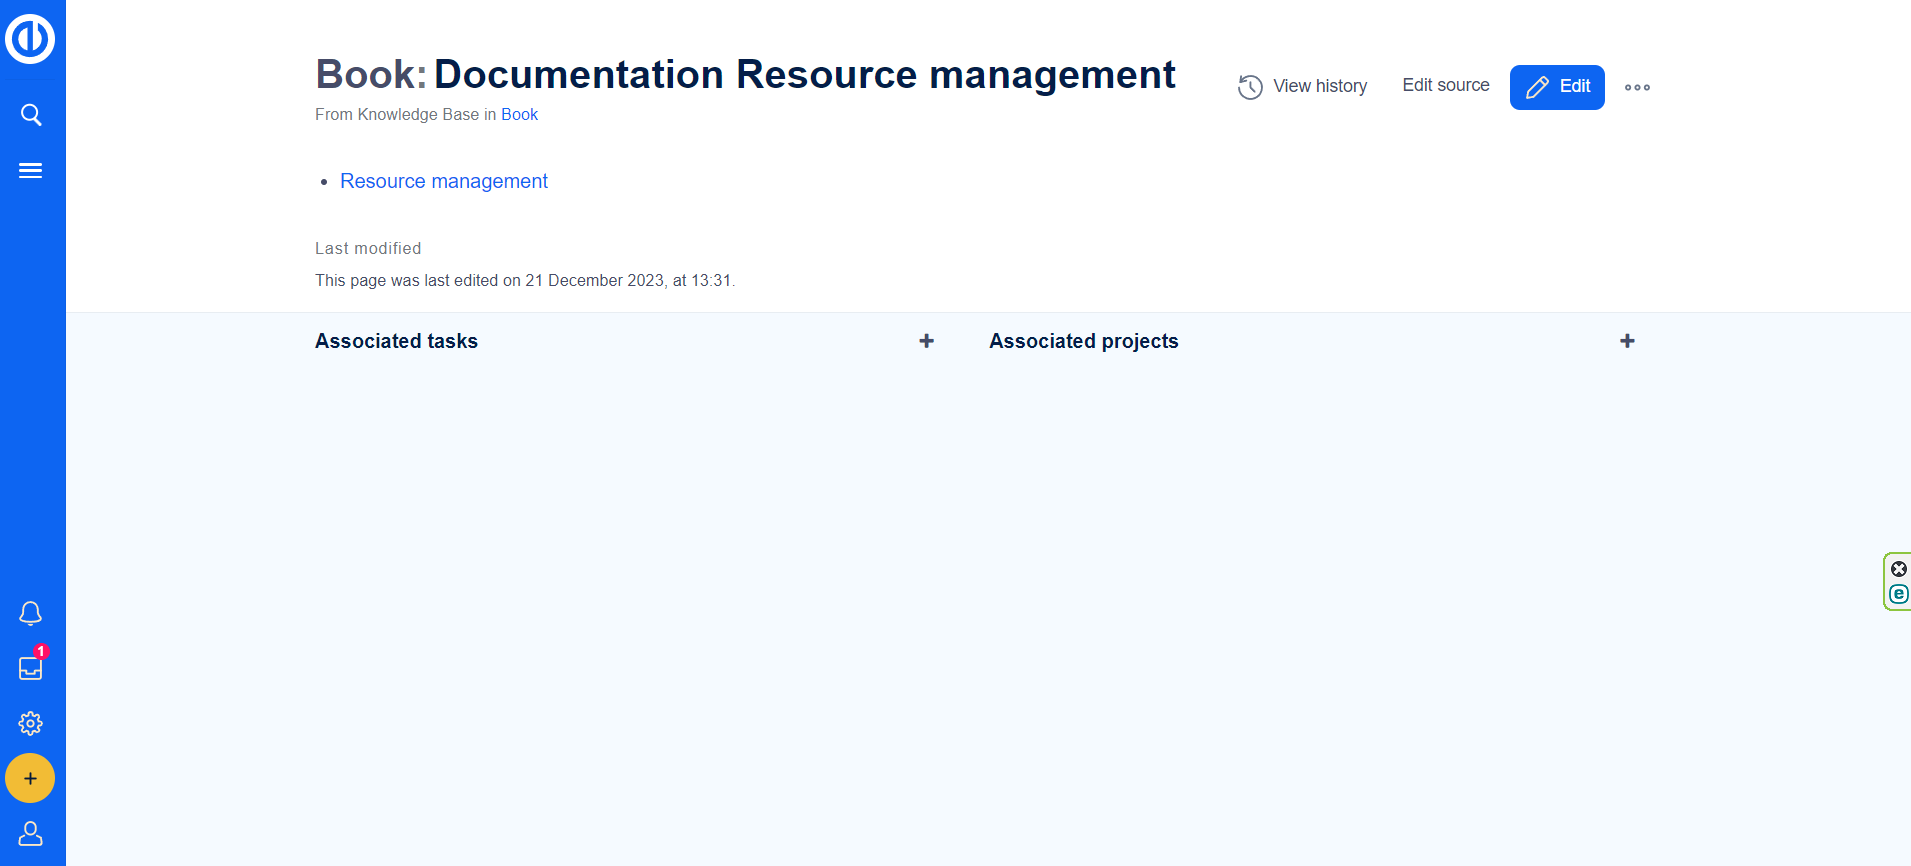
PDF Output: The Book feature also allows for the generation of complete PDFs, serving as a source for consistently updated manuals, documentation, and similar materials suitable for printing.
Name Spaces: The Book functionality respects NameSpace, meaning that the visible content may vary for users based on their access to NameSpace content. Books can be set in the Public namespace, providing a well-structured documentation solution.
Output:
Templates
Page templates serve as a valuable tool for creating consistent and structured content within a knowledge base. This feature allows users to apply predefined content structures and layouts to new pages, ensuring a standardized format for various types of information.
Usage: Page templates find application in the creation of extensive manuals, guides, documentation, or similar content by assembling existing pages into a cohesive book. Additionally, templates can be utilized within pages, offering an easy way to add prepared structured content, including formal headers and sophisticated semantic elements.
Dynamic Content: The content of a book or page created with a template is dynamic, meaning that updates to individual pages automatically reflect in the overall content without requiring additional actions.
When to Use Page Templates: Page templates are particularly useful for frequently used content formats such as meeting minutes, reference pages, product descriptions, customer information, or short manuals.
Characteristics of Page Templates:
Standard Page Templates:Several standard templates cater to specific needs, including Decision Matrix, Event planning, Guideline creation, How-to Articles, Management Meeting Minutes, Meeting Agendas, Request for Comments, Status Reports, and To-do Lists.
Managing Standard Page Templates: Standard templates, once installed, can be deleted from Global actions > Management > Page templates. Deleting a template removes it from the selection during page creation but not from the Template namespace.
Creating and Using Page Templates: Any knowledge base user with edit rights can add a new page template in the template namespace. Admin permissions are required to add the template to Page template administration. Each page template depends on an actual page in the Template namespace.
Important!By default, the Template namespace does not have visual editing activated. If you want to create page templates in visual editing mode, adjust the settings for this namespace in the namespace manager.
Note:Every page template depends on an actual page in the namespace Template. This template must exist before creating a page template.
Template Fields:When creating or editing a page template, the required information includes:
Demo Templates: Three types of process templates have been prepared for your use:
Binding a Template to a Button: Utilize a Create Page droplet to associate a template with a button. Upon clicking the button, users will be redirected to a new knowledge article page pre-populated with the template data. Strategically place the button on an overview page or any other easily visible location for the user.
Steps:
Example:

Using Page Templates: During page creation, a list of available templates appears below the default "Empty page" template. Users can select a template to create a new page pre-filled with content from the actual template page. Two important settings include assigning namespaces in the page templates administration and activating the PageTemplates option for a namespace in the Namespace manager. This ensures that associated templates are automatically displayed when creating a new page in that namespace.
Output:
Read confirmation
An administrator must enable read confirmations in the namespace manager:
When read confirmations are enabled within a namespace, designated users encounter a confirmation prompt upon any changes to the page content. Once the user selects the "Yes, I have thoroughly read this article" checkbox and clicks on "Confirm," the page version will be flagged as read for that particular user.
Output:
Administering Read Confirmations
Admins (admin, maintenance admin, structure manager roles) can access an overview of all read confirmations via Global actions > Management > Assignments. The "Read?" column displays read confirmation information, and pages can exist in various states:
Actions include:
The status of read confirmations (eye icon) provides a list of assigned users and their confirmation status.
Group restrictions
Administrators can restrict specific Namespaces in the Knowledge base for specific user Groups (that come from Easy Redmine) in Namespace Access ( Global actions >>Namespace Access (under administration))
Groups are transferred to the Knowledge Base environment to make sure that users will have access only to areas where they are allowed.
If the admin adds/removes the user to/from the Group (User - user edit >> tab Groups - (un)check a group) it's automatically reflected in the Knowledge Base after clicking on the Save button
If the Group is deleted from Easy Redmine, the same is applied for deleting the Group from Knowledge Base environment, ie. if the user is part of the group called for example “People” in Easy Redmine, after removing him from this Group, then since the Group does not exist anymore, he is no longer part of the Group in Knowledge Base environment.
If the admin goes to Administration >> Plugins >> Knowledge base - Edit - Update permission after he changed the Permissions for KB (like added permission Manage articles as an extension to already existing View articles). By clicking on the Update permissions button, the information about the Groups is also sent to KB.
Administrator can go to the following page: /wiki/Special:UserManager - see the Groups column, which is a listed overview of all Groups where the user belongs in Knowledge Base and Easy Redmine. (Several Groups come originally from the Knowledge Base)
Groups called “editor” and “viewer” = reflect permissions on Easy Redmine side (Manage articles, View articles).
All other different names that are visible come from the Groups created in Easy Redmine.
If the administrator ONLY changes PERMISSIONS in Easy Redmine, the information about Groups is NOT automatically sent to the Knowledge Base = Administrator has to go to rys settings to click on the Update permissions button (to do a bulk-update-of-users-permissions).
Page Assignment and Secured Page Assignment
Page assignment is a straightforward feature that can be activated within a namespace. It serves multiple purposes:
How to Implement:
To assign a user or a group to a page:
Secured Page Assignment:
Within the namespace manager, you have the option to set page assignments as secured. In such a configuration, a page created in this namespace is editable only by users assigned to it. Therefore, every new page must be created by a user with reviewer or admin rights since these roles possess the required permissions for assignment. If a page is created in this namespace by a user with edit rights, subsequent editing is restricted for that user unless assigned by another user with the necessary permissions.
Reminder
The Reminder feature allows users to track pages by setting notification dates for themselves or others. Users can:
In user preferences, users can choose to be notified a week before the event and on the day of the event.
Workflows
In the Finance namespace:
Rating
The Rating feature allows users to rate a wiki page with up to five stars or recommend the page. Wiki administrators can configure rating activation in specific namespaces. Users can provide their rating and change it at any time. The average evaluation and the number of assessments are displayed.
Important Considerations:
While these features offer valuable functionalities, their implementation should be evaluated based on the added value compared to time investment. For instance, publishing documents for the general public should undergo review, but internal knowledge base posts may not require the same level of scrutiny to avoid unnecessary delays.
Special Pages Administration
This section highlights essential special pages within the Special namespace configuration. Special pages encompass all configuration pages placed in the Special namespace.
All Pages:
Namespace Manager/Access:
Special:NamespaceManager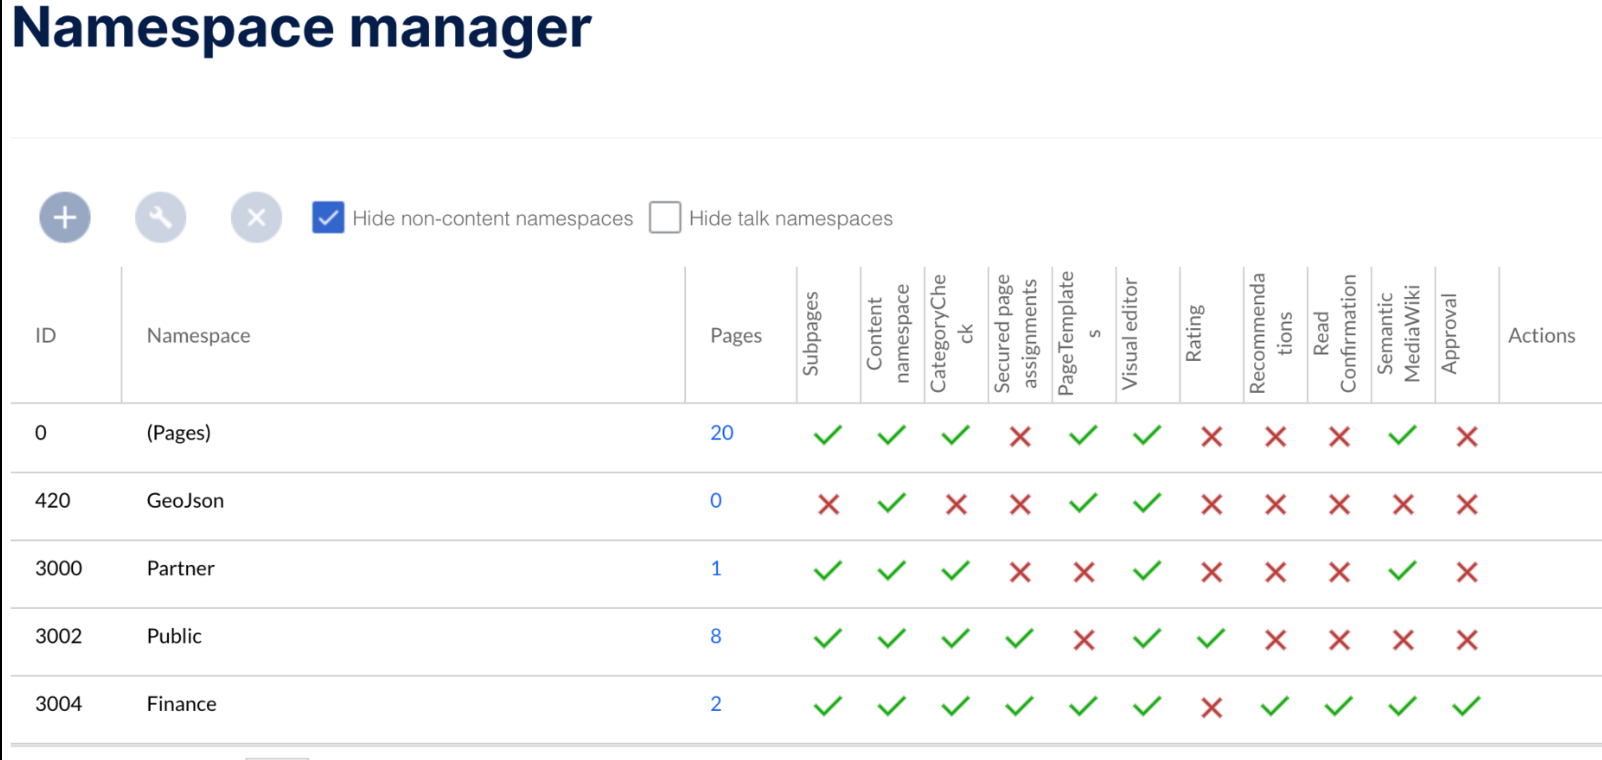
Special:NamespaceAccess

Category Manager:
Group Manager:
Page Templates:
Templates:
Broken Redirects:
Export Pages / Import Pages:
Bookshelves:
This overview provides a concise understanding of the critical features offered by these special pages, enhancing the management and organization of the Knowledge Base.
Setting Up Dashboard Widget
A knowledge article can be conveniently added to a project's dashboard in the form of a widget, providing users with instant access to crucial information. This widget dynamically updates as the underlying knowledge article changes.
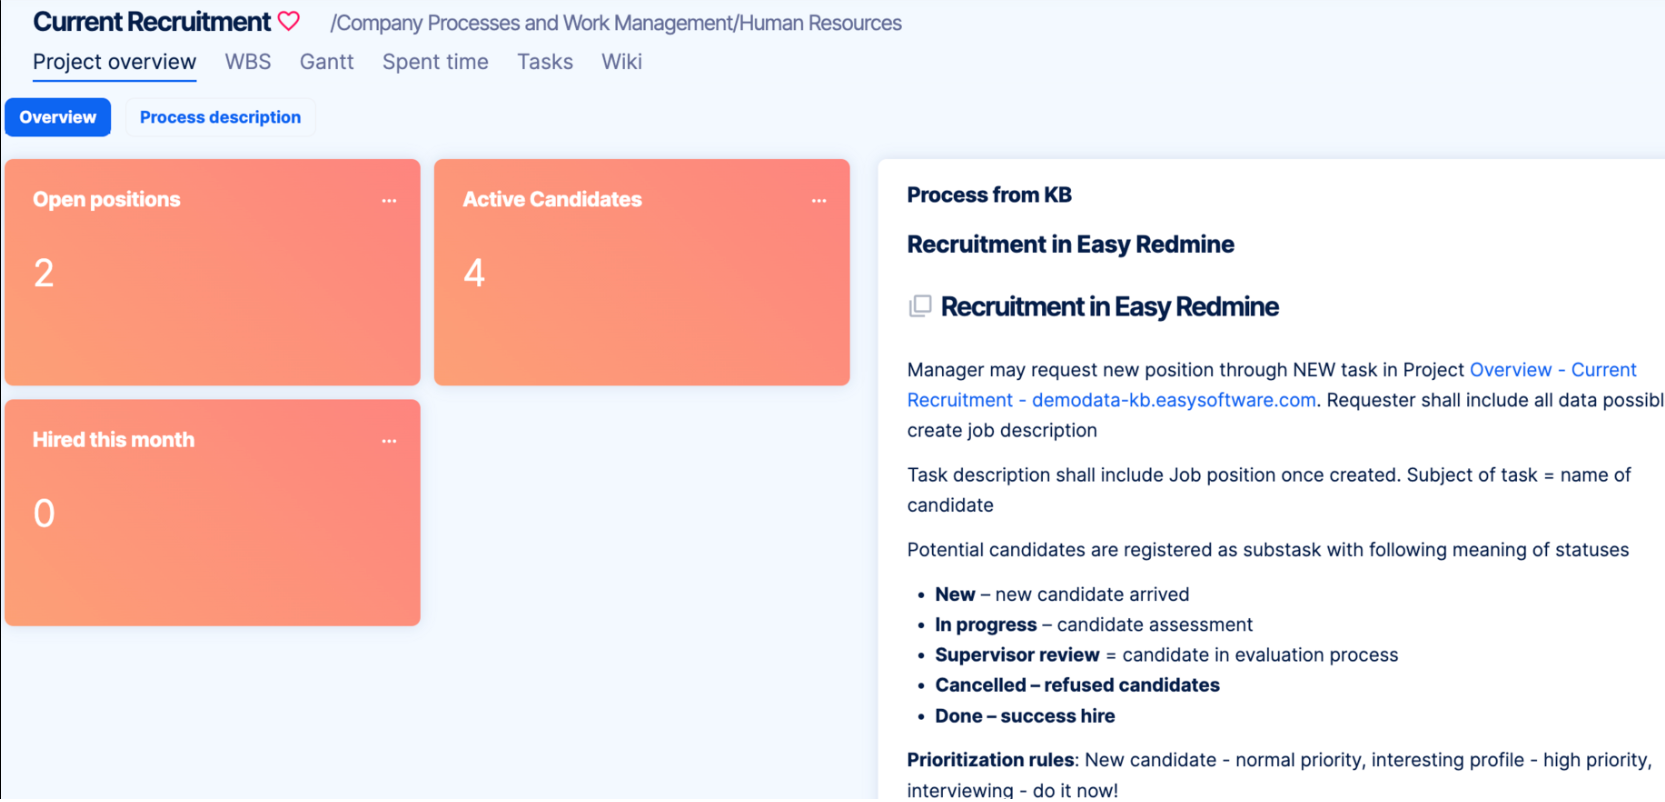
Knowledge Article Widget:
Adding a Knowledge Article Widget:
Tasks Integration:In the Article:
To reference an Easy Task within an article while editing:
To associate a task with the knowledge article:
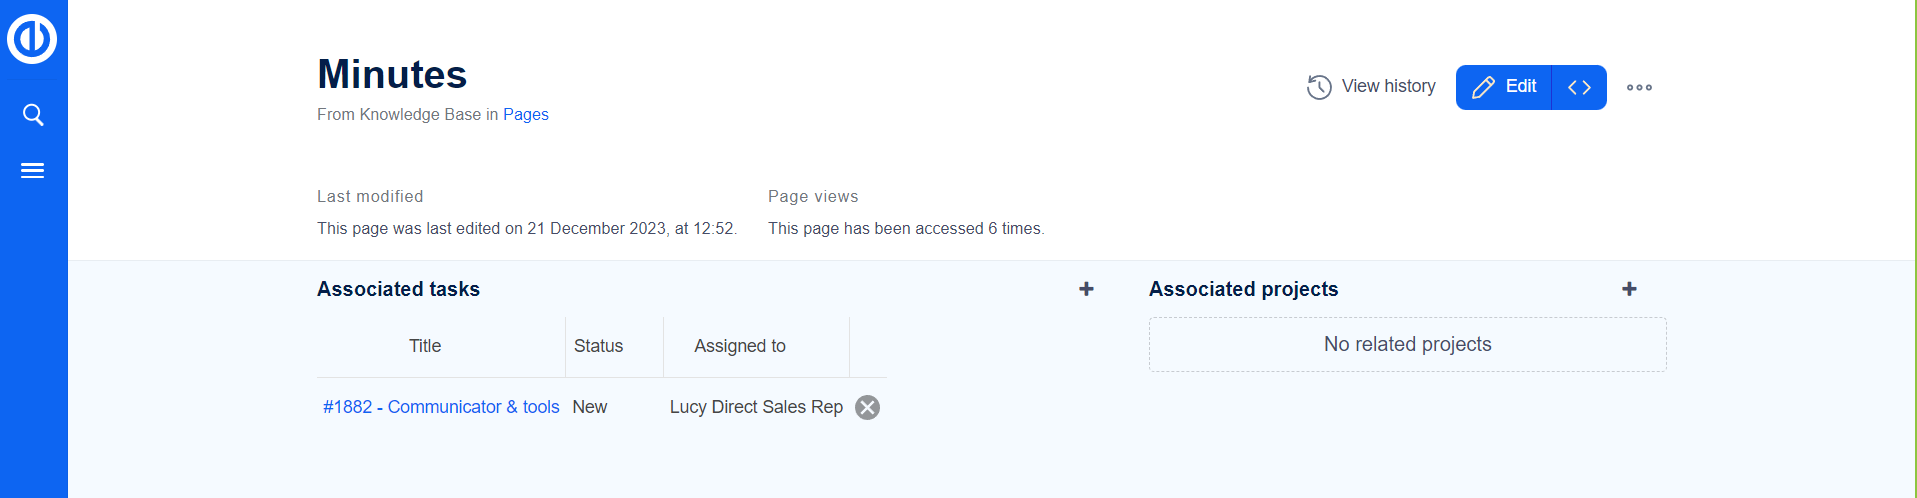
The referenced tasks appear under the knowledge article and directly on the associated task.
Associated Projects:
Easy Redmine Droplets:Coming Soon:
Useful links:

