


How to Complete Your Redmine Installation on Ubuntu 18.04 Lts (2 Essential Steps)

Secure your Redmine install
When you perform a simple Redmine installation on Ubuntu 18.04 LTS, secure access to your Redmine application (HTTPs) is not enabled. Enabling HTTPs protects your passwords and the information traveling through the Internet while using Redmine. In our case, we will use Let’s Encrypt certificates to enable HTTPs on your Redmine installation. Let's Encrypt certificates are completely free and fully supported by all browsers.
The required steps are as follows:
- If you have any firewall software of appliance enabled, make sure HTTPs protocol traffic can go through and reach the IP address of your Redmine server.
- Add the Let’s encrypt repository to APT and update.
sudo add-apt-repository -y ppa:certbot/certbot
sudo apt-get update
- Install the certification bot that will get and configure your HTTPs certificates.
sudo apt-get install -y python-certbot-nginx
- Get and install the certificate for your Redmine application.
sudo certbot --nginx -d redmine.mydomain.com
During the certificate installation, you will be prompted for:
- Your email address.
- Your agreement to the terms of service.
- Your authorization for getting subscribed to Let’s Encrypt email list.
Once you have answered all these questions, the certificate will be generated and configured in your Ubuntu 18.04 LTS server
COMMAND OUTPUT:
Obtaining a new certificate
Performing the following challenges:
http-01 challenge for redmine.mydomain.com
Waiting for verification...
Cleaning up challenges
Deploying Certificate to VirtualHost /etc/nginx/sites-enabled/redmine.mydomain.com
- Finally, you will be prompted whether to redirect HTTP traffic to HTTPs. Select “Redirect” to make all your Redmine transactions secure.
- Go to your Redmine application on your browser. The lock icon should be visible on the right side of the URL, indicating that HTTPs is in use.

Redmine running over HTTPs
Congratulations! You have secured your Redmine application. It is now running over HTTPs.
Email delivery configuration
Redmine application usually sends notifications through email. For them to operate correctly, the Redmine email delivery preferences need to be configured.
Go through the following steps to change your email settings. For the purpose of this tutorial, we assume your Redmine installation is located at /var/www/html/redmine. Change this path to fit yours.
Configuring email within Redmine
- Select an email address that will be used as a source email for your Redmine notifications. This email address will be shown on the To field of all the Redmine delivered emails.
- Create your configuration file from the existing template.
cd /var/www/html/redmine/config/
cp configuration.yml.example configuration.yml
3. Edit your configuration file
sudo nano /var/www/html/redmine/config/configuration.yml
Locate the default section within the file and enter the following settings:
development:
email_delivery:
delivery_method: :smtp
smtp_settings:
enable_starttls_auto: true
address: <address of your SMTP server>
port: <port used by your server>
domain: mydomain.com
authentication: :login
user_name: <source email account username>
password: <source email account password>
The configuration shown here will fit 90% of the Redmine installations. In case your SMTP server uses different settings, you can find more information at the Redmine site.
Just a couple of hints:
- Remove enable_starttls_auto: true if you are not planning to use TLS.
- If you have issues with your email server certificate (happens with some email providers), add to your smtp_settings.
Restart Redmine for the new configuration to be applied.
Reload NGINX: sudo systemctl reload nginx
Test email delivery
Perform the following steps to check your e-mail configuration
- Within your Redmine application, go to "Administration -> Settings -> Email notifications"
- Configure your source email address at the “Emission email address” field. Don’t forget to save your new settings clicking at the “Save” button located at the end of the page.
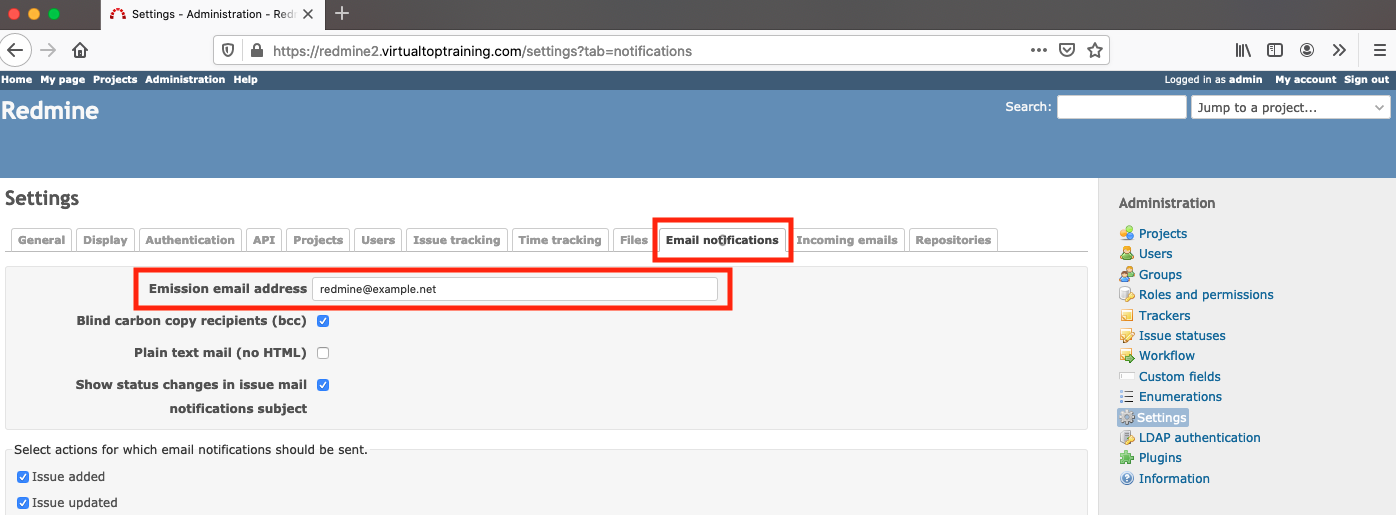
Redmine email configuration screen
- Finally, go to the bottom and click on “Send a test email”. If your email configuration is correct, a message will be shown informing you that your test email was successfully delivered.
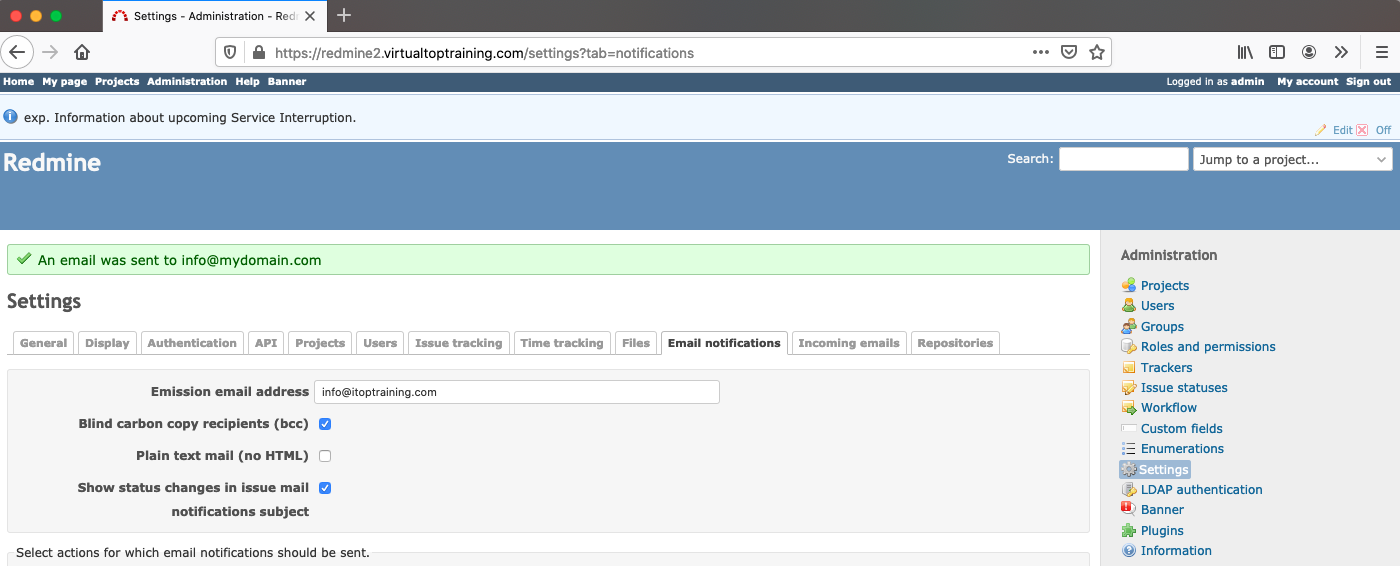
Redmine test email successfully delivered
If your test email is not correctly sent, you will get an error. Errors clearly identify the issue (wrong password, unable to reach the SMTP server, etc.). Fix the problem and try again.
Congratulations! Your Redmine email configuration is fully operational.

The ultimate Redmine upgrade? Easy.
Get all powerful tools for perfect project planning, management, and control in one software.

