


Redmine in Kubernetes – Part 1: Preparing Environment
In this two-part series, we will deploy Redmine into Kubernetes. We will use recommended tools and practices with the goal of deploying a resilient instance of Redmine over HTTPS.

We divided this how-to into two parts to focus first on installing the tools and components the Redmine deployment will use. But don’t worry about complexity. Even if you are new to Kubernetes it will be an understandable explanation.
This guide was written to be cloud-agnostic, so we purposely left out all mentions of the cloud we used. Leave a comment if you can guess the cloud we used and tell us what detail gave it away. We recommend you to use the Kubernetes service your cloud offers, as it is well integrated with other services your cloud also provides.
Environments like microk8s or minikube are not considered here as they require some more configuration that is out of the scope of this guide. In particular, our HTTPS configuration requires our cluster to have a public IP.
Let's use Helm
Kubernetes is a complex tool for container orchestration. There are many concepts we need to learn to get started. Luckily for us there is a project called Helm that provides the level of abstraction we need. In their own words “If we did things right, users could install Helm and then within minutes be installing production-grade off-the-shelf components”
Leaving aside the reasons for their names (it all tells the story of a metaphor, Helm, Kubernetes, and Containers) helm really simplifies installation while allowing room to customize the component to our needs. We will use Helm 3, their latest and even simpler version.
If you use the cloud shell of your cloud provider, chances are that Helm 3 is already available, but if not you can install it following the guide the Helm docs provide, helm.sh/docs/intro/install/. You need to already have access to your cluster from the command line you use. Your cloud provider has a guide on how to do that too.
Install the Ingress Controller
This is the first component we will install in our cluster and is also the first kubernetes concept we will see. An Ingress controller sits at the entry door of your cluster, receives all web requests and redirects them to the internal component responsible for answering the request. Initially, there will be no one ready to answer, but when we install Redmine, it will be added as a destination for the requests.
Kubernetes provides the NGINX Ingress Controller we’ll use. Their documentation explains how to install it using Helm:
helm repo add ingress-nginx https://kubernetes.github.io/ingress-nginx && helm repo update
helm install ingress-controller ingress-nginx/ingress-nginx
The first command adds the repository of applications where the ingress controller is, while the second one installs it in your cluster. When finished, the command will print some information to get started, including how to get the public IP assigned to the controller:
kubectl get services --watch
The result will be something similar to this:
NAME TYPE CLUSTER-IP EXTERNAL-IP PORT(S) AGE
nginx-controller LoadBalancer 10.0.115.117 89.68.23.33 80/TCP,443/TCP 5m22s
controller-admission ClusterIP 10.0.135.226 <none> 443/TCP 5m22s
kubernetes ClusterIP 10.0.0.1 <none> 443/TCP 44h
Take note of the EXTERNAL-IP as we will need it in the next step. It could happen that instead of an IP the value you get there is <pending>. It takes some time for the cloud to obtain a public IP and assign it to your cluster. Just wait a few more seconds and the IP should be available.
Create a DNS A Record
Now that you got the IP you could just go to a browser and see how your cluster answers you. Of course, as no application is installed yet, your cluster will answer with a “404 Not Found” error. We will create a DNS domain we can associate to that IP, hopefully, easier to remember than a list of numbers and dots.
The way to create an internet domain for your Redmine greatly depends on your domain provider, but in all cases, you end up creating a DNS A Record that links a domain name with your IP. See as a reference the following screenshot from the no-ip.com DNS provider.
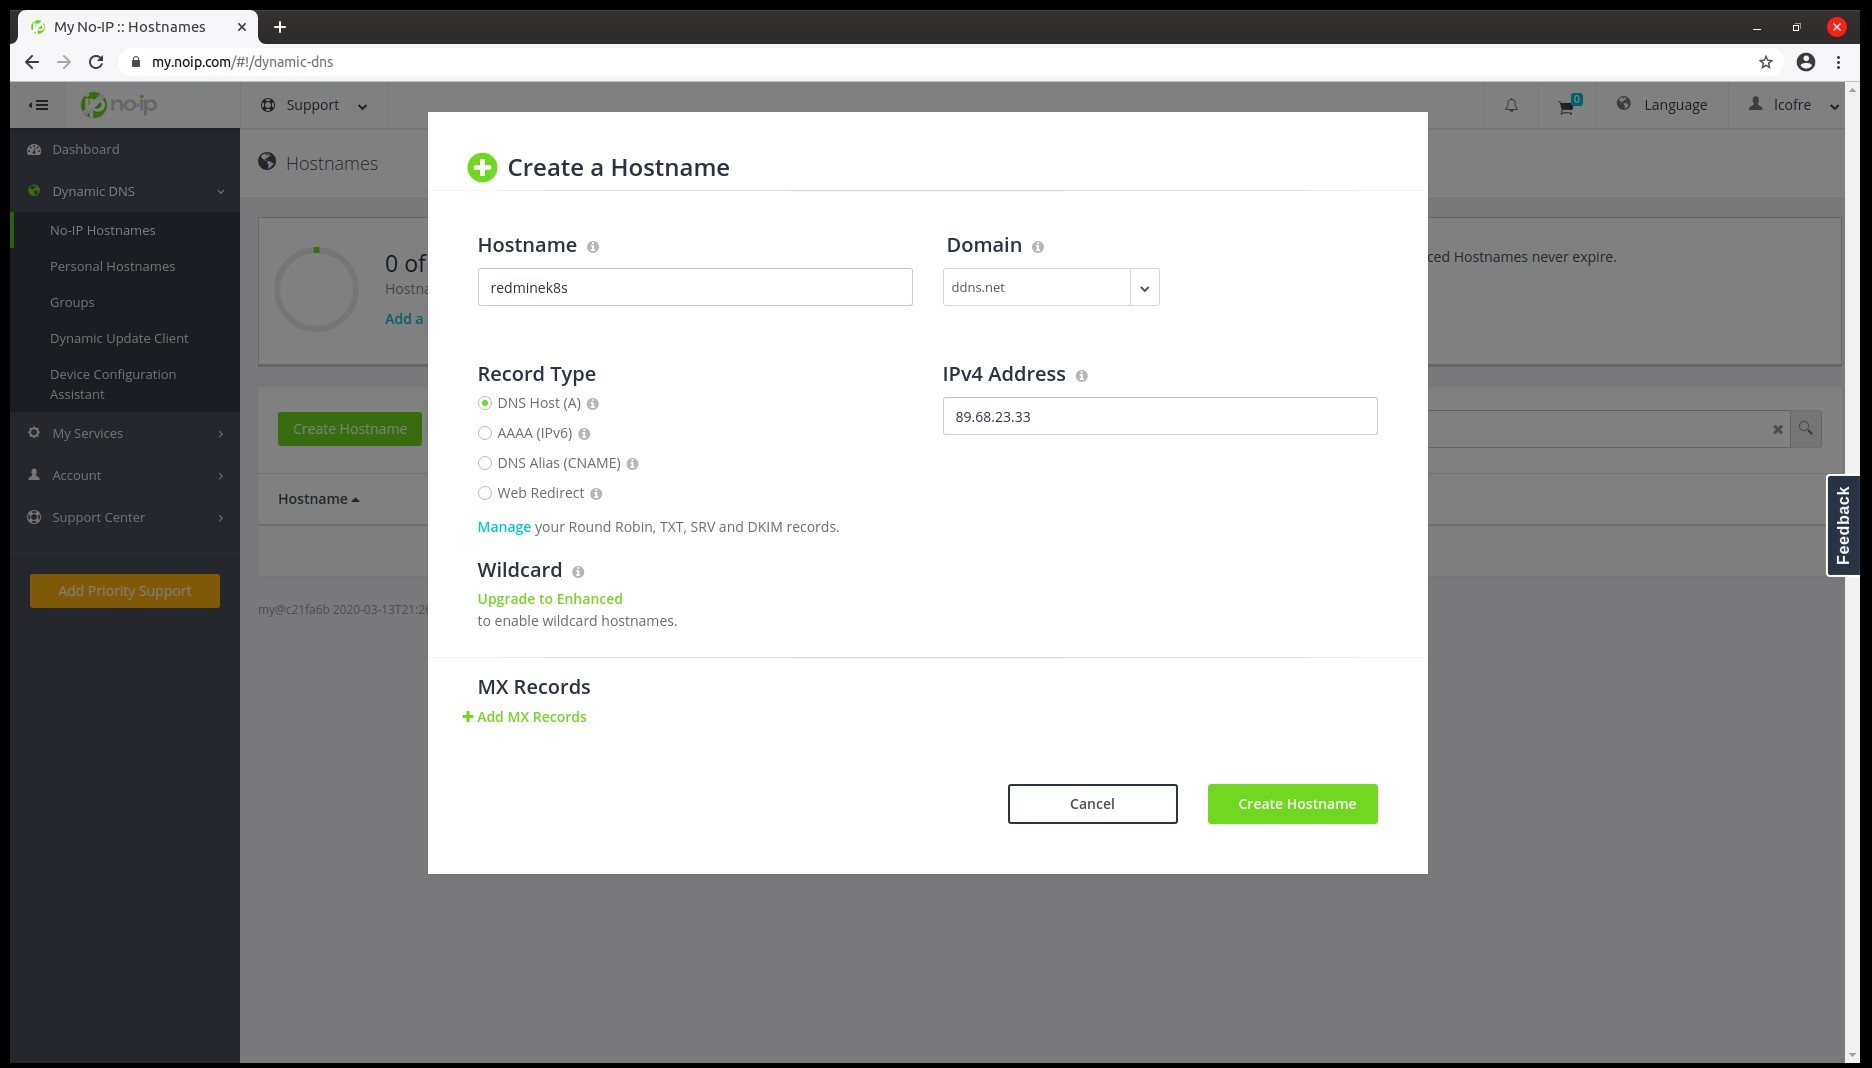
Creating our DNS A Record
The data to complete, as you might expect, is the DNS name and the IP. No-IP is just what we need to illustrate the creation of a domain, but you probably have or will choose a different DNS provider. The process is fairly similar in all of them.
It takes some time for the new record to propagate, so you can use ping to check when the IP is resolved correctly:
ping redminek8s.ddns.net
Next steps
Now that we have an ingress controller and a DNS domain the only thing left is to configure HTTPS for our site and install Redmine. We will use PostgreSQL as our database, but you’ll see how easy it is to configure all using Helm.
Keep tuned in for Redmine in Kubernetes Part 2: Installing Redmine.

The ultimate Redmine upgrade? Easy.
Get all powerful tools for perfect project planning, management, and control in one software.

